Ever hit that garage door button only to watch it start down and then rudely reverse back up? Or maybe it refuses to budge at all when you try to close it? Those little sensors at the bottom of your garage door track are likely the culprits. They’re small but mighty important—and when they fail, your whole day gets derailed.
Why Your Garage Door Sensors Stop Working
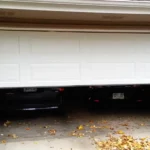
Garage door sensors aren’t complicated devices, but they’re surprisingly sensitive. They create an invisible beam across your garage door opening that, when broken, prevents the door from closing—a safety feature designed to protect people, pets, and property.
Misalignment: The #1 Culprit
The most common reason your sensors fail is simply that they’re not lined up properly. These sensors need to “see” each other perfectly to work. Even a slight bump from a bike handle, broom, or wayward basketball can knock them out of alignment.
The telltale sign? Look at the LED lights on your sensors. You should typically see:
- A steady green light on the sending unit
- A steady green light on the receiving unit when properly aligned
If one is blinking or showing red instead of green, misalignment is likely your problem.
Dirty Sensor Eyes
Your garage collects dust, cobwebs, and grime like nobody’s business. When this builds up on the small “eyes” of your sensors, they can’t communicate properly. It’s like trying to see through sunglasses covered in fingerprints.
Regular cleaning isn’t just for looks—it’s essential maintenance for your garage door sensors.
Damaged or Faulty Wiring
The wires running from your sensors to the opener control board are vulnerable to:
- Moisture damage
- Rodent chewing
- Accidental cuts during yard work
- Simple wear and tear over time
Even a small nick in a wire can cause intermittent sensor issues that drive you crazy.
Electrical Interference
Surprising as it sounds, bright sunlight shining directly into a sensor can confuse it into thinking the beam is broken. Similarly, nearby devices with strong electrical signals can occasionally interfere with sensor operation.
Sensor Hardware Failure
Like any electronic device, sensors eventually wear out. Most last 5-7 years, but heavy use, extreme temperatures, or moisture exposure can shorten their lifespan. If you’ve had the same garage door opener for a decade, the sensors might simply be at the end of their road.
How to Know Your Sensors Are the Problem
Before diving into fixes, confirm that sensors are actually your issue.
The Door Closes When You Hold the Button
Try this quick test: Press and hold the wall-mounted button until the door fully closes. If it closes completely when you hold the button but not when you press and release, that’s a sensor problem. The door knows you’re watching for obstacles when you hold the button, so it overrides the sensor safety feature.
Check the LED Indicators
Both sensors should display solid green lights when working properly and aligned. If you see:
- No lights at all: power issue
- Red light or flashing light: misalignment or obstruction
- Dim lights: possible wiring or power problems
Light Patterns on Your Opener
Many modern garage door openers flash their overhead lights in specific patterns when detecting sensor problems. Check your opener’s manual to decode these signals.
DIY Fixes for Garage Door Sensor Problems
Let’s tackle the most common sensor issues, starting with the easiest fixes first.
1. Clear Obstructions and Clean Sensors
First things first:
- Remove any objects that might block the sensor beam
- Wipe both sensor lenses with a clean, soft cloth
- Clear away cobwebs, leaves, and debris around the sensor area
This simple step solves about 30% of sensor problems immediately.
2. Realign Your Sensors
If cleaning didn’t work, alignment is the next likely culprit:
- Locate the mounting brackets holding each sensor
- Loosen (don’t remove) the screws or bolts securing them
- Adjust both sensors until they point directly at each other
- Watch the LED indicators—when they both show steady green, you’ve got proper alignment
- Tighten the brackets without changing the position
For precise alignment, use a string or laser level to ensure both sensors are at the same height and angle.
3. Check and Fix Wiring Issues
Inspect the entire wire path from each sensor to the opener:
- Look for visible damage, pinch points, or exposed wires
- Follow the wires up the garage door track and across to the opener
- Check connection points at both the sensors and the opener terminal
If you find damaged sections, you can:
- Repair small nicks with electrical tape
- Splice and reconnect broken wires (after turning off power)
- Replace the entire wire run for serious damage
4. Test Power Supply
No lights on either sensor suggest a power issue:
- Verify the opener itself has power
- Check if other outlets in the garage are working
- Reset any tripped circuit breakers
For battery-powered sensors, replace the batteries with fresh ones—typically 3V CR2450 batteries for most models.
5. Try the “Quick-Connect” Test
This advanced troubleshooting method can identify wiring vs. sensor problems:
- Disconnect both sensors from their mounting brackets
- Hold them facing each other in your hands, just a few inches apart
- If the LEDs light up correctly when held close together but not when mounted, you’ve confirmed an alignment issue
- If they still don’t work when held together, you likely have a wiring or sensor hardware problem
Advanced Troubleshooting: The Wiring Bypass Test
If you suspect wiring issues but can’t find visible damage, try this test:
- Disconnect power to the opener
- Remove both sensors from their brackets
- Cut or disconnect the wires about 12″ from each sensor
- Strip both ends of all wires
- Connect like-colored wires together (white to white, black to black)
- Reconnect to the appropriate terminals on the opener
- Restore power
- Hold sensors facing each other
If the LEDs now work properly when the sensors face each other, you’ve isolated the problem to the existing wiring run, which will need replacement.
When to Replace Your Garage Door Sensors
Sometimes repair isn’t the best option. Consider replacement when:
- Sensors are more than 7 years old
- They’ve been exposed to water damage or flooding
- You’ve tried all troubleshooting steps with no success
- The cost of new sensors (typically $20-40) is less than your time investment in repairs
Most major retailers and home improvement stores carry universal replacement sensors compatible with most garage door opener brands. Always check compatibility before purchasing.
Installing New Sensors
If you decide to replace your sensors:
- Purchase compatible replacement sensors
- Turn off power to the garage door opener
- Remove the old sensors from their brackets
- Disconnect wiring from terminals (note wire locations first)
- Connect new sensors using the same wiring configuration
- Mount new sensors in brackets
- Align properly until both show green indicator lights
- Test door operation
Preventing Future Sensor Problems
An ounce of prevention saves pounds of frustration:
- Clean sensor lenses monthly with a soft cloth
- Keep the floor area near sensors clear of debris and stored items
- Check alignment after storms or whenever the garage door operates unusually
- Protect wiring with conduit in high-traffic or vulnerable areas
- Immediately address any changes in door operation or sensor behavior
The Safety Factor: Never Bypass Your Sensors
It’s worth noting that while it’s possible to bypass garage door sensors, you should never do this as a permanent solution. These sensors prevent thousands of injuries and property damage incidents yearly.
Modern garage doors exert hundreds of pounds of force—enough to cause serious injury or damage if they close on a person, pet, or valuable item. The minor inconvenience of fixing sensors is far better than the alternatives.
Your garage door is likely the largest moving object in your home. Keeping its safety features in proper working order isn’t just about convenience—it’s about protecting what matters most.