Having dashboard warning lights for ABS, VSC, or TRAC suddenly illuminate after a wheel alignment or suspension work? Your Toyota’s steering angle sensor likely needs a reset. This sensor tells your vehicle’s safety systems where your steering wheel is pointed, and when it gets confused, those systems can shut down. Don’t worry—in many cases, you can fix this yourself.
What is a Steering Angle Sensor?
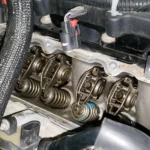
The steering angle sensor (SAS) is a critical component that monitors your steering wheel’s position and movement. Located in the steering column, this sensor constantly communicates with your Toyota’s safety systems.
Your SAS helps power several key safety features:
- Electronic Stability Control (ESC)
- Anti-lock Braking System (ABS)
- Traction Control System (TRAC)
- Vehicle Stability Control (VSC)
When properly calibrated, the sensor knows exactly when your steering wheel is centered and how far it’s turned in either direction. This information helps your vehicle maintain stability during cornering or when traction is compromised.
Why Your Toyota’s Steering Angle Sensor Needs Resetting
Your steering angle sensor can lose its calibration for several reasons:
After Wheel Alignments
The most common reason for SAS recalibration is following a wheel alignment. During an alignment, your vehicle’s steering geometry changes, but the sensor doesn’t automatically adjust to these changes. The Center for Ground Vehicle Safety explains that without proper recalibration, the SAS will provide incorrect data to your vehicle’s safety systems.
Following Component Replacement
If you’ve replaced any of these parts, you’ll need an SAS reset:
- Steering column
- Clock spring
- Steering angle sensor itself
- Yaw rate sensor
- Suspension components
Warning Signs You Need a Reset
Watch for these indicators that your Toyota’s steering angle sensor needs calibration:
- ABS, VSC, or TRAC warning lights illuminated on your dashboard
- Vehicle pulling to one side despite proper alignment
- Diagnostic trouble codes like C1290 or C1223
- Stability control systems deactivating unexpectedly
DIY Reset Methods for Toyota Steering Angle Sensors
You have several options for resetting your Toyota’s steering angle sensor, from simple DIY approaches to using professional-grade diagnostic tools.
The Paperclip Method
This widely documented DIY approach works on many Toyota models. According to this instructional video, you’ll need to short specific pins on the OBD-II connector:
- Park on level ground with the steering wheel perfectly centered
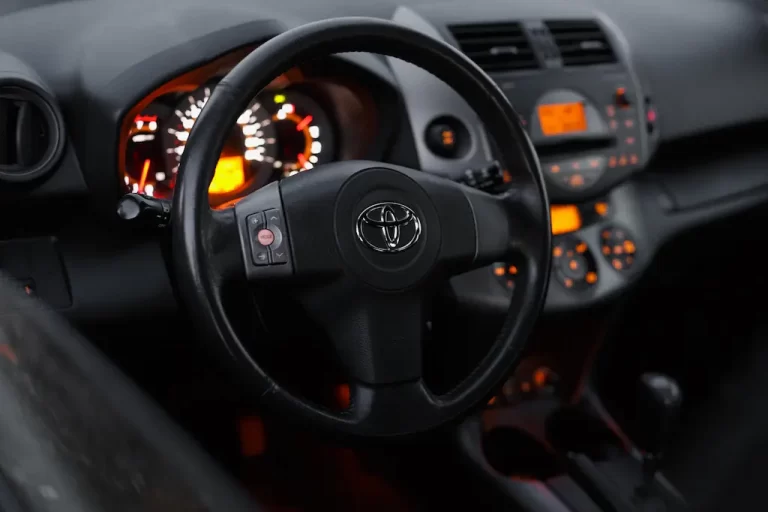
- Locate your OBD-II port (usually under the dashboard on the driver’s side)
- Identify pins 4 and 13 (on most Toyotas) in the OBD-II connector
- Connect the pins using a paperclip or jumper wire
- Turn ignition to ON position (don’t start the engine)
- Watch for flashing warning lights (ABS/VSC will typically flash)
- Remove the paperclip once lights flash
- Turn off ignition, then restart the vehicle
- Drive straight at over 25 mph for about 10 seconds to complete calibration
This method varies by model. For a 2005 Toyota Yaris, Total Car Diagnostics suggests quickly connecting and disconnecting pins 4 and 12 four times within eight seconds.
Using Toyota Techstream Software
For more precise calibration, Toyota’s Techstream software provides guided reset procedures:
- Connect a Mini VCI cable to your OBD-II port
- Launch Techstream software on your computer
- Select your vehicle model
- Navigate to the ABS/VSC module
- Find the “Utility” or “Zero Point Calibration” option
- Follow the on-screen instructions
A case study shared on ClubLexus demonstrates that Techstream is particularly effective for vehicles with more complex systems like Variable Gear Ratio Steering (VGRS).
Third-Party Scan Tools
Several aftermarket scan tools can also reset Toyota steering angle sensors:
- Autel MaxiSys: Navigate to “Steering Angle Sensor” under the ABS module
- Launch X431: Use the “Special Functions” menu to access SAS calibration
- Snap-on Solus Edge: Find calibration under “Wheel Alignment” functions
These tools provide step-by-step guidance similar to Toyota Techstream but at a lower entry cost for DIYers who perform multiple resets.
Model-Specific Reset Procedures
Toyota’s diverse lineup means slight variations in reset procedures across different models.
Toyota Tacoma SAS Reset
Tacoma owners frequently report C1290 codes after alignments. According to Tacoma World forums, you’ll need to:
- Use pins 4 and 13 for the paperclip method
- Ensure the truck is on perfectly level ground
- Keep the steering wheel centered during the entire process
- Drive straight for at least 1/4 mile after reset
Toyota Prius SAS Reset
The Prius hybrid system adds complexity to the SAS reset. An instructional video demonstrates that Prius models often use pins 4 and 12 for reset, and you must:
- Turn the power to “ON” mode (not READY mode)
- Wait for the hybrid system check to complete before attempting reset
- Complete a specific drive cycle after reset (straight line at 25+ mph)
Toyota 4Runner SAS Reset
4Runner owners have documented a specific procedure on Toyota 4Runner forums:
- Park on level ground with wheels straight
- Bridge pins 4 and 13 with the paperclip
- Turn ignition to ON position
- Wait for dashboard lights to flash in sequence
- Remove paperclip
- Drive straight at exactly 35 mph for at least 10 seconds
Troubleshooting Failed SAS Resets
If your reset attempts haven’t worked, consider these common issues:
Incorrect Pin Identification
OBD-II connectors have 16 pins total, and identifying the correct pins is crucial. Refer to this pin diagram for clarity:
| Pin | Purpose in SAS Reset |
|---|---|
| 4 | Chassis Ground (CG) |
| 12 | Test Signal (TS) – used in some models |
| 13 | Test Signal (TS) – used in most models |
According to the OBD Tester technical guide, getting the wrong pins can prevent successful resets or potentially damage electrical systems.
Vehicle Movement During Calibration
The WABCO repair manual emphasizes that the vehicle must remain absolutely stationary during the initial calibration process. Even slight movement can cause calibration failure.
Component Failures
If resets consistently fail, you may have a faulty:
- Steering angle sensor
- Clock spring
- Wiring harness
- Yaw rate sensor
A diagnostic guide shared on IH8MUD forums suggests checking for physical damage to these components if repeated resets fail.
Verifying Successful SAS Reset
After completing your reset procedure, verify success by:
- Checking warning lights: All ABS, VSC, TRAC lights should be off
- Test driving: Make several gentle turns in both directions
- Scanning for codes: Use an OBD-II scanner to confirm no DTCs remain
- Monitoring real-time data: If using Techstream or similar tools, check that SAS values change smoothly with steering input
Reset After Suspension Modifications
If you’ve installed a lift kit or aftermarket suspension on your Toyota, you’ll need special consideration for SAS calibration. An instructional video for Lexus VGRS calibration demonstrates that vehicles with modified suspensions often require:
- More precise steering wheel centering
- Multiple calibration attempts
- Possible adjustment of toe settings during alignment
- Use of professional diagnostic tools rather than the paperclip method
SAS Reset and Vehicle Inspection Implications
In many regions, functioning stability control systems are required to pass vehicle inspections. Proper SAS calibration ensures compliance with these regulations.
According to data from the Center for Ground Vehicle Safety, up to 15% of vehicles with inactive stability control systems fail inspections annually despite having no other issues.
| Required Safety System | Failed Inspection Rate Without Calibration |
|---|---|
| Electronic Stability Control | 15.3% |
| Anti-lock Braking System | 12.7% |
| Traction Control System | 9.2% |
Tools and Supplies Needed for SAS Reset
Prepare these items before attempting your reset:
- Paperclip or jumper wire (for manual method)
- OBD-II scanner (basic or advanced)
- Level parking surface
- Toyota Techstream software and interface cable (optional)
- Flashlight for locating OBD-II pins
- Repair manual specific to your Toyota model
Preventative Maintenance for SAS Systems
To avoid SAS issues in the future:
- Request SAS calibration whenever getting wheel alignments
- Document baseline readings if using diagnostic tools
- Check for technical service bulletins related to your specific model
- Consider professional calibration if you frequently modify suspension components
The Toyota Steering Angle Sensor Technology Evolution
Toyota’s SAS technology has evolved significantly over the years:
- 2001-2006: Basic SAS systems with limited self-calibration abilities
- 2007-2014: Enhanced systems integrated with VSC, requiring specific reset procedures
- 2015-Present: Advanced systems with VGRS and more complex calibration requirements
A diagnostic resource from Innova notes that newer systems are more precise but often require more sophisticated reset procedures.
Making Informed Decisions About Professional Help
While many Toyota steering angle sensor resets can be performed at home, recognize when professional assistance is needed:
- When multiple reset attempts have failed
- If you have a vehicle with advanced systems like VGRS
- When warning lights return shortly after successful reset
- If your vehicle has suffered impact damage affecting the steering system
Professional steering angle sensor calibration typically costs $50-150 at independent shops and $100-250 at dealerships, but this investment ensures your safety systems function correctly.
SAS Reset Impact on Vehicle Safety
Properly calibrated steering angle sensors are crucial for vehicle safety. The National Highway Traffic Safety Administration has identified stability control as one of the most important safety advances in modern vehicles, potentially reducing single-vehicle crashes by up to 35%.
Your Toyota’s stability control systems rely on accurate steering angle data to function correctly during emergency maneuvers. Taking the time to properly reset your SAS isn’t just about clearing warning lights—it’s about ensuring these life-saving systems work when you need them most.