So your 4L80E is either on its last legs or you’re planning a serious power build — either way, you’re in the right place. This guide covers everything from budget-friendly fixes to full-send race builds, and it’ll save you from making expensive mistakes along the way. Stick around — there’s a lot of gold here.
What Makes the 4L80E Worth Upgrading?
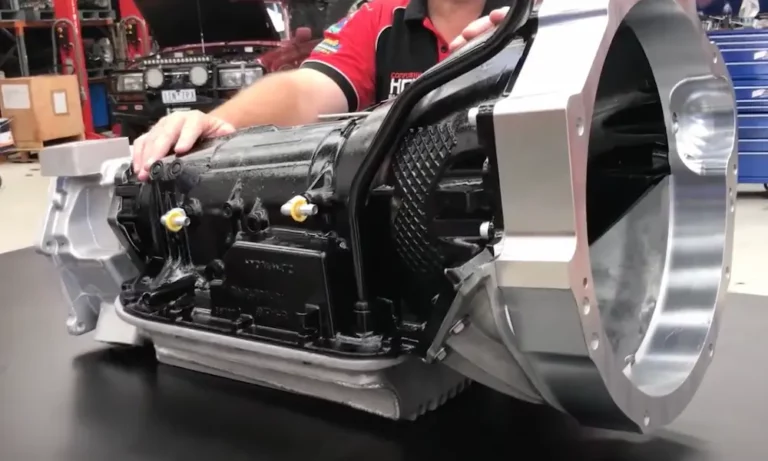
The 4L80E isn’t just a strong transmission — it’s arguably the toughest automatic GM ever bolted behind a gas or diesel engine. Introduced in 1991 as a direct successor to the legendary TH400, it added a fourth-gear overdrive and electronic shift control while keeping that brick-wall durability the TH400 was famous for.
It handles up to 440 lb-ft of input torque and 885 lb-ft of output torque in stock form. Push more power through it without upgrades? You’ll find its limits fast.
Here’s a quick look at the baseline specs:
| Spec | 4L80E | 4L85E |
|---|---|---|
| 1st Gear Ratio | 2.48:1 | 2.48:1 |
| 4th Gear (OD) | 0.75:1 | 0.75:1 |
| Max Input Torque | 440 lb-ft | 460 lb-ft |
| Max Output Torque | 885 lb-ft | 885 lb-ft |
| Max GVWR | 8,000 lbs | 16,500 lbs |
| Dry Weight | 254 lbs | 254 lbs |
The 4L80E ran in production until 2013 and found its way into everything from 3/4-ton Chevy trucks to the Hummer H1, Bentley, and Rolls-Royce. That pedigree matters when you’re building for power.
Know Your Core: Pre-1997 vs. Post-1997
Before you spend a dollar on 4L80E transmission upgrades, figure out what year core you’re working with. The year determines your lubrication layout and which parts you need.
1991–1996: The Front-Lube Problem
Early 4L80Es ran both cooler lines from the front of the case. This meant cooling fluid often lost pressure before it reached the rear planetary gearset — the part working hardest under load. The result? Premature wear and heat damage in the rear gears.
Even worse, 1991–1993 units had a notorious internal wiring connector that let transmission fluid wick into the external harness and eventually destroy the PCM. If you’re building an early core, replacing that connector with the updated 1994+ style harness is non-negotiable.
1997+: Center-Lube Design
GM moved the rear cooler line to the middle of the case in 1997. This “center-lube” design dramatically reduced rear planetary failures by delivering cooled fluid directly to the center support. Later 1999+ units also improved the neutral safety switch and pressure control solenoid. If you can choose a core, pick a post-1997 unit.
The Most Common 4L80E Failure Points
You can’t plan smart 4L80E transmission upgrades without knowing what breaks first. These three failure modes take out more 4L80Es than anything else.
Boost Valve and Runaway Line Pressure
The boost valve inside the pump controls line pressure based on input from the Pressure Control Solenoid. When this valve wears and starts sticking, you get either dangerously high pressure or dangerously low pressure.
Too high? The hydraulic force can crack the aluminum case or blow the intermediate clutch snap ring lugs right out of the case. Too low? The clutches slip, overheat, and burn. A quality shift kit with an updated boost valve is the fix.
The Torque Converter: Factory Achilles Heel
The stock converter uses a stamped steel cover that flexes under pressure. That flex causes shudder, prevents solid lock-up engagement, and under extreme conditions causes the converter to physically “balloon.” A ballooned converter can push forward on the crankshaft with enough force to kill the engine’s thrust bearing.
Any serious power build needs a converter with a billet CNC-machined cover. No exceptions.
Valve Body Wear and Cross-Leakage
The aluminum valve body wears over time as steel valves cycle through the bores. Oversized bores let pressurized fluid bleed into the wrong circuits, causing:
- Soft or flared shifts
- Third gear slippage under load
- Solenoid filter blockage leading to limp mode
- Erratic diagnostic codes
A performance valve body or shift kit from Sonnax or TransGo addresses these issues directly.
4L80E Transmission Upgrades by Power Level
Your build tier determines your parts list. Don’t overbuild a street truck or underbuild a race car.
500–750 HP: Street/Strip Build
At this level, the stock shafts and drums can survive — but only if the hydraulics are corrected first. The critical upgrade here is the billet forward clutch hub. The factory cast hub can’t handle aggressive shifts or nitrous hits. A rollerized billet replacement adds a needle bearing where the factory uses a thrust washer, cutting friction and adding strength where it counts.
You should also add a quality shift kit and recalibrate line pressure to increase clutch clamping force. Don’t skip it — this is what keeps everything else alive.
750–1,000 HP: Serious Business
The factory input shaft becomes a liability above 750 HP. It’s the first mechanical link between your engine and transmission, and torsional stress at this level will snap a stock shaft. The replacement standard at this tier is 300M billet steel — a low-alloy, vacuum-melted material with a tensile strength of roughly 280,000–300,000 PSI. It flexes slightly under shock load instead of breaking.
1,000–1,500+ HP: Full Send
Every major rotating component gets replaced with billet alternatives — intermediate shaft, main shaft, direct drum, all of it. Builders at this level often step up from 300M to Vasco Jet or Aermet 100, which are aerospace-grade alloys with superior fatigue resistance.
| Material | Recommended HP Limit | Key Trait |
|---|---|---|
| OEM Cast/Forged | ~750 HP | Susceptible to shock failure |
| 300M Billet | ~1,000 HP | High tensile strength, great torsion memory |
| Vasco Jet | ~1,500 HP | Superior fatigue life for drag racing |
| Aermet 100 | 1,500+ HP | Highest known strength for auto trans shafts |
At this tier, you’ll also want the Super Drum. The factory uses a 34-element intermediate sprag. The Super Drum upgrades to a 36-element sprag with a wider race, spreading the load across more surface area during the violent 1-2 shift. It’s the difference between surviving and not.
The Dual Feed Modification: The Most Important Hydraulic Upgrade
If there’s one 4L80E transmission upgrade that every performance builder agrees on, it’s the dual feed direct clutch modification. This single change can triple the clamping force on the direct clutches — the clutches that control 3rd gear and Reverse.
In stock form, the direct clutch piston has two chambers, but the transmission only fills one of them during 3rd gear. That limits clamping force and makes the direct clutch the most common failure point in any high-power 4L80E.
The dual feed mod works by:
- Removing the center lip seal that separates the two piston chambers
- Plugging a specific passage in the case or center support to stop fluid from bleeding back into the pan
- Removing the second sealing ring from the top of the center support to connect both fluid circuits
The result is full hydraulic force on both chambers simultaneously. This upgrade is considered mandatory for any build above 450 HP.
Separator Plate Feed Hole Sizing
While you’re in the valve body, resize the separator plate feed holes to control shift speed. Larger holes move fluid faster, which means less clutch slippage per shift and less heat generated per gear change.
| Build Goal | Feed Hole Size (2nd/3rd/4th) |
|---|---|
| Stock / Smooth | No change |
| Firm Street | 0.090″–0.100″ |
| Competition / Race | 0.115″–0.120″ |
Friction Materials: Picking the Right Clutch Packs
The friction material you choose should match how you drive. Using the wrong material is like putting race slicks on a grocery getter.
- High-Energy (HE) Carbon Frictions — from BorgWarner or Raybestos, these dark green/brown plates handle heat well and are ideal for daily drivers and heavy towers. Smooth, consistent engagement.
- Alto Red Eagle — saturated in phenolic resin and silicate for extreme heat resistance. Shorter lock-up time means less heat from slippage, but the shift feel is noticeably firmer.
- Raybestos GPZ — built specifically for high-stress diesel applications. Tests show up to 20% longer lifespan compared to standard frictions in demanding environments.
You can also increase clutch pack capacity by using thinner frictions and steels (PowerPacks) to fit an extra plate or two in each drum. Going from 5 to 6 or 7 frictions in the direct drum increases torque-holding capacity without touching the drum itself.
Thermal Management: Keep It Cool
Heat destroys transmissions faster than any mechanical failure. A two-part approach works best.
Auxiliary Transmission Coolers
The factory radiator cooler can’t keep up with performance or towing demands. You need a dedicated stacked-plate auxiliary cooler — they move more heat than tube-and-fin designs thanks to greater surface area and fluid turbulence. A good rule of thumb: choose a cooler rated for at least 3x your vehicle’s GVW. For most 4L80E-equipped trucks, units like the Tru-Cool 40K or the Derale Hyper-Cool with an integrated fan are the go-to choices.
Deep Pans and Fluid Volume
An aftermarket deep pan from Mag-Hytec, B&M, or PML adds 2–4 quarts of fluid capacity. More fluid means a bigger thermal heat sink, slower temperature rise, and cooler overall operation. Cast aluminum pans also add external fins for passive cooling and provide a mild girdle effect on the case under high-torque conditions. Most include a drain plug and a temperature sensor port — both worth having.
Torque Converter Selection: Match It to Your Engine
Stall speed and lock-up type have to match your power band and usage. Get this wrong and you’ll either bog off the line or torch the converter.
- Low Stall (1,800–2,200 RPM): Best for towing and heavy hauling. Keeps the engine in its low-RPM torque range and reduces converter heat during low-speed work.
- High Stall (2,800–4,000+ RPM): Lets a high-horsepower engine flash into its power band at launch — essential for strip use.
For lock-up type, single-disc converters work fine up to about 650 HP in naturally aspirated builds. Forced induction engines, heavy diesel trucks, and anyone planning to lock the converter at wide-open throttle needs a triple-disc converter. Three friction surfaces multiply the holding power dramatically, and the billet cover eliminates the ballooning issue that kills stock converters.
Electronic Tuning: The Final Piece
The “E” in 4L80E means this transmission relies on software as much as hardware. Get the tuning wrong and your hard parts suffer unnecessarily.
Standalone Controllers for Swaps
If you’re dropping a 4L80E into a non-GM vehicle or a pre-electronic chassis, you need a standalone TCU. Here are the main options:
| Controller | Interface | Best For |
|---|---|---|
| HGM COMPUSHIFT Sport | Smartphone (Bluetooth) | Easy real-time tuning |
| TCI EZ-TCU | Handheld unit | No laptop needed |
| Simple Shift | Physical dials | Simplest possible setup |
| MicroSquirt | Laptop (TunerStudio) | Maximum flexibility and control |
HPTuners and EFILive for Factory PCM Vehicles
If you’re staying on the factory computer, HPTuners or EFILive let you dial in three critical parameters:
- Shift Times: Factory settings run 0.5–0.7 seconds for a smooth feel. Performance builds need 0.2–0.3 seconds to reduce clutch slippage per shift.
- Torque Management: GM pulls ignition timing during shifts to protect the trans. With upgraded hard parts, you can reduce or eliminate this for maximum acceleration.
- TCC PWM: Set the torque converter clutch duty cycle to 100% (hard on/off) to prevent slipping and protect your aftermarket converter investment.
Swapping a 4L80E Into a Non-Truck Platform
The 4L80E is a popular swap into older muscle cars and resto-mods, but it’s not plug-and-play. It’s longer, heavier, and has an integrated bellhousing — some vehicles need tunnel modifications to clear the main electrical connector and cooler lines.
The 4L80E uses a larger 32-spline output shaft (same as a TH400), so driveshaft modification is almost always required. Most swap kits include a new slip yoke for welding onto your existing shaft.
If you’re replacing a 4L60E, you’ll need a conversion harness or connector repinning, plus a PCM segment swap — overwriting the 4L60E control logic with 4L80E software. Skip the segment swap and the PCM won’t understand the different gear ratios or solenoid patterns. The result is a transmission permanently stuck in limp mode.
Build It Once, Build It Right
The 4L80E’s strength ceiling is genuinely impressive. With the right combination of hydraulic recalibration, billet hard parts, proper friction material, thermal management, and electronic tuning, this transmission handles four-digit horsepower in heavy vehicles without complaint. Its lineage from the TH400 gives it a foundation most modern transmissions can’t match.
Pick your power level, follow the upgrade path that matches it, and don’t cut corners on the dual feed modification or the torque converter. Those two items alone determine whether your build survives its first hard pull — or ends up in pieces.