Getting the 4L80E oil capacity wrong can kill a perfectly good transmission. Whether you’re doing a simple pan drop or filling a fresh rebuild, the numbers matter — and they’re not all the same. This guide breaks down exactly how much fluid you need, which pan you have, and what type of fluid to use. Stick around to the end, and you’ll also know how to check your line pressure like a pro.
What Is the 4L80E Oil Capacity?
The short answer: it depends on what kind of service you’re doing.
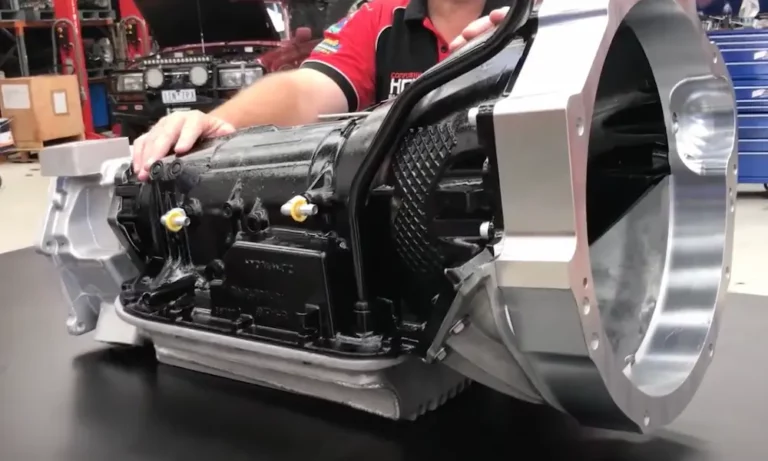
The 4L80E is a heavy-duty four-speed automatic built for trucks and SUVs up to 8,000 pounds GVWR. It weighs 254 pounds dry and 268 pounds fully filled. That extra 14 pounds? That’s your transmission fluid doing all the heavy lifting inside.
There are two completely different fill scenarios you need to understand:
Pan Drop (Routine Service):
A standard pan-drop service drains and refills between 6.3 and 7.7 quarts. GM’s factory service manual targets a refill range of 6.6 to 7.3 quarts. On older models, like a 1991 Chevrolet chassis motorhome, you might only drain about 4.2 quarts depending on temperature and drain time.
Dry Fill (Full Rebuild or Fresh Install):
A complete dry fill is a different story. You’re looking at 12.0 to 16.0 quarts total, with the standard spec landing at 13.5 quarts for most Silverado, Sierra, and Cadillac SUV applications. That bigger number reflects the torque converter, which acts as the primary fluid reservoir.
Torque Converter Capacity by Size
The torque converter alone holds a significant chunk of fluid. Here’s how converter size affects your total fill:
| Converter Size | Fluid Capacity |
|---|---|
| 13-inch | 5.0 quarts |
| 12-inch | 4.0 quarts |
| 11-inch | 3.5 quarts |
| 10-inch | 3.0 quarts |
| 9-inch | 2.5 quarts |
| 8-inch | 2.0 quarts |
| 7-inch | 2.0 quarts |
Don’t skip this step when planning a rebuild. Use the wrong converter size assumption and your fluid level will be off from the start.
Stock Pan Specs: Early vs. Late Models Matter More Than You Think
GM didn’t keep the 4L80E pan the same throughout the production run. There are two distinct pan designs, and mixing them up can cause real problems.
1991–1996 (Early Style Pan):
The early pan is 2.6 inches deep with a squared-off flat bottom. Under hard acceleration, fluid slams backward toward the rear of the case. Because a quarter-inch difference on the dipstick equals roughly one quart of fluid, even a slightly low fill can starve the filter pickup. The pump pulls air instead of fluid — and then you get cavitation, pressure loss, and slipping clutches. That’s a bad day.
1997 and Up (Late Style Pan):
The late-style pan deepens to 2.9 inches and adds an angled rear corner. That angle keeps fluid concentrated around the filter pickup during acceleration, preventing starvation. It’s a small geometry change with a big impact on hydraulic stability.
If you’re running an early-style squared pan on a truck that tows or accelerates hard, this is worth paying attention to.
Aftermarket Pan Options: More Fluid, Better Cooling
For towing, high-performance builds, or commercial use, a stock pan isn’t always enough. Aftermarket pans give you extra fluid capacity and better heat management — both critical for a long-lasting transmission.
Here’s a side-by-side look at the most popular options:
| Pan Manufacturer | Material | Added Capacity | Sump Depth |
|---|---|---|---|
| PML Low Profile (SC-9313-AC) | Cast Aluminum | +1.5 quarts | 3.375 inches |
| PML Deep (SC-9167) | Cast Aluminum | +3.75 quarts | 1.49 inches deeper than stock |
| Mag-Hytec (4L80E-A) | Finned Aircraft Aluminum | +4.0 to 4.5 quarts | Deep Finned Sump |
| Derale (14207) | Finned Stamped Steel | +4.5 quarts | 4.0625 to 4.25 inches |
| Hughes Performance (HP2580) | Cast Aluminum (2WD) | +4.0 quarts | 4.125 inches |
| JEGS (555-60174) | Finned Cast Aluminum | +2.0 quarts | 4.50 inches |
| TCI (278000) | Finned Cast Aluminum | +2.0 quarts | Deep Finned Sump |
A few things worth knowing before you buy:
- The Derale pan uses internal cooling tubes to drop operating temps by 20–50°F. That’s real-world performance, not a marketing claim.
- Mag-Hytec pans require a specific deep-pan filter — GM part number 24210956. Replace it every service interval, no exceptions.
- JEGS and Hughes pans include custom filter extensions so the pickup sits at the bottom of the deep sump.
- PML deep pans have cast-in filter supports inside the pan floor, so you can run a standard-height filter without any extension.
If your truck has tight ground clearance, the PML low-profile at 3.375 inches depth is the safest choice. For maximum thermal protection, the Derale and Mag-Hytec are the go-to picks.
Which Transmission Fluid Does the 4L80E Take?
Using the wrong fluid doesn’t just void warranties — it wrecks clutches and seals.
1991–2005 models: The factory fill was Dexron III. These vehicles can use either Dexron III or Dexron VI as a service replacement.
2006 and newer: GM Powertrain Service Bulletin 04-07-30-037A mandated Dexron VI for all 2006+ warranty services. If your truck is a 2006 or newer, Dexron VI only — no mixing, no substitutions.
Why Dexron VI Is Better
Compared to Dexron III, Dexron VI delivers significant improvements across every performance metric:
- 100% better oxidation resistance
- 120% increase in clutch durability
- 20% thicker oil film
- 150% improvement in foam and aeration resistance
- 200% better shear stability
That shear stability number is huge for towing. Fluid that shears thin under load drops hydraulic pressure and causes sloppy, heat-generating shifts.
Special Cases
Not every 4L80E takes the same fluid. A few exceptions worth noting:
- Hummer H1 applications were factory-filled with Mercon V to meet military-grade specs.
- Isuzu, Jaguar, and Rolls-Royce applications using the 4L80E maintained Dexron III per their own specifications.
- In extreme-duty high-heat environments, some transmission builders recommend a low-viscosity tractor fluid meeting Caterpillar TO-4 industrial specs. It helps stabilize torque converter stall speed and extends friction plate life under brutal shear loads.
Service Intervals: How Often Should You Change the Fluid?
The answer depends on how hard you use the truck.
Normal driving conditions: Change the fluid and filter every 50,000 to 60,000 miles.
Severe service (towing, commercial use, off-road, hot climates): Drop that interval to 30,000 to 40,000 miles, and inspect the fluid every 15,000 miles.
Dark, burnt-smelling fluid with visible metal particles means you’re already behind schedule. Don’t wait for a fault code to tell you something’s wrong.
How to Do a Proper Pan-Drop Service
Getting the fluid right means following the right steps in the right order. Here’s how to do it without making a mess or warping anything:
Tools you need:
- 13mm socket wrench
- Torque wrench
- Gasket scraper
- Smooth flat file
- Lint-free rags
- Large drain pan
Step-by-step process:
- Place a drain pan under the transmission and remove the rear pan bolts first to control the fluid flow.
- Pull the old filter and discard it.
- Scrape all old gasket material or dried silicone off the transmission case flange. Every bit of it.
- Wipe the flange clean with lint-free rags, then run the flat file over any burrs or high spots.
- Apply a thin coat of clean transmission fluid to the new pan gasket or O-ring before mounting.
- Hand-start all 17 fasteners before torquing anything.
- Torque the fasteners in a cross-pattern sequence to 12–16 foot-pounds. Don’t go tighter — you’ll warp the flange or strip the threads.
Refilling the system:
- Pre-fill the torque converter with about 1 quart of fluid before final assembly on a rebuild.
- Pour 5 quarts through the filler neck after the pan is secured.
- Start the engine and let it idle in Park while the pump pulls fluid into the valve body.
- Add the remaining fluid gradually, bringing the total to roughly 7 quarts for a standard pan service.
- Shift through all positions including Reverse to purge air from the hydraulic circuits.
- Do your final level check with the engine idling in Park and fluid at normal operating temperature.
How to Check Line Pressure on the 4L80E
If you’re diagnosing shift quality issues or verifying the hydraulic system after a service, line pressure testing gives you the real picture. You’ll need a 400 psi fluid pressure gauge connected to the diagnostic tap on the driver’s side of the transmission case.
Run the engine to operating temperature first, then check against these factory target specs:
| Gear Selection | Engine Condition | Target Line Pressure |
|---|---|---|
| Drive, Park, or Neutral | Idle | 40–70 psi |
| Drive, Park, or Neutral | Wide-Open Throttle | 160–180 psi |
| Reverse | Idle | 60–70 psi |
| Reverse | Wide-Open Throttle | 300–330 psi |
Critical rule: Never hold wide-open throttle for more than two seconds during this test. Two seconds. Any longer and you’ll overheat the transmission fast. Keep the parking brake and service brakes fully applied throughout the entire test.
Pressure readings below spec usually point to a worn pump, degraded pressure regulator valves, or failed internal sealing rings. For electronic faults and solenoid codes, you’ll need a Tech 2 diagnostic scanner to read and clear what the Powertrain Control Module has stored.
Getting the 4L80E oil capacity exactly right — whether it’s a 7-quart pan service or a 13.5-quart dry fill — is the single easiest way to protect a transmission that’s built to handle serious work. Use the right fluid, stick to your service intervals, and your 4L80E will keep shifting clean for a long time.