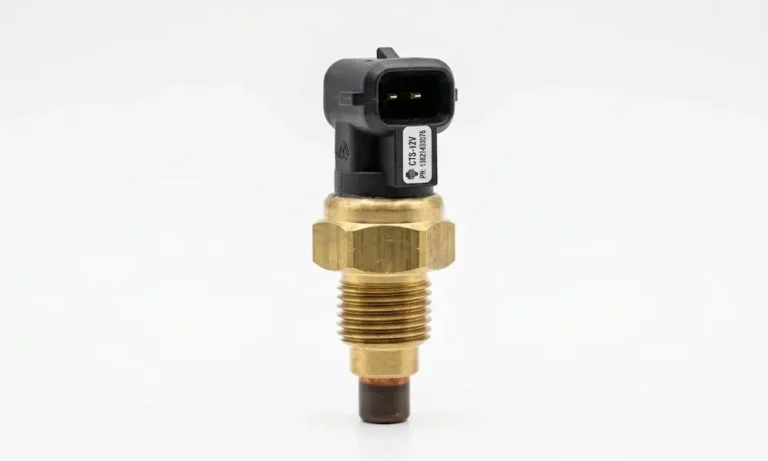
Dealing with a check engine light, poor fuel economy, or a Hemi that won’t warm up properly? The coolant temperature sensor is likely the culprit. Finding it depends heavily on which version of the 5.7 Hemi you have — and that’s where most people get stuck. Read to the end, and you’ll know exactly where to look, how to test it, and how to swap it out.
Two Engines, Two Very Different Sensor Locations
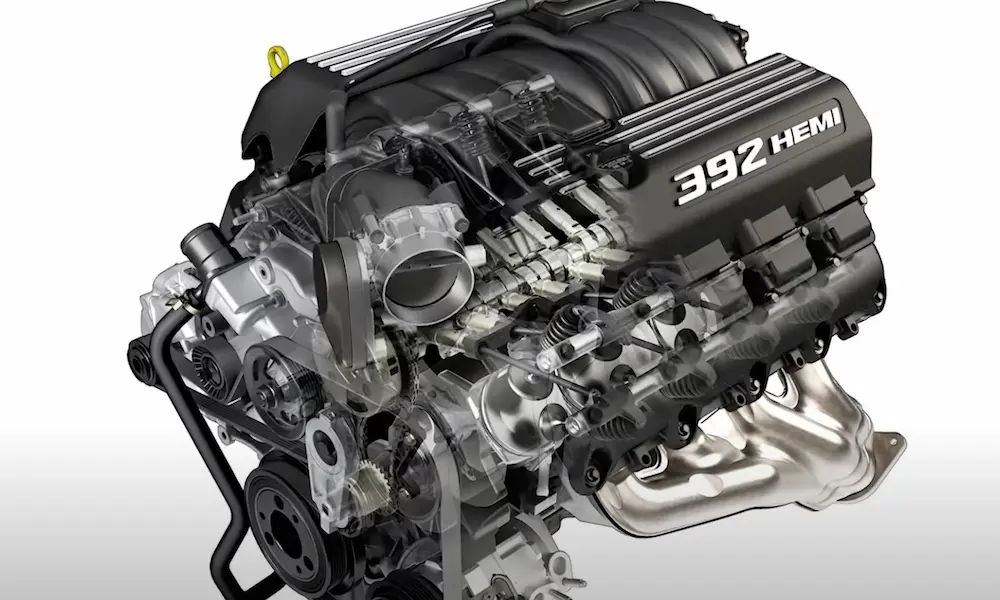
The 5.7 Hemi coolant temperature sensor location changed dramatically in 2009. Chrysler redesigned the engine — internally called the “Eagle” revision — and moved the sensor from a frustratingly hidden spot to a place you can actually see and reach.
Knowing which version you have is the first step before you touch anything.
| Engine Version | Model Years | Sensor Location |
|---|---|---|
| Pre-Eagle (Early Gen III) | 2003–2008 | Hidden behind the A/C compressor |
| Eagle (Revised Gen III) | 2009–Present | On top of the water pump housing |
The model year is a strong clue. But if you want to be certain, check the casting number on the driver’s side of the engine block. Pre-Eagle blocks carry numbers like 53021319AG or 53021319CB. Eagle blocks use 53021319DK or 53021314DR.
What Does the Coolant Temperature Sensor Actually Do?
Before you dig into the engine bay, it helps to understand why this small sensor matters so much.
The coolant temperature sensor is a thermistor — a resistor that changes its electrical resistance based on temperature. On the 5.7 Hemi, it uses a negative temperature coefficient design. That means as coolant heats up, resistance drops. The powertrain control module (PCM) sends a 5-volt reference signal through the sensor and reads the return voltage to calculate engine temperature.
Here’s why that matters in practice:
- Cold start: The engine runs in open-loop mode. It ignores the oxygen sensors and uses coolant temperature data to add extra fuel. Cold fuel doesn’t vaporize well, so this enrichment prevents stumbling and stalling.
- Warm engine: Once the coolant hits around 160°F, the system switches to closed-loop operation. It then targets a 14.7:1 air-to-fuel ratio using live oxygen sensor feedback.
- Multi-displacement system (MDS): Your Hemi won’t drop to four cylinders until it reaches stable operating temperature. A bad sensor can keep MDS from ever activating, killing your highway fuel economy.
5.7 Hemi Coolant Temperature Sensor Location: 2003–2008 (Pre-Eagle)
Here’s the honest truth: Chrysler buried this thing.
On 2003–2008 Rams, Chargers, 300s, and Magnums, the sensor sits on the front of the engine on the driver’s side — completely hidden underneath the air conditioning compressor. You can’t see it from the top without a mirror. You can’t reach the electrical connector without moving the compressor.
In Ram trucks, there’s decent room between the engine and radiator, but the compressor bracket still blocks everything. In the Chrysler 300 and Dodge Charger, the engine sits closer to the firewall. The working space is tighter, and you’ll almost certainly need to unbolt the compressor to even see the connector.
How to Replace It on a 2003–2008 Hemi
This job takes an experienced tech 45 to 60 minutes. Here’s the process:
- Let the engine go cold. A pressurized cooling system will spray hot coolant if you pull the sensor while warm.
- Disconnect the negative battery cable. This prevents the electric fans or A/C clutch from surprising you mid-job.
- Remove the serpentine belt from the A/C compressor pulley using a tensioner bar or long-handled ratchet.
- Unbolt the A/C compressor — usually three or four 13mm or 15mm bolts. Don’t disconnect the refrigerant lines. The hoses are flexible enough to let you move the compressor toward the radiator without losing the refrigerant charge.
- Disconnect the sensor connector. Use a small pick to release the locking tab. The harness is routed tight against the block on these engines.
- Remove the sensor with a 19mm deep socket, turning counter-clockwise.
- Install the new sensor by hand first, then snug it with the socket. Don’t crank it tight — you risk cracking the housing.
- Reassemble in reverse order.
5.7 Hemi Coolant Temperature Sensor Location: 2009–Present (Eagle)
The 2009 redesign fixed the accessibility problem completely.
On every Eagle Hemi, the sensor sits on the water pump housing — right at the front of the engine, facing up or slightly toward the passenger side. Follow the upper radiator hose from the radiator back to the engine. It connects at the thermostat housing. The coolant temperature sensor is right there, within an inch or two of the thermostat. Pull the plastic engine beauty cover, and you’ll spot it immediately.
This applies to:
- 2009+ Ram 1500 and 2500
- 2009+ Dodge Charger and Challenger
- 2009+ Chrysler 300
- 2011+ Jeep Grand Cherokee and Dodge Durango
How to Replace It on a 2009–Present Hemi
This takes 15 to 30 minutes. It’s a basic maintenance task.
- Let the engine cool completely.
- Pull the plastic engine cover straight up off its mounting studs. On some Ram models, loosen the air intake tube slightly to improve tool clearance.
- Disconnect the harness by pressing the release tab and pulling it free.
- Remove the sensor with a 19mm socket or combination wrench.
- Quick-swap option: If you don’t want to drain the coolant, have the new sensor ready. Pull the old one out and immediately thread the new one in to minimize air introduction and fluid loss. This works well on Eagle engines but requires quick hands.
- Thread by hand first, then snug with the wrench. The water pump housing is cast aluminum — it strips easily if you overtighten.
Diagnostic Trouble Codes You’ll See With a Bad Sensor
The PCM monitors the sensor’s output constantly. When something doesn’t add up, it stores a code.
| Code | What It Means | Likely Cause |
|---|---|---|
| P0115 | Circuit malfunction — no signal | Broken wire or completely dead sensor |
| P0116 | Range/performance problem | Signal isn’t changing as engine warms up |
| P0117 | Circuit low input | Short to ground — computer thinks engine is extremely hot |
| P0118 | Circuit high input | Open circuit — computer thinks engine is extremely cold |
| P0128 | Thermostat performance | Engine warming too slowly — often a lazy thermostat or low-reading sensor |
Watch out for “in-range” failures. The sensor might always report 140°F — a technically valid temperature — while the engine actually runs at 200°F. No code triggers, but MDS won’t engage and fuel economy tanks.
The Cold Soak Test
This is the best way to catch an in-range failure. Park the vehicle and let it sit 8 to 12 hours in a controlled environment. Using a scan tool, compare the coolant temperature sensor, intake air temperature sensor, and transmission oil temperature sensor readings. All three should be within 2–3°F of each other after a long cold soak. If the coolant sensor reads 110°F while the others read 70°F, it’s bad — even without a stored code.
Testing the Sensor with a Multimeter
No scan tool? A digital multimeter works fine. A healthy sensor behaves like this:
- Room temperature (~70°F): Moderate resistance across both pins
- Ice water bath: Resistance spikes sharply; back-probe voltage reads 5.0–6.5V
- Boiling water bath: Resistance drops to its lowest point; voltage drops to approximately 0.25V
Use quality leads — poor contact adds false resistance and ruins your diagnosis. Also inspect the electrical connector for green corrosion, especially on vehicles from salt-belt states. Corroded connectors cause intermittent failures that are maddening to track down.
Tools You’ll Need for Either Job
| Tool | Purpose | Spec |
|---|---|---|
| Deep socket or wrench | Sensor removal | 19mm |
| Ratchet and extension | Reaching tight spots | 3/8″ drive with swivel |
| Socket set | Compressor and guard bolts | 8mm, 13mm, 15mm |
| Serpentine belt tool | Belt removal (Pre-Eagle only) | Long-reach tensioner bar |
| Digital multimeter | Electrical testing | High-impedance digital |
| Small flathead or pick | Connector tab release | Automotive pick preferred |
Use a deep 19mm socket. A standard-length socket won’t clear the connector housing and can break the plastic sensor body during removal.
Bleeding Air From the Cooling System After the Swap
This step gets skipped constantly, and it’s a serious mistake. The 5.7 Hemi — especially Pre-Eagle versions — traps air pockets in the cylinder heads. Those pockets cause localized overheating, which leads to dropped valve seats. That’s a full engine rebuild situation.
Here’s how to bleed it properly:
- Fill the radiator with the correct coolant. 2003–2012 models use HOAT coolant. 2013+ models use OAT coolant. Don’t mix them — it causes gelling.
- Start the engine with the radiator cap off. Set the cabin heater to max heat on low fan. This opens the heater core circuit and lets air escape.
- Keep topping off the radiator as the level drops — that’s air leaving the system.
- Once the thermostat opens (upper radiator hose gets hot), a larger air burp may escape the filler neck. That’s normal.
- Once bubbles stop and the heater blows consistent hot air, reinstall the cap and fill the overflow to the “Full Cold” line.
- Clear any stored codes with a scan tool and take it for a short drive. Watch the temperature gauge and check around the new sensor for drips afterward.
Two More Things Worth Doing While You’re In There
Replace the thermostat at the same time if you have a P0128. On Eagle engines, the thermostat sits in the same housing as the sensor. It costs almost nothing extra to swap both while you’re already there, and a stuck-open thermostat is the most common cause of P0128 anyway.
Look at the water pump on 2009+ engines. The sensor mounts directly to it. If you spot dried pink or white coolant residue around the water pump pulley or weep hole, plan the water pump replacement now. Otherwise, you’ll be pulling that new sensor back out sooner than you’d like.
The 5.7 Hemi coolant temperature sensor location depends entirely on which engine generation you’re working with. Pre-Eagle means a compressor relocation and an hour of work. Eagle means 20 minutes and a 19mm socket. Either way, the sensor itself is cheap — and replacing it correctly keeps your Hemi running at peak performance for years to come.