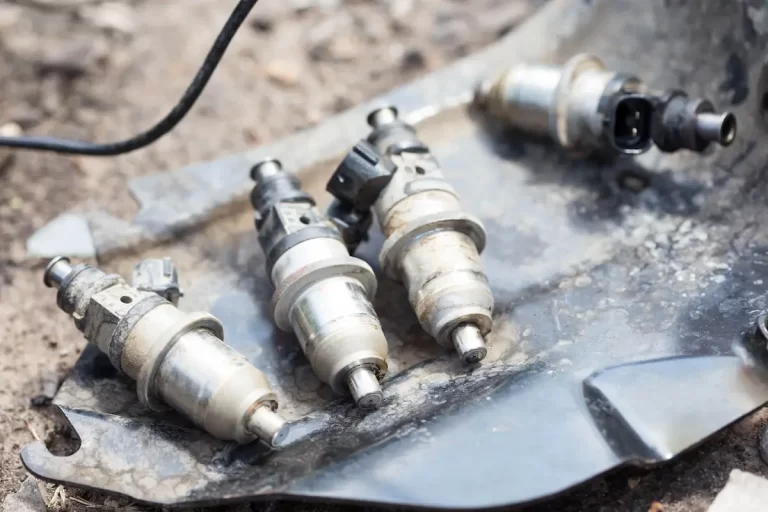
Getting your 5.9 Cummins injector torque specs wrong doesn’t just cause a minor leak — it can destroy a brand-new injector before you even start the engine. Whether you’re wrenching on a classic 12-valve or a 2007 common-rail, this guide breaks down every critical spec, explains why each number matters, and walks you through the exact sequences that keep your fuel system alive.
Why Injector Torque Specs Matter More Than You Think
Torque specs aren’t just suggestions written by engineers with too much free time. Every number on this list creates a specific clamping force. That force:
- Compresses copper sealing washers to stop combustion gas leaks
- Prevents injector bodies from distorting and hanging open
- Keeps high-pressure fuel inside lines rated for 23,000+ PSI
- Stops fasteners from fatiguing and snapping under vibration
Miss the spec by even a few foot-pounds, and you’re looking at fuel leaks, compression loss, oil dilution, or a full engine failure. The physics behind these fasteners shows that over-torquing stretches a bolt past its elastic limit — it loses its “spring tension” and simply can’t hold the joint anymore.
That said, let’s get into the actual numbers by generation.
Generation 1: 12-Valve Mechanical Injection (1989–1998)
The 12-valve Cummins uses mechanically actuated pop-off injectors threaded directly into the cast iron cylinder head. There’s no hold-down clamp here — a large retaining nut does all the work, crushing a copper sealing washer at the base to seal combustion gases.
12-Valve Injector & Fuel System Torque Specs
| Component | Torque Spec | Notes |
|---|---|---|
| Injector Retaining Nuts | 44 ft-lbs | Direct thread into cast iron head |
| High-Pressure Injection Line Nuts | 18 ft-lbs | Steel lines to pump and injectors |
| Bosch VE Pump Gear Nut (1989–1993) | 50 ft-lbs | Rotary distributor pump shaft |
| Bosch P7100 Pump Gear Nut (1994–1998) | 144 ft-lbs | Inline pump creates severe torsional resistance |
| Fuel Banjo Bolt (Injection Pump) | 24 ft-lbs | Main low-pressure supply lines |
| Fuel Banjo Bolt (Cylinder Head) | 18 ft-lbs | Fuel return lines at head |
| Fuel Banjo Bolt (Injector) | 6 ft-lbs | Fuel return flow fitting |
| Fuel Lift Pump Mounting Bolts | 18 ft-lbs | Camshaft-driven low-pressure pump |
What Happens If You Get This Wrong
Over-torque the injector nut past 44 ft-lbs and you distort the injector body. The internal needle binds open and dumps raw fuel straight into the cylinder. That’s a fast track to hydraulic lock and a bent connecting rod.
Under-torque it, and combustion gases bypass the copper washer. Carbon builds up in the injector bore, making future removal an absolute nightmare — and pushing abrasive soot into your fuel system.
Notice that massive jump between the VE pump gear nut at 50 ft-lbs versus the P7100 at 144 ft-lbs. That’s not a typo. The P7100’s internal camshaft-driven plungers create enormous torsional resistance. Under-torque that gear nut and it slips on the tapered shaft — instant timing loss, white smoke, and a no-start condition.
Cylinder Head Torque Sequence (12-Valve)
The head bolts use a multi-pass torque-plus-angle sequence:
- 30 ft-lbs
- 60 ft-lbs
- 90 ft-lbs
- Final: rotate an additional 90 degrees
Main bearing caps: 37 → 45 → 66 ft-lbs → 90° rotation. Connecting rod bolts: 22 → 44 ft-lbs → 60° rotation.
Bleeding the 12-Valve System
After replacing injectors, leave the high-pressure line nuts loose at the injectors while cranking. Wait until liquid fuel flows freely from the fittings — air in the lines absorbs the hydraulic pulse and prevents the injector needle from lifting. Once fuel flows clean, tighten the nuts to 18 ft-lbs.
Generation 2: 24-Valve VP44 Electronic Injection (1998.5–2002)
The 24-valve engine moved the injector to a perfectly vertical position in the center of the combustion chamber. That changed everything about how injectors mount. Gone is the big retaining nut — now you’ve got a two-pronged hold-down clamp secured by a small bolt.
The Most Common Mistake on This Engine
Confusing inch-pounds with foot-pounds. The injector hold-down bolt on the 24-valve is torqued to 89 inch-pounds — that’s about 7.4 ft-lbs. Apply that with a standard torque wrench reading in foot-pounds and you’ll snap the bolt flush inside the head. Then you’re dealing with an extraction job on a cast iron cylinder head. No fun.
24-Valve Injector & Fuel System Torque Specs
| Component | Torque Spec | Notes |
|---|---|---|
| Injector Hold-Down Clamp Bolt | 89 in-lbs | Critical — use an inch-pound torque wrench |
| High-Pressure Injection Line Nuts | 22 ft-lbs | Increased over 12-valve |
| Bosch VP44 Pump Gear Nut | 125 ft-lbs | Electronic distributor pump |
| Fuel Banjo Bolts | 18 ft-lbs | Low-pressure fluid transfer points |
| Electric Lift Pump Mounting Bolts | 18 ft-lbs | Block-mounted electric supply pump |
| Rocker Shaft Pedestal Bolts | 27 ft-lbs | Rocker assemblies on 24-valve head |
Why Supply Pressure Is Life or Death on the VP44
The VP44 pump uses incoming fuel for both lubrication and cooling — not engine oil, not coolant. Fuel. If a banjo fitting is under-torqued and bleeds air into the system, supply pressure drops. Low supply pressure starves the VP44 of lubrication and the electronic control module mounted on top overheats without constant fuel flow cooling it.
Maintain 10–15 PSI of supply pressure minimum. That’s not optional on this generation.
Cylinder Head Torque Sequence (24-Valve)
- 44 ft-lbs
- 89 ft-lbs
- Verify 89 ft-lbs
- Final: rotate an additional 90 degrees
Generation 3: 24-Valve High-Pressure Common Rail (2003–2007)
This is where 5.9 Cummins injector torque specs get genuinely complex — and where most fuel system repairs go wrong. The common-rail system operates at up to 23,000 PSI under load. At that pressure, diesel fuel acts with tremendous hydraulic force against every mating surface.
Injectors now live completely under the valve cover and receive fuel through a horizontal connector tube that passes through the side of the cylinder head casting.
Common-Rail Injector & Fuel System Torque Specs
| Component | Torque Spec | Notes |
|---|---|---|
| Injector Hold-Down Bolt | 89 in-lbs | Preliminary AND final stage |
| Injector Connector Tube Nut | 37 ft-lbs | Final — mates horizontal feed tube to injector |
| Injector Wiring Solenoid Nuts | 11–13 in-lbs | Fragile M4 studs; hand-tighten only |
| High-Pressure Fuel Line Nuts | 22 ft-lbs | Rail to connector tubes |
| Fuel Rail Mounting Bolts | 18 ft-lbs | Common rail manifold to block |
| Fuel Rail Pressure Sensor | 26 ft-lbs | Monitors static rail pressure |
| Fuel Rail Relief Valve | 26 ft-lbs | Prevents over-pressurization |
| CP3 Pump Mounting Nuts | 18 ft-lbs | High-pressure pump to timing gear case |
| CP3 Pump Gear Nut | 77 ft-lbs | Drive gear to pump shaft |
| Fuel Filter Housing Bolts | 18 ft-lbs | Primary filtration assembly |
The Staged Alignment Sequence You Cannot Skip
This six-step procedure is the most critical maintenance task on the 2003–2007 platform. Skipping or reordering any step creates a microscopic eccentric leak path at the connector tube-to-injector interface. High-pressure fuel bleeds directly into the return gallery and the CP3 pump can’t build the 4,000 PSI minimum needed to fire the injectors. The engine cranks and cranks and never starts.
Here’s the exact sequence:
- Install injector into vertical bore. Tighten hold-down bolts to 44 in-lbs (preliminary only)
- Loosen hold-down bolts completely — let the injector float
- Insert connector tube horizontally through the head until the alignment balls lock into the cylinder head slots
- Tighten connector tube nut to 11 ft-lbs (133 in-lbs) preliminary — this rotates the floating injector into perfect alignment
- Tighten injector hold-down bolts to final 89 in-lbs — locks the injector in its aligned position
- Tighten connector tube nut to final 37 ft-lbs — crushes the metal seal against 23,000 PSI
Skip step 2 and the locked injector can’t pivot to meet the incoming tube. The hardened steel conical tip carves an eccentric groove into the softer injector body port. That groove becomes a permanent high-pressure bypass leak.
Pro tip: Always install new connector tubes with new injectors. The conical tip deforms during initial seating to create the crush seal. A reused tube on a new injector won’t seat properly.
Handle Those Solenoid Nuts Gently
The wiring solenoid nuts on top of each injector sit on M4 threaded studs. Torque them to 11–13 in-lbs using a hand nut driver — treat it like tightening a screwdriver. Grab a standard ratchet and apply normal force and you’ll shear the stud clean. A snapped terminal stud means an otherwise perfect $400 injector goes in the trash.
Cylinder Head Torque Sequence (Common Rail 2003–2007)
Mirrors the 24-valve sequence: 44 → 89 → verify 89 ft-lbs → 90° rotation.
Critical difference on the short block: The common-rail main bearing caps use 37 → 59 ft-lbs → 90° rotation. Do NOT use the older 37 → 45 → 66 ft-lbs sequence from earlier generations on this engine. The documentation explicitly warns against mixing these specs.
How the 5.9 Compares to Duramax and Powerstroke
Different architectures demand completely different clamping strategies. Here’s a quick comparison of injector torque specs across platforms:
| Engine | Generation | Injector Torque |
|---|---|---|
| 5.9 Cummins (12v) | 1989–1998 | 44 ft-lbs (retaining nut) |
| 5.9 Cummins (24v) | 1998.5–2007 | 89 in-lbs (hold-down bolt) |
| Duramax LB7 | 2001–2004 | 37 ft-lbs (hold-down bolt) |
| Duramax L5P | 2017–Present | 89 in-lbs + 70° rotation |
| Powerstroke 7.3L | 1994–2003 | 120 in-lbs |
| Powerstroke 6.0L | 2003–2007 | 24–25.8 ft-lbs |
| Powerstroke 6.7L | 2011–2016 | 22 ft-lbs + 90° rotation |
The Cummins connector tube design — with fuel passing horizontally through the head casting — is unique to its inline-six layout. The GM and Ford V8 platforms use external or under-cover injector layouts that require fundamentally different clamping geometry.
Quick Diagnostic Reference: Common Failure Symptoms by Generation
Knowing the specs is half the battle. Knowing what a bad install looks like saves you from tearing the engine apart twice.
- 12-valve: Black smoke + rough idle after injector work → check for 44 ft-lbs and proper copper washer seating
- 24-valve: Hard start after pump replacement → VP44 low supply pressure; verify banjo bolt torques and lift pump function
- Common-rail: Cranks but won’t start after injector replacement → connector tube not properly aligned; rail can’t reach 4,000 PSI threshold
- Any generation: Rising oil level on dipstick + fuel smell from valve cover → injector body leak causing oil dilution
On common-rail engines specifically, maximum total return leakage for all six injectors combined during a Fuel Pressure Override Test is 210 ml over 30 seconds of cranking. Any single injector pushing more than 40–50 ml in a 10-second crank is a confirmed failure.
FAQs
Are high-pressure fuel injector feed tubes reusable on the common-rail platform?
Factory service literature sometimes allows reuse after visual inspection, but best practice says replace them every time you pull injectors. The conical tip deforms intentionally on first install to create a crush seal. Put an old tube on a new injector and you risk an improper seat — thousands of PSI of fuel pressure will bypass the fitting and bleed into the return system instantly.
What role does battery voltage play in diagnosing a crank-no-start condition?
A battery showing 12V on a standard multimeter can still fail under starter load. If voltage drops below 9V while cranking, the ECM on electronically governed engines simply won’t fire the injectors or actuate the fuel control solenoid. What looks like a pump or injector failure might just be weak batteries or corroded terminals. Test voltage under cranking load, not at rest.
What are the effects of excessive idle time on injector performance?
Extended idling keeps combustion temps too low for clean fuel burn. Injector nozzles accumulate carbon deposits that disrupt the spray pattern — leading to rough idle, poor fuel economy, and unburned fuel hammering your DPF or exhaust components.
Can aftermarket performance fasteners use factory torque specifications?
No. High-performance head studs and rod bolts use different alloys with different stretch characteristics. Applying factory torque values to aftermarket hardware will severely under-torque the joint. Always follow the fastener manufacturer’s specific instructions and recommended lubricants.
How does a restricted fuel filter mimic a failing CP3 pump?
A clogged filter chokes fuel volume to the high-pressure pump. At idle, demand is low enough to mask the restriction. Under load, the supply pressure tanks, the CP3 can’t fill its pumping chambers, and the ECM registers a low rail pressure code (P0087). Many technicians replace the CP3 before ever changing the filter. Always check filter restriction first before condemning the pump.