Got a “Perform Service” light glaring at you, or maybe your Ram is suddenly leaking oil from three different places? A clogged 6.7 Cummins CCV filter is likely the culprit. This guide walks you through everything — symptoms, part numbers, the full replacement procedure, and how to reset that stubborn dashboard light. Stick around to the end.
What Is a CCV Filter and Why Does It Matter?
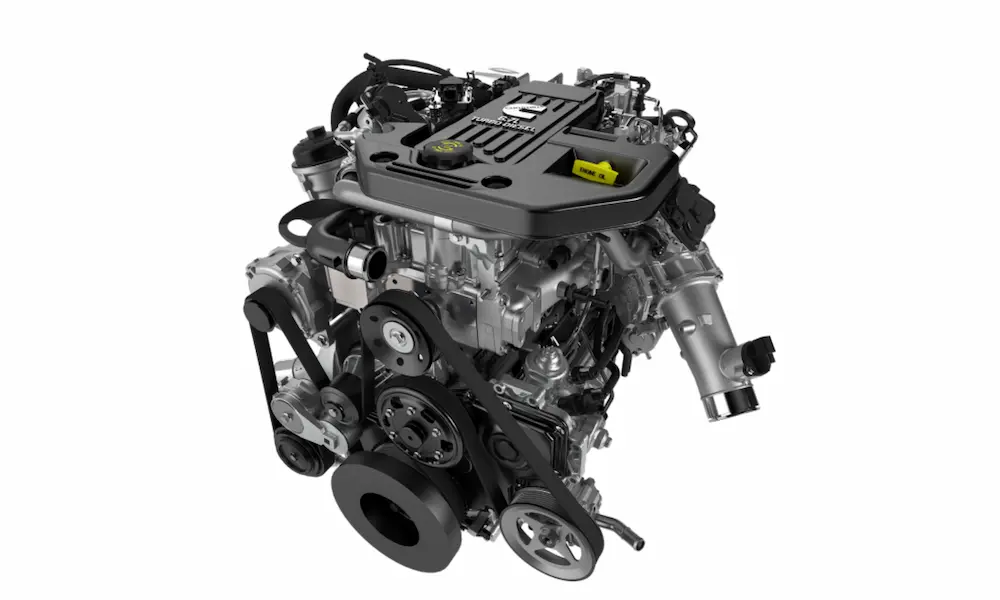
The Crankcase Ventilation (CCV) filter sits on top of your engine’s valve cover, hidden under a plastic acoustic shroud. Its job is straightforward: it separates oil mist from crankcase blow-by gases before those gases get recycled back into the intake tract.
Here’s the quick version of what happens inside:
- Combustion gases sneak past piston rings and pressurize the crankcase
- Those gases carry aerosolized oil, soot, moisture, and unburned fuel
- The CCV filter’s synthetic fiber matrix traps the oil droplets
- Clean oil drips back into the oil pan; cleaner gas flows into the turbo inlet
When the filter clogs, that whole system backs up — and your engine pays the price.
How Often Should You Replace the 6.7 Cummins CCV Filter?
The factory intervals depend on your model year. Your dashboard will show a “Perform Service” message when it’s time.
| Vehicle Model Years | Engine | Replacement Interval | Indicator |
|---|---|---|---|
| 2007.5 – 2018 | 6.7L Cummins ISB | 67,500 miles or 54 months | “Perform Service” |
| 2019 – 2024 | 6.7L Cummins (Updated) | 75,000 miles or 60 months | “Perform Service” |
Severe Duty? Change It Earlier
If you haul heavy, idle constantly, or rack up miles in dusty conditions, inspect the CCV system between 30,000 and 40,000 miles. These real-world situations burn through filters faster:
- Frequent heavy towing — sustained high load means more blow-by
- Extended engine idling — lower temps create wetter, heavier crankcase vapor
- Dusty environments — Midwest agriculture or desert Southwest operations accelerate clogging
- High-mileage engines — worn piston rings produce more blow-by from the start
Symptoms of a Clogged 6.7 Cummins CCV Filter
Don’t wait for catastrophic failure. Watch for these warning signs.
Oil Leaks Popping Up Everywhere
A blocked filter builds positive pressure inside the engine block. That pressure needs somewhere to go, so it pushes oil past every rubber seal it can find. Common failure points include the valve cover gasket, oil pan gasket, front crankshaft seal, and the rear main seal.
That last one hurts. Replacing a blown rear main seal means pulling the transmission — a repair that easily runs $1,500 to $2,500 in labor alone.
Unexplained Oil Consumption
If your truck is burning through oil between changes but you’re not seeing blue smoke from the exhaust, excessive crankcase pressure pushing oil past seals is likely the cause.
Turbocharger and Intake Contamination
A saturated filter stops coalescing oil. Instead, it lets raw liquid oil flow straight into the turbo inlet. This causes a domino effect:
- Turbo imbalance — oil-coated compressor wheels attract soot, causing bearing wear
- Intercooler fouling — oil coats internal fins, killing cooling efficiency and robbing power
- Silicone boot degradation — engine oil chemically attacks rubber boots, causing boost leaks
- Intake manifold sludge — oil vapor mixes with EGR soot, creating sticky tar-like buildup
Rough Idle and Power Loss
Trapped crankcase pressure fights against every downward piston stroke. You’ll feel it as sluggish throttle response, reduced fuel economy, and a rough, vibrating idle.
The Oil Cap Bounce Test
This is the fastest field check for crankcase pressure:
- Start the engine and let it warm up
- Loosely rest the oil filler cap upside down over the opening — don’t screw it down
- Watch what happens
Normal: The cap sits relatively still or gets pulled slightly downward by mild intake vacuum.
Clogged filter: The cap bounces, jumps off, or hisses loudly as pressurized air forces its way out.
This visual test takes 30 seconds and gives you a clear answer.
Diagnostic Trouble Codes to Know
P1507 and P1508 — Direct Restriction Codes
These codes mean the crankcase pressure sensor detected pressure above the allowable threshold. When you pull a P1507 or P1508, replace the CCV filter immediately. The diagnostic path is almost always that simple.
P04DB — The Frustrating One
The P04DB code officially means “Crankcase Ventilation System Disconnected.” But don’t assume a hose fell off. This code shows up even when everything looks physically secure.
Here’s why: the PCM compares crankcase pressure against intake manifold pressure. If it sees an impossible pressure drop, it assumes the vent hose disconnected. In reality, oil and moisture emulsion often fouls the pressure sensor itself, causing erratic voltage signals the computer misreads as a disconnected system.
Diagnosing P04DB properly:
- Visually inspect all vent hoses and clamps
- Use a smoke machine to find microscopic leaks if the visual check looks clean
- Inspect the wiring harness for chafed wires or corroded connectors
- Remove pressure sensors, inspect for oil fouling, clean with electrical contact cleaner or replace entirely
- Use a scanner to reset the PCM’s learned idle and airflow baseline after installing new sensors
CCV Filter Part Numbers and Cross-Reference Guide
The 6.7 Cummins powers everything from Ram pickups to school buses. That means a lot of part numbers for the same filter. Here’s the complete cross-reference:
| Brand | Part Number | Notes |
|---|---|---|
| Fleetguard (Cummins OEM) | CV52001 | OEM brand — exact media composition and fitment |
| Cummins Engine Co. | 4936636 / 4932168 / 4943250 | Direct factory numbers for commercial dealers |
| Mopar (Ram) | 68002433AA / AB / AC | All revisions are physically identical and backward-compatible |
| Dorman OE Solutions | 904-418 / 904-416 | Widely available direct-fit aftermarket alternative |
| WIX Filters | WA11221 | Premium aftermarket choice for independent shops |
| Baldwin Filters | CV15010 | Heavy-duty commercial fleet standard |
Vehicle Compatibility
This filter fits a surprisingly wide range of platforms:
- Ram 2500/3500 — 2007.5 through 2024 (2WD and 4WD)
- Ram 4500/5500 Chassis Cab — 2008 through 2024
- Ford F-650/F-750 — 2011 through 2020 (Cummins-equipped models)
- Freightliner MT45/MT55, M2 106/108SD — 2008 through 2019
- Blue Bird, Thomas Built school buses — all 6.7L-equipped variants
- International DuraStar, WorkStar, MV, HV series — ISB and B6.7 platforms
Step-by-Step 6.7 Cummins CCV Filter Replacement
This job takes about 20 to 30 minutes with the right tools. You don’t need a lift.
Tools You’ll Need
| Item | Purpose |
|---|---|
| New CCV filter assembly (with O-ring) | Replacement part |
| 8mm socket | Acoustic cover bolts and housing perimeter bolts |
| Long socket extension | Reaching rear bolts near the firewall |
| 3/8-inch drive ratchet | Paired with socket and extension |
| Flathead screwdriver or clamp tool | Loosening worm-gear hose clamps |
| Lint-free shop towels | Absorbing oil, wiping sealing surfaces |
| Brake parts cleaner or degreaser | Cleaning gasket mating surfaces |
| Dielectric grease or rubber lubricant | Breaking stuck hose connections safely |
| Safety glasses and nitrile gloves | Personal protection |
Step 1 — Prepare the Vehicle
Park on a level surface and set the parking brake. Let the engine cool completely. The CCV housing sits directly above the exhaust manifold and turbocharger — both stay extremely hot for hours after shutdown. Disconnect the negative battery terminal before working near fuel injector wiring harnesses.
Step 2 — Remove the Acoustic Cover
Open the hood and locate the large black plastic cover over the engine top.
- Remove the four 8mm retaining bolts
- Lift the cover up and maneuver it around the oil dipstick tube
- Set it aside — the CCV housing is now fully exposed on the valve cover
Step 3 — Disconnect the Ventilation Hose
- Locate the primary hose running from the filter housing toward the turbocharger inlet
- Loosen the metal worm-gear clamp with a screwdriver
- Grip the hose and twist gently while pulling backward to break the heat-bond
Don’t use picks or sharp tools here. If the hose won’t budge, spray rubber lubricant around the fitting and wait a few minutes. Tearing this hose creates a vacuum leak that triggers immediate fault codes.
Step 4 — Remove the Old Filter
- Use the 8mm socket with the long extension to remove all perimeter housing bolts — typically eight total
- The rear bolts near the cab firewall are tight on Ram trucks. Work patiently and keep the socket seated squarely to avoid stripping the brass inserts
- Lift the housing cover off and set it aside
- Pull the old filter element straight up and out
Place a shop towel under the filter immediately — a saturated filter drips heavily with black oil. Expect it to weigh noticeably more than a standard air filter.
Step 5 — Clean the Mating Surfaces
- Wipe the inside of the valve cover cavity dry with lint-free towels
- Clean the gasket flange with brake parts cleaner — remove all carbon tracking and old rubber residue
- Inspect the ventilation hose for cracking, swelling, or structural collapse. Replace it if it feels spongy
- Check the crankcase pressure sensor connector for oil intrusion or corrosion
Step 6 — Install the New Filter
- Confirm the new rubber O-ring is seated properly in its groove
- Lower the filter straight down into the cavity — it only fits one way
- Place the housing cover back on top
- Thread all eight 8mm bolts in by hand first — this prevents cross-threading the plastic brass inserts
- Tighten in a crisscross star pattern for even clamping force
Critical torque warning: The manufacturer specifies only 10 Newton-meters (89 inch-pounds) for these bolts. The housing is thermal plastic. Over-tighten it and you’ll warp or crack the flange, creating an oil leak that requires a full valve cover replacement.
Step 7 — Reassemble and Verify
- Reattach the ventilation hose and tighten the worm-gear clamp securely
- Reconnect the negative battery terminal
- Reinstall the acoustic cover and tighten its four 8mm bolts
- Start the engine and inspect all connections for air hissing or oil seeping
- Check the oil dipstick — the old saturated filter held oil, so top off the level if needed
- Take the truck for a test drive. Bring it to full operating temperature and run a hard acceleration to confirm full boost pressure and no warning lights
How to Reset the “Perform Service” Dashboard Light
Replacing the filter doesn’t automatically tell the PCM the job is done. The “Perform Service” message stays on until you complete a specific manual reset sequence.
The Reset Procedure
- Close all doors. Turn the ignition to ON/RUN — don’t start the engine.
- Keyed ignition: Two clicks forward, stop before the starter engages
- Push-button start: Press the start button twice with your foot off the brake
- Press the brake pedal fully down and release it — twice
- Immediately press the accelerator pedal fully to the floor and release it — twice
- Complete both sequences within 10 seconds total
- Turn the ignition fully OFF
- Start the engine normally — the “Perform Service” message should be gone
If it’s still showing, the handshake failed. The most common reasons are pedal timing that’s slightly off, or pedals not returning fully to neutral between presses. Turn everything off, wait a moment, and try again with a steady, deliberate rhythm.
No scanner needed for this reset. You only need a scan tool if a hard check engine light is stored (like P1507 or P04DB) — those fault codes require digital clearing after the mechanical repair.
OEM Replacement vs. CCV Reroute and Delete Kits
This topic generates a lot of heated debate in diesel communities. Here’s the straightforward breakdown.
What Reroutes and Deletes Actually Do
- Reroute kit: Keeps the factory housing on the valve cover but redirects the vent hose to the atmosphere or an external catch-can instead of the turbo inlet
- Full delete kit: Guts the filter internals entirely, often replacing the plastic valve cover top with a machined aluminum bypass plate, and vents all blow-by gases externally
The Mechanical Argument for These Kits
Proponents argue that physically severing the crankcase-to-intake connection prevents oil from ever reaching the turbo, intercooler, or intake manifold. That means no intake sludge, no silicone boot degradation, and no intercooler oil fouling. It’s a legitimate mechanical argument for off-road or competition builds.
The Legal and Practical Reality
Here’s what the enthusiast forums often downplay:
- The factory CCV system is a federally mandated emissions control device regulated under the Clean Air Act
- Venting raw crankcase gases to the atmosphere is a direct federal violation on any street-driven vehicle
- These modifications cause immediate emissions inspection failures in every state with visual checks
- They void your factory powertrain warranty immediately and irrevocably
- The PCM constantly monitors pressure differentials — a delete triggers a permanent P04DB check engine light that only clears with illegal delete tuning software
For any truck driven on public roads — whether it’s your daily driver, a commercial hauler, or a tow rig — the OEM-style replacement filter is the only legally compliant and practically sensible choice.
Frequently Asked Questions
Can I clean and reuse the 6.7 Cummins CCV filter?
No. The coalescing media uses specialized synthetic fibers and chemical resins that can’t survive cleaning solvents or compressed air. Cleaning destroys the internal structure. Once it’s saturated, replace it — full stop.
What happens if I ignore the “Perform Service” light and skip the replacement?
Complete filter saturation builds crankcase pressure until it blows oil past your valve cover gasket, front crankshaft seal, and rear main seal simultaneously. A destroyed rear main seal requires full transmission removal — turning a $40 maintenance item into a potential $2,000+ repair. It also pushes raw oil into your turbo and intercooler, causing expensive collateral damage.
Will replacing a restricted CCV filter improve fuel economy?
Yes, indirectly. A clogged filter creates parasitic pumping losses as the engine fights trapped crankcase pressure. Restoring free airflow removes that internal resistance, recovering fuel economy, improving throttle response, and smoothing out rough idle.
I just replaced my filter and immediately got a P04DB code. What went wrong?
Check two things first: confirm the ventilation hose is fully seated on the housing fitting, and verify the worm-gear clamp is tight. If everything looks secure, oil emulsion from the previously clogged system may have fouled the crankcase pressure sensor during operation. Remove the sensor, clean it with electrical contact cleaner, and reset the PCM’s baseline values with a scanner.
Do newer 2021+ Cummins engines have a maintenance-free CCV system?
No. The 6.7L Cummins in current Ram 2500, 3500, 4500, and 5500 trucks still uses a physical replaceable coalescing filter element. The interval extended to 75,000 miles on newer models, but the filter still needs periodic replacement.
Do I need a dealership scanner to reset the service light?
No. The pedal-sequence reset procedure works without any tools or software. You only need a scan tool if a hard fault code like P1507 or P04DB is stored — those require digital clearing after addressing the underlying mechanical issue.