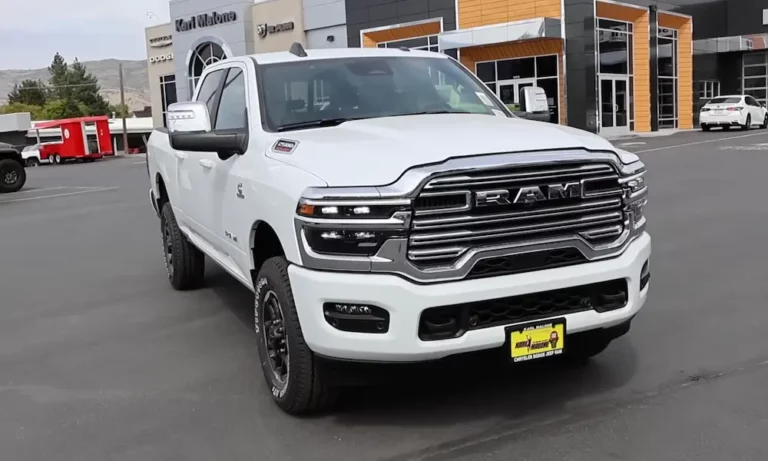
Got a clunking Ram 2500 that’s wandering all over the highway? Or maybe you’re dealing with the dreaded “death wobble” at 65 mph? Worn control arms are likely the culprit. This guide breaks down everything you need to know about Dodge Ram 2500 control arm replacement — from spotting the symptoms to torque specs and real costs. Read to the end before you touch a wrench.
What Do Control Arms Actually Do on a Ram 2500?
Control arms connect your front axle to the frame. They control where the axle sits geometrically as it moves up and down. On a heavy-duty truck like the Ram 2500, that job is enormous.
The Ram 2500 runs a solid front axle. That axle is heavy. When the bushings inside the control arms wear out, the axle starts shifting under load. That shift throws off your caster angle, wrecks your tire wear, and in bad cases, triggers violent front-end oscillation.
This isn’t just a comfort issue. It’s a safety issue.
How the Control Arm Design Changed Over the Years
The Ram 2500 has gone through major suspension redesigns. What works on a 1998 model won’t apply to a 2018. Here’s a quick breakdown:
1994–1999: Four-link front suspension with two upper and two lower stamped-steel control arms. Great for articulation. The short arm length caused the axle to travel in a tight arc, creating caster angle problems as bushings aged.
2003–2013: Heavier tubular and hydroformed arms. Bigger bolts. The 2003–2009 models used a 16mm alignment cam bolt on the axle side of the lower arm. The 2010–2013 models got a larger cam design for better axle stability under load. As the APOC Industries install guide notes, lifting these trucks without longer arms or drop brackets will destroy your caster angle.
2014–Present: Massive front radius arms replaced the four-link setup entirely. A single reinforced arm per side connects to the frame at one pivot and to the axle at two points. At the same time, the rear leaf springs were ditched in favor of a five-link rear coil suspension. This was a complete architectural overhaul.
Radius Arms vs. Four-Link: What’s the Real Difference?
If you’re replacing front control arms on a 2014+ Ram 2500, you’ll face a choice: stick with the radius arm setup or convert to a four-link system. Here’s how they compare:
| Dynamic Metric | Factory Radius Arm (2014+) | Aftermarket 4-Link Conversion |
|---|---|---|
| Caster Angle Stability | Varies through suspension travel | Excellent — limits variance to under 1 degree |
| Off-Road Articulation | Limited by torsional bind | Superior — independent arm pivoting |
| Towing Stability | Excellent — rigid connection limits sway | Very good — depends on bracket rigidity |
| Maintenance Complexity | Low — two arms, fewer pivot points | High — four arms, complex brackets |
| Ground Clearance | High — follows factory routing | Lower — often needs large drop brackets |
According to BDS Suspension’s radius arm vs. 4-link breakdown, the right call depends entirely on how you use your truck. Tow heavy loads daily? Keep the radius arms. Run technical off-road trails? A four-link conversion handles articulation far better.
Warning Signs Your Control Arms Are Failing
Don’t wait until you’re fighting the steering wheel on the freeway. Watch for these symptoms:
Early warning signs:
- Squeaking or groaning over speed bumps
- Slight steering wander on straight roads
- Uneven or cupped tire wear
Late-stage symptoms:
- Loud metal clunking during hard braking or acceleration
- Pulling sharply to one side under braking
- Death wobble — violent front-end oscillation that only stops when you brake hard
That last one is serious. Death wobble on solid-axle trucks happens when worn bushings can’t dampen harmonic resonance in the front axle. Worn control arm bushings are a primary trigger.
How to Diagnose the Problem Before You Buy Parts
Don’t throw parts at it blindly. Here’s how to confirm control arm wear:
- Bounce test: Push down hard on each front corner of the truck. Listen for binding or clunking at the suspension pivots.
- Pry bar test: Lift the truck safely on a heavy-duty hoist. Use a long pry bar between the control arm and the frame bracket. If the arm moves laterally or axially, the bushing is gone.
- Visual check: Look for cracked or shredded rubber bushing material around the pivot points.
A basic suspension system inspection at a shop typically runs $98–$143. That’s money well spent before committing to a full repair.
Tools You’ll Actually Need for This Job
This isn’t a job for a basic socket set. The Ram 2500’s suspension hardware is massive, and seized bolts are extremely common — especially in rust-belt states. Here’s what you need on the bench before you start:
| Tool Category | Specific Requirement | Purpose |
|---|---|---|
| Wrenches | 21mm, 24mm, 1-1/2″, 1-9/16″ | Holding bolt heads, tightening jam nuts |
| Sockets | 18mm, 21mm, 24mm, 27mm (1-1/16″) | Removing pivot bolts and radius arm mounts |
| Breaker Bar | 1/2″ or 3/4″ drive | Breaking factory torque on corroded fasteners |
| Torque Wrench | Capacity up to 300 ft-lbs | Applying correct final torque |
| Reciprocating Saw | With carbide metal-cutting blade | Cutting seized bolts |
| Pry Bar + Ratchet Straps | Heavy-duty | Aligning axle to bolt holes |
| Jack Stands | Minimum 6-ton rated | Supporting the frame safely |
| Hydraulic Floor Jack | Maneuverable unit | Supporting and positioning the axle |
The Southern Truck control arm instructions are worth bookmarking before you start teardown.
The Seized Bolt Problem (and How to Handle It)
Here’s the thing nobody warns you about: on high-mileage Ram 2500s, especially in the Northeast or Midwest, the pivot bolts rust-weld themselves to the inner sleeve of the bushing. You hit it with an impact wrench, the rubber just spins, and the bolt goes nowhere.
Don’t use a torch. The heat will warp your frame brackets and ignite the melting rubber. Instead, use a reciprocating saw with a carbide blade. Slide the blade between the bushing face and the frame bracket wall. Cut through the bolt on both sides. The arm drops free, and you punch out the leftover stubs with a drift pin.
It adds hours to the job. Buy replacement alignment hardware before you start — you’ll likely need it. The Dodge Off Road long arm install documentation covers this scenario in detail.
Step-by-Step: Replacing Front Control Arms (1994–2013 Four-Link)
Here’s the procedure in plain terms:
- Mark the cam positions. Use a soapstone marker to index the factory alignment cams before removing anything. This gives you a safe baseline for driving to the alignment shop afterward.
- Support the vehicle. Lift the frame on 6-ton-rated jack stands. Support the front axle separately on a hydraulic floor jack.
- Lower the axle slightly. Unload the coil springs completely before disconnecting arms.
- Remove one side at a time for like-for-like replacements. If you’re installing longer aftermarket arms, remove both sides simultaneously so the axle can roll forward to the correct caster position.
- Diesel trucks: You may need to loosen the turbocharger downpipe clamp and exhaust hangers to clear the passenger-side upper arm bolts.
- Install new arms. Upper arm first, then lower. Orient grease zerks upward on upper arms and downward on lower arms.
- Snug bolts only. Don’t torque anything yet.
- Lower the truck to ride height. Apply final torque only when the truck’s full weight sits on the tires.
This YouTube walkthrough for 1997–2002 Ram 2500 lower control arms is one of the clearest visual references available.
Replacing Rear Control Arms on 2014+ Models
The five-link rear suspension on newer Ram 2500s adds real complexity. When you lift the rear, the factory arms pull the axle forward, shortening the wheelbase and tilting the pinion downward. A misaligned pinion angle destroys your driveshaft U-joints fast.
You need adjustable aftermarket rear control arms made from DOM steel tubing. These let you dial in proper pinion angle after lifting.
A few things to check before buying:
- Air ride equipped? Your new arms need mounting tabs for the electronic ride-height sensors. Without them, the system faults out and deflates. APOC Industries rear control arms specifically address this.
- Emergency brake cables and ABS wiring mount directly to the factory arm bodies. Quality aftermarket replacements include integrated brackets for these lines.
The Critical Rule: Always Torque at Ride Height
This is the single most common mistake on control arm replacements. Here’s why it matters so much:
Rubber bushings work by twisting internally. The inner sleeve stays clamped in the bracket. When the arm moves, the rubber absorbs it. If you torque the bolts while the axle hangs in the air, the inner sleeve locks into a downward position. When the truck’s weight compresses the springs at ride height, the arm rotates upward — and immediately puts the new bushing under constant tearing stress. A few hundred miles later, it’s shredded.
Always lower the truck fully to the ground before applying final torque. No exceptions.
Torque Specifications by Model Year
These specs matter. Under-torqued bolts allow the bracket holes to wallow out. Over-torqued bolts stretch and break.
| Model Year | Location | Fastener | Torque Spec |
|---|---|---|---|
| 1994–1999 | Upper Control Arm | Frame and Axle Bolts | 110 ft-lbs |
| 1994–1999 | Lower Control Arm | Frame and Axle Bolts | 140 ft-lbs |
| 2003–2009 | Upper Control Arm | Frame and Axle Bolts | 120 ft-lbs |
| 2003–2009 | Lower Control Arm | Frame-Side Pivot Bolt | 170 ft-lbs |
| 2003–2009 | Lower Control Arm | Axle-Side (16mm Cam) | 140 ft-lbs |
| 2010–2013 | Lower Control Arm | Frame-Side Pivot Bolt | 170 ft-lbs |
| 2010–2013 | Lower Control Arm | Axle-Side Cam | 160 ft-lbs |
| 2014–2024 | Radius Arm (Upper) | Axle-Side Upper Bolt | 258 ft-lbs |
| 2014–2024 | Radius Arm (Lower) | Axle-Side Cam | 258 ft-lbs |
| 2014–2024 | Radius Arm (Pivot) | Frame-Side Mount | 258 ft-lbs |
Polyurethane vs. Rubber Bushings: Use the Right Grease
This is a quick one, but it trips people up constantly. If your replacement arms use polyurethane bushings, standard petroleum-based chassis grease will destroy them. The petroleum solvents swell and break down polyurethane on a molecular level.
Use only high-tack silicone grease or non-petroleum synthetic compounds on polyurethane bushings. Apply it generously to the inner sleeve and outer flanges during assembly. This also eliminates the squeak that poorly installed aftermarket bushings are notorious for.
Rubber bushings? They typically need no lubrication at all.
Don’t Forget the Ball Joints
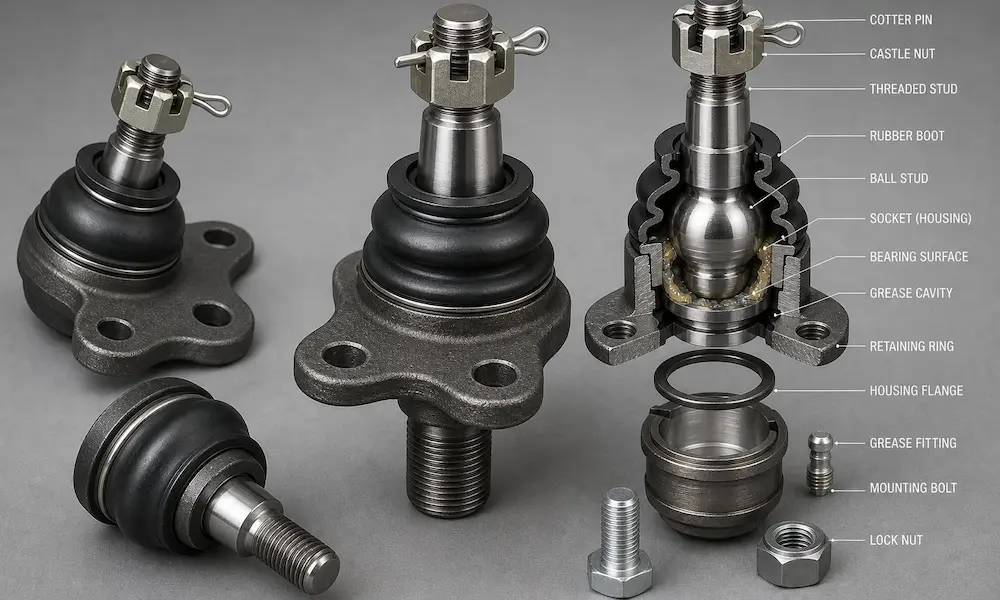
The Ram 2500’s 9.25-inch solid front axle has a well-documented upper ball joint problem. The factory upper ball joints are sealed — no grease zerks. Worse, manufacturing variances in the axle housing casting mean the upper and lower ball joint bores rarely align perfectly. The factory joint compensates by deforming during installation, which causes it to wear out fast.
MOOG’s technical bulletin on upper ball joint failure on Ram trucks explains this in detail and recommends all-metal internal bowl replacements that pivot smoothly without destructive deformation.
When pressing ball joints, never apply press force to the rear backing plate. Press only on the outer housing flange. And torque the lower stud first, then the upper, then re-torque the lower to guarantee full taper lock. Mevotech’s TSB on ball joint installation covers this staggered torque sequence clearly.
Ball joint replacement on the Ram 2500 averages $361–$498. If your control arms need replacing and the ball joints are original, do them at the same time.
Track Bar: The Part Everyone Forgets
The track bar keeps your axle centered side to side. Control arms keep it positioned front to back. If you install longer control arms for a lift and forget the track bar, your axle shifts toward the driver’s side.
Install an adjustable track bar and lengthen it until the axle sits centered. Torque the pinch bolts to 30 ft-lbs in sequence, the axle mount to 285 ft-lbs, and the frame mount to 74 ft-lbs plus 160 degrees of additional rotation.
What Does Dodge Ram 2500 Control Arm Replacement Actually Cost?
Here’s the honest breakdown based on RepairPal’s national estimator data:
| Repair Type | Parts Cost | Labor Cost | Total Range |
|---|---|---|---|
| Complete Control Arm Assembly | $299–$308 | $279–$409 | $578–$717 |
| Bushing Press/Replacement Only | $75–$169 | $317–$465 | $392–$599 |
| Ball Joint Replacement | $80–$86 | $281–$412 | $361–$498 |
| Suspension System Inspection | N/A | $98–$143 | $98–$143 |
Notice something counterintuitive? Replacing just the bushings often costs nearly as much as replacing the whole arm. The hydraulic press work is labor-intensive. Most techs recommend replacing the complete arm assembly — it’s faster, cheaper in total, and guarantees you’re not working with a fatigued steel housing.
High-end adjustable rear control arms for 2014+ models can run $500–$1,100 per set for parts alone, depending on the manufacturer.
You Still Need a Professional Alignment After This Job
Marking the cams before disassembly gives you a baseline — nothing more. New bushings pull the axle into its true position differently than worn ones. New arm dimensions are slightly different even on OE replacements. Laser-guided alignment after every control arm replacement isn’t optional. Skip it and your tires will tell you about it in a few thousand miles.
Frequently Asked Questions
Q: What causes control arm bolts to spin without backing out?
Galvanic corrosion has rust-welded the bolt shank to the inner bushing sleeve. An impact wrench just twists the rubber. The fix is a reciprocating saw with a carbide blade inserted between the bushing face and frame bracket wall — cut both sides of the bolt, drop the arm, punch out the stubs. Have replacement alignment hardware ready before you start.
Q: Do I really need an alignment if I marked the cams before I started?
Yes. The marks give you a safe driving baseline to reach the alignment shop. New bushings and even minor dimensional differences in replacement arms will change your caster, camber, and thrust angle. A laser-guided four-wheel alignment after every control arm replacement is mandatory for safe handling and proper tire wear.
Q: On a lifted 2014+ Ram 2500, should I keep the radius arms or convert to a four-link?
It depends on your primary use. For heavy towing and commercial work, keep the radius arm setup — it resists sway far better. For serious off-road use where you need maximum axle articulation, a four-link conversion provides far better geometry. BDS Suspension’s comparison guide breaks down this decision thoroughly.
Q: What grease do I use on aftermarket control arm bushings?
If the bushings are polyurethane, use silicone-based grease only. Petroleum-based chassis grease chemically degrades polyurethane, causing it to swell and fail. If the bushings are rubber, they typically require no lubrication.
Q: Will aftermarket rear control arms fit my 2014+ Ram 2500 with factory air suspension?
Only if the arms include mounting tabs for the electronic ride-height sensors. Without those tabs, the system faults and deflates. Confirm air-ride compatibility with the manufacturer before purchasing.
Q: Can I replace just the bushings instead of the whole arm?
You can, but it often doesn’t save money. Bushing-only replacement requires press work that drives up labor costs significantly. The total repair estimate for bushing replacement often approaches the cost of a full arm swap. On a high-mileage truck, replacing the complete arm assembly is almost always the better call.
Q: How do I know if my pinion angle is off on a 2014+ Ram 2500 after lifting?
Driveline vibration during acceleration is the clearest sign. If your driveshaft shakes when you get on the throttle, the rear axle has been pulled forward by the factory arms, angling the pinion yoke downward. Adjustable aftermarket rear control arms correct this by repositioning the axle and restoring the proper geometric relationship between the differential yoke and the driveshaft.