Got a check engine light, freezing cold heat, or a temperature gauge acting weird? Your Dodge Caravan thermostat is probably the culprit. This guide walks you through everything — diagnosis, parts, step-by-step replacement, and bleeding the system. Stick around to the end, because the air-bleeding section alone could save your engine.
What Does the Thermostat Actually Do?
Your thermostat is a small, wax-filled valve that controls coolant flow between the engine and radiator. When the engine is cold, it stays closed and lets the engine warm up fast. Once it hits the right temperature (between 195°F and 203°F), it opens and lets hot coolant flow through the radiator to cool down.
No electronics. No computer control. Just physics.
It keeps your engine in a tight, efficient temperature range whether you’re idling in winter traffic or hauling a full load up a highway incline. When it fails, things go wrong fast.
Know Your Engine First
The repair steps differ depending on which engine you have. Here’s a quick breakdown:
| Engine | Model Years | Thermostat Style | Location |
|---|---|---|---|
| 3.6L Pentastar V6 | 2011–2020 | Integrated housing unit | Top-front of engine, easy access |
| 3.3L / 3.8L Pushrod V6 | Pre-2011 | Separate thermostat + housing | Lower intake manifold, partially hidden |
The 3.6L Pentastar is the focus here since it covers most vehicles on the road today. The full replacement walkthrough for 2011–2020 models shows just how accessible this job really is.
How to Tell Your Thermostat Is Failing
Your Caravan won’t always throw obvious signs. Here’s what to watch for depending on which way the thermostat fails.
Stuck Open: The Slow Killer
A stuck-open thermostat is the most common failure on the Dodge Grand Caravan. The valve can’t close, so your engine never fully warms up. The P0128 code — “Coolant Temperature Below Thermostat Regulating Temperature” — is the telltale sign.
Here’s what you’ll notice:
| Symptom | Why It Happens |
|---|---|
| Check engine light | ECM detects engine running too cold too long |
| Remote start disabled | Chrysler/Dodge disables it whenever a check engine code is active |
| Heater blows cold or lukewarm air | Coolant never gets hot enough to warm the heater core |
| Worse fuel economy | ECM keeps injecting extra fuel because it thinks the engine is always cold |
| Temperature gauge stays low | Needle hovers near the bottom instead of settling in the middle |
Stuck Closed: The Emergency
This one’s serious. The valve can’t open, so coolant can’t reach the radiator. Your engine overheats rapidly. The temperature gauge spikes into the red, you’ll hear warning chimes, and coolant may boil over.
Stop driving immediately. Continuing even a few miles with a stuck-closed thermostat can blow the head gasket, warp the cylinder heads, or seize the engine — repairs that cost thousands.
Cracked Housing: The Sneaky Leak
The factory thermostat housing on the 3.6L Pentastar is made of plastic. Over years of heat cycles, it cracks. Coolant leaks out, and air gets sucked in. You’ll see wet stains near the front of the engine, a dropping coolant level, or erratic temperature readings.
Plastic vs. Aluminum Housing: Which Should You Buy?
This is where it gets interesting. The factory plastic housing is an known weak point on the 3.6L Pentastar. It’s the same engine family that’s notorious for the plastic oil filter housing cracking too.
The fix? An upgraded cast aluminum thermostat housing.
Here’s why it’s worth the extra cost:
- Doesn’t crack from thermal cycling
- Flat mating flange holds its shape under bolt torque
- Metal bleeder valve threads won’t strip like plastic ones do
- Lasts the life of the vehicle — it’s essentially a permanent fix
Brands like MITZONE offer aluminum housing assemblies compatible with 2011–2021 Dodge, Jeep, Ram, and Chrysler 3.6L vehicles. The price difference over a plastic OEM replacement is minimal. The reliability difference is huge.
Tools You’ll Need
Don’t start wrenching without these:
- 10mm and 13mm metric sockets with extensions
- Calibrated inch-pound torque wrench (non-negotiable)
- Hose clamp pliers or locking vise-grips
- Flat blade screwdriver and automotive pick set
- Spill-proof coolant funnel kit
- 2-gallon fluid catch pan
- New thermostat assembly (aluminum preferred)
- Correct engine coolant (more on this below)
- Lint-free shop cloths
Coolant Specs: Get This Wrong and You’ll Regret It
This part matters more than most people realize. Dodge changed its coolant formula midway through the Grand Caravan’s production run.
| Model Year | Coolant Spec | Color | Spec Code |
|---|---|---|---|
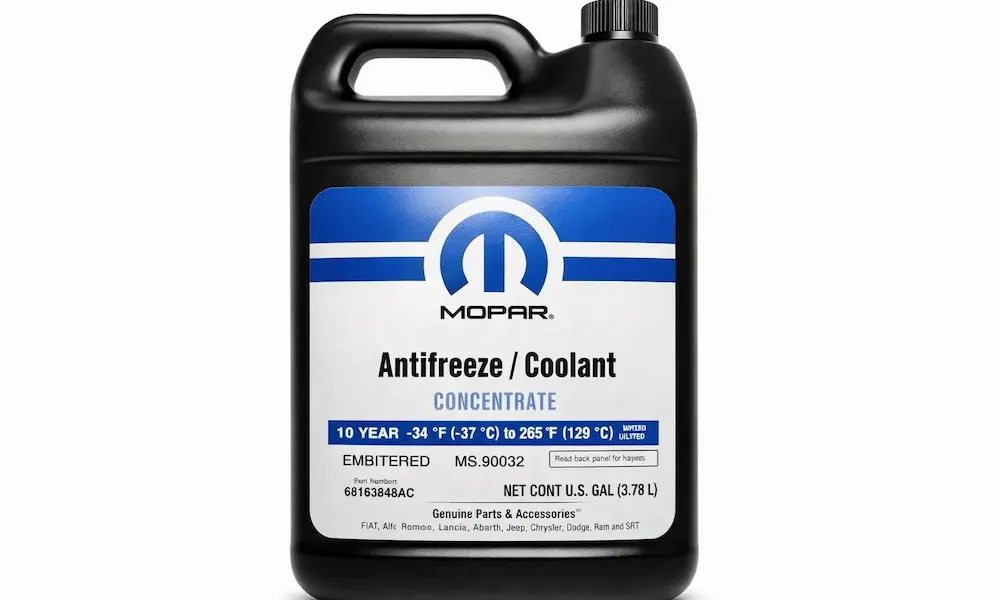
| Pre-2013 | Hybrid Organic Acid Technology (HOAT) | Pink/Orange | Mopar MS-9769 |
| 2013 and newer | Organic Acid Technology (OAT) | Purple | Mopar MS-12106 |
Never mix these two. Mixing HOAT and OAT coolant causes a chemical reaction that forms thick, gelatinous sludge. That sludge clogs your heater core and radiator, leading to overheating and a very expensive repair bill.
Always use the right spec for your year, diluted 50/50 with distilled water only. Tap water introduces minerals that accelerate corrosion inside your aluminum engine block.
Check your VIN or owner’s manual if you’re unsure which spec applies to your specific van.
Step-by-Step: Thermostat Replacement on the 3.6L Pentastar
The cooling system deserves a full service at 100,000 miles. While you’re in there, replacing the thermostat preventatively is smart.
Here’s how to do it:
Step 1: Cool the Engine Completely
Don’t rush this. A hot, pressurized cooling system is dangerous. Let the engine cool to room temperature before touching anything.
Step 2: Drain Coolant Below the Thermostat Housing
Find the drain petcock at the lower passenger-side corner of the radiator. Place your catch pan underneath, remove the radiator cap to vent the system, and drain 1–2 gallons. You don’t need to drain the whole system — just enough so coolant doesn’t pour out when you pull the housing.
Step 3: Remove the Engine Cover and Air Intake
Lift off the plastic acoustic engine cover from its rubber grommets. Loosen the intake hose clamps, unclip the Intake Air Temperature sensor, and pull the entire air intake tube free. This gives you clear access to the thermostat housing.
Step 4: Disconnect the Upper Radiator Hose
Use hose clamp pliers to compress and slide the spring clamp down the hose. The hose often bonds tightly to the plastic housing after years of heat. Use a dull pick or hook tool to break the seal between the rubber and the housing — don’t yank or cut. Twist the hose free and tuck it aside.
Step 5: Remove the Thermostat Housing
Two 10mm bolts hold the housing to the engine block. Remove them with a ratchet and extension. Pull the housing straight off. The old gasket usually comes with it.
Step 6: Clean the Mating Surface
This step is critical. Wipe the aluminum engine block mating surface clean with a lint-free cloth. It should be smooth, flat, and completely free of old gasket material or debris.
Do not use RTV silicone or liquid gasket. The new thermostat comes with an engineered elastomer O-ring gasket. That’s your seal. Adding sealant can actually cause leaks or block internal coolant passages.
Step 7: Install the New Thermostat Housing
Position the new housing against the block. Thread both 10mm bolts in by hand first — aluminum threads strip easily if you start with a ratchet.
Then torque them to exactly 106 inch-pounds (8.8 ft-lbs) with your calibrated torque wrench.
This torque spec isn’t a suggestion. Under-torque it and you’ll have a pressurized coolant leak. Over-torque it and you’ll crack a plastic housing or pull threads from the engine block. Either way, you’re starting over.
Step 8: Reconnect the Radiator Hose
Slide the hose back onto the housing neck. Reposition the spring clamp into its original indentation on the hose — that groove is there for a reason, it ensures even clamping force.
Reinstall the air intake assembly, sensor connectors, and engine cover in reverse order.
How to Bleed the Cooling System (Don’t Skip This)
Air trapped in the cooling system causes hot spots, heater failures, and engine damage. You must bleed the system after every thermostat replacement.
Phase 1: Static Bleed Through the Bleeder Screw
The 3.6L Pentastar has a built-in bleeder screw on top of the thermostat housing. Here’s the process:
- With the engine off, slightly loosen the bleeder screw on the top of the new housing
- Attach a spill-proof coolant funnel to the radiator filler neck
- Slowly pour in your correct, pre-mixed coolant
- Watch the bleeder screw — keep pouring until a steady, bubble-free stream of coolant flows out
- Tighten the bleeder screw firmly
Phase 2: Dynamic Purge with the Engine Running
Static bleeding only gets the bulk of the air out. You need the engine running to clear the deep pockets in the block and heater core.
- Keep the spill-proof funnel attached and half-filled with coolant
- Start the engine
- Set the heat to maximum, fan to maximum — this opens the heater core loop
- Watch the funnel — bubbles will rise and pop as air escapes
- Top up the funnel as the level drops — never let it run dry or you’ll suck air back in
- Watch for the thermostat to open (you’ll see a sudden fluid surge in the funnel)
- Let the engine run until the electric radiator fans cycle on and off twice
Two fan cycles confirm the thermostat opened properly and the system is operating normally. Once that happens, shut the engine off, remove the funnel, top off the radiator to the full line, reinstall the cap, and fill the overflow reservoir to the cold-fill mark.
Check the reservoir level daily for the first week of driving. A small amount of residual air works its way out through normal thermal cycling.
What Does This Repair Actually Cost?
| Repair Option | Parts Cost | Labor Cost | Total Estimate |
|---|---|---|---|
| Professional shop | ~$100–$160 | $193–$283 | $392–$443 |
| DIY with aluminum upgrade | $100–$150 | $0 | ~$100–$150 |
The DIY savings are real — roughly $250 to $300 back in your pocket. The 3.6L Pentastar thermostat is one of the most accessible repairs on this platform. Most people finish it comfortably in under two hours.
Older 3.3L and 3.8L Engines: What’s Different
If your Caravan uses the older 3.3L or 3.8L pushrod V6, the thermostat physics are identical but the job is harder. The housing sits lower on the intake manifold and the ignition coil pack blocks access. You’ll likely need to unbolt and move the coil pack to get your tools in.
The other key difference: the thermostat and housing are separate pieces on these engines. When you install the new thermostat, the spring-loaded end goes down into the engine block, and the jiggle valve points to the 12 o’clock position. Get that wrong and airlocks become a real problem on first startup.
A separate rubber gasket or paper gasket goes between the housing and block on these older engines — no integrated O-ring here.
Frequently Asked Questions
Does the orientation of the jiggle valve matter on older thermostats?
Yes, absolutely. The small metal pin or jiggle valve on older-style thermostats must always sit at the 12 o’clock position. Its job is to let trapped air bypass the closed thermostat during initial filling. If it’s at the bottom, air can’t escape and you’ll have airlock problems before the engine even warms up.
How does a bad radiator cap mimic thermostat symptoms?
The radiator cap is a pressure valve that holds the cooling system at 15–18 PSI. This raised pressure pushes the coolant’s boiling point well above normal. If the cap spring weakens and can’t hold pressure, coolant boils prematurely, pushes into the overflow tank, and causes localized overheating — symptoms that look exactly like a stuck-closed thermostat or a blown head gasket. Always pressure-test the cap before replacing the thermostat.
What does the TIPM have to do with thermostat failure?
The Totally Integrated Power Module controls high-amperage electrical loads including the radiator fans. When the ECM detects a P0128 code or loses confidence in coolant temperature data, it commands the TIPM to run the radiator fans at full speed continuously as a protective default. Replace the thermostat, clear the code, and the TIPM restores normal fan operation automatically.
Can you just remove the thermostat entirely to fix overheating?
No. Running without a thermostat destroys your engine slowly. Coolant flows too fast, the engine never reaches operating temperature, and the ECM constantly commands a rich fuel mixture. That excess unburned fuel washes oil off the cylinder walls, wears the piston rings, and turns your engine oil into acidic sludge. It’s a terrible shortcut that creates a much bigger problem.
What are the rules for disposing of old coolant?
Engine coolant is toxic to people, pets, and wildlife. It’s also illegal to pour down drains or onto soil in the United States. Capture it in sealed containers and take it to a certified automotive fluid recycling center or your local municipal hazardous waste facility. Most auto parts stores will accept it for free.