Is your Ford vehicle showing an EVAP leak code? Does the fuel door not snap back like it used to? You might be dealing with a failing capless fuel filler system. This convenient technology eliminates the traditional gas cap but can develop issues over time. I’ll walk you through everything you need to know about diagnosing and replacing this system yourself, potentially saving you hundreds in mechanic fees.
How to Tell If Your Ford Capless Fuel Filler Needs Replacement
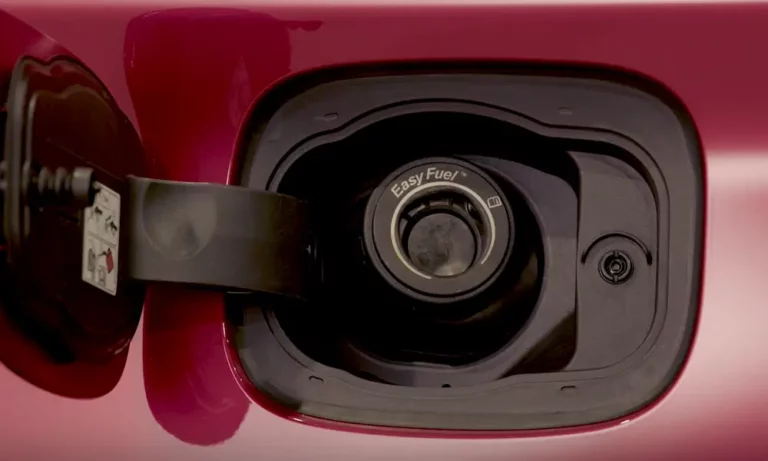
Your Ford’s capless fuel system uses internal flapper valves to create an airtight seal. When these components fail, several telltale signs appear:
- Check engine light illuminated with EVAP codes (commonly P0456)
- Fuel filler flap that doesn’t spring back properly
- Hissing sound from the filler area when the system is pressurized
- Gas odor around your vehicle
- Failed emissions test due to vapor leaks
When the internal mechanism stops creating a proper seal, your vehicle’s computer detects the vapor leak and triggers the check engine light. This isn’t just an annoyance—it’s affecting your vehicle’s emissions system and fuel efficiency.
Try These Quick Fixes Before Replacement
Before investing in a complete replacement, try these cleaning methods to potentially restore function:
- Use compressed air to blow out any debris lodged in the filler neck
- Apply a light penetrating lubricant like WD-40 around the flapper valve
- Insert and remove the emergency funnel (typically found in your trunk) several times to work the lubricant into the mechanism
- Check for visible damage or debris that might be preventing proper closure
These steps often clear minor issues, but if your check engine light persists or the flapper still doesn’t operate correctly, replacement is necessary.
Identifying Your Ford Model’s Specific Filler Neck
Ford uses different capless fuel filler assemblies across their vehicle lineup. Finding the correct part number is essential:
| Vehicle Model | Years | Part Number | Approximate Price |
|---|---|---|---|
| Explorer/Mountaineer | 2008-2010 | AL2Z-9034-B | $140 |
| Edge/Lincoln MKX | Up to 7/2012 | BT4Z-9034-A | $148 |
| F-150 (Crew/Super Cab) | 2012-2020 | CL3Z-9034-C | $130 |
| F-150 3.0L Diesel | 2015+ | JL3Z-9034-K | $128 |
I recommend purchasing genuine Ford parts for this repair. While aftermarket options exist, the precise fit and function of OEM components help ensure the system seals properly. You can find these parts at your local Ford dealership or through Ford Parts Giant.
Tools You’ll Need for the Job
Gather these tools before starting:
- Metric socket set (6mm, 7mm, 8mm, 10mm, 13mm, 19mm)
- Flat-tip screwdriver or trim pick
- Shop light for better visibility
- Safety glasses (fuel vapors can irritate eyes)
- Optional: plastic trim removal tool
- Clean rags
- Penetrating lubricant
Having everything ready will make the job flow much more smoothly. The entire process typically takes 1-2 hours, depending on your experience level and vehicle model.
Step-by-Step Replacement Process
1. Preparing Your Vehicle
Start with safety first:
- Work in a well-ventilated area
- Ensure the engine is off and cool
- Disconnect the negative battery terminal
- Release fuel system pressure by removing the fuel pump fuse and running the engine until it stalls
- Have a fire extinguisher nearby
2. Accessing the Fuel Filler Housing
The first step is getting to the filler neck assembly:
- Open the fuel door
- Look for the plastic filler-door shroud (the decorative piece around the filler)
- Using your trim tool or flat screwdriver, carefully pry out this shroud by releasing the three plastic retaining tabs
- Work slowly to avoid breaking the plastic components
This initial access is crucial as it exposes the mounting bolts for the next step. The process is demonstrated clearly in this video guide.
3. Removing Shields and Mounting Bolts
With the shroud removed:
- Locate and remove the three shroud mounting bolts (typically 7mm or 8mm)
- For F-150 models, check behind the fender well for a 13mm bolt securing the filler neck to the body
- For Explorer and other SUV models, you may need to access the trunk area to find this mounting bolt
- Remove all fasteners and set them aside in a safe place
Take photos as you go to remember the exact placement of components during reassembly.
4. Disconnecting Fuel and EVAP Lines
Now you’ll need to disconnect the hoses attached to the filler neck:
- Locate the main fill hose (the largest one)
- Compress the spring clamp with pliers and slide it back on the hose
- Carefully pull the hose off the filler neck
- Find the EVAP vent line (smaller hose with a quick-disconnect fitting)
- Push in the tab on the quick-disconnect and pull the line free
- Remove any additional breather lines or vacuum hoses by hand
This step requires patience to avoid damaging the connections. The detailed video walkthrough shows the proper technique for these disconnections.
5. Releasing Locking Tabs and Removing the Neck
The filler neck is secured to the vehicle body with plastic locking tabs:
- Position yourself where you can access underneath the filler area
- Use an angled pick or small screwdriver to depress each of the four plastic locking tabs
- While keeping the tabs depressed, gently pull the filler neck assembly away from the body
- Once all tabs are disengaged, the entire assembly should pull free
This can be the trickiest part of the job. Take your time and avoid forcing anything to prevent damage.
6. Installing the New Filler Neck
With the old assembly removed:
- Clean the body opening thoroughly
- Apply a light film of oil to all O-rings on the new filler neck
- Carefully align the new filler neck with the body opening
- Push firmly until you hear all four locking tabs snap into place
- Verify the neck is secure by gently pulling on it
Proper alignment is critical for creating a leak-free seal between the filler neck and your vehicle’s body.
7. Reconnecting Fuel and EVAP Systems
Now reconnect everything in reverse order:
- Reattach the main fuel fill hose and slide the clamp back into position
- Connect the EVAP vent line until you hear it click securely
- Attach any additional breather or vacuum lines
- Double-check all connections are tight and secure
- Reinstall the 13mm body-mounting bolt
Loose connections here can cause future EVAP leaks, so ensure everything is properly seated.
8. Reassembling the Exterior Components
Finally, put everything back together:
- Bolt the plastic shroud back into its original position
- Snap the decorative trim piece back into place
- Close the fuel door and open it several times to test operation
- Test the filler flap by inserting the emergency funnel; it should open and snap closed correctly
9. Testing Your Installation
Before considering the job complete:
- Reconnect the battery
- Clear any EVAP codes with a scan tool
- Take the vehicle for a test drive
- Monitor for any new check engine lights
- Check for fuel odors around the filler area
Labor and Cost Breakdown
Understanding the total investment helps you decide whether to DIY or hire a professional:
DIY Approach:
- Parts: $130-$225 (genuine Ford filler neck)
- Tools: $0-$50 (if you need to purchase specific tools)
- Time: 1-2 hours of your labor
- Total DIY Cost: Approximately $130-$275
Professional Installation:
- Parts: $130-$225
- Labor: $80-$150/hour (typically 1-2 hours)
- Shop supplies and fees: $20-$50
- Total Professional Cost: Approximately $230-$450
As you can see, doing this job yourself can save $100-$200 or more.
Common Mistakes to Avoid
Keep these potential pitfalls in mind:
- Don’t use aftermarket “universal” replacement parts
- Avoid damaging the locking tabs during removal
- Never force components that don’t align properly
- Don’t skip clearing the EVAP codes after replacement
- Don’t confuse cleaning with replacement—if the system is truly failing, cleaning alone won’t fix it
What About Aftermarket Solutions?
Some online forums suggest using aftermarket funnels ($6-$15) as a permanent solution. While these can help with cleaning, they don’t address underlying seal problems. A complete assembly replacement is the only definitive repair for a persistent EVAP leak.
According to user experiences on Ford forums, attempts to partially repair these systems rarely provide lasting results.
When the Replacement Is Complete
After successful installation, you should notice:
- No more check engine light (after clearing codes)
- Proper operation of the filler flap
- No fuel odors
- Improved fuel system pressure
- Successful emissions testing
The new assembly should last for many years with proper care. To extend its life, avoid inserting foreign objects into the filler and keep the area clean.
By following these guidelines and the detailed replacement procedure, you can restore your Ford’s fuel system to proper working order and eliminate those frustrating EVAP leak codes. This repair not only fixes current issues but helps maintain your vehicle’s emissions system integrity and fuel efficiency for the long term.