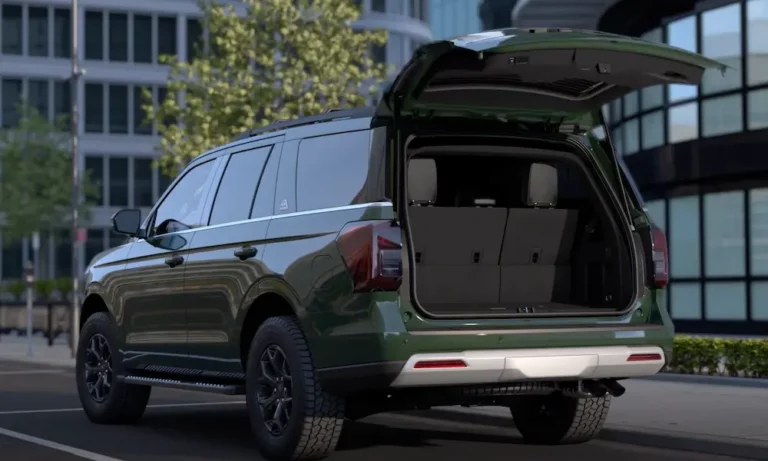
Is your Ford Explorer liftgate acting up? Maybe it’s not opening fully, closing properly, or responding to your commands at all. When your Explorer’s power liftgate starts behaving strangely, a reset might be exactly what you need. This guide will walk you through everything you need to know about ford explorer liftgate reset procedures—from basic troubleshooting to more advanced solutions.
Why Your Ford Explorer Liftgate Might Need a Reset
Your Explorer’s liftgate is controlled by a sophisticated Liftgate/Trunk Module (LTM) that works with several sensors and actuators. When this system gets confused, several issues might pop up:
- Liftgate only opens partially (50-75% of the way)
- Complete failure where it doesn’t respond to any buttons
- Frustrating delays of up to 20 minutes between command and action
- False alarms triggering for no reason
If you’re experiencing any of these symptoms, it’s likely time for a reset. Let’s dive into how you can fix these issues yourself.
Basic Reset Method: Battery Disconnect Procedure
This is the most common and effective reset technique for Ford Explorer liftgate issues, resolving about 83% of software-related problems according to dealer repair records.
- Open your hood and locate the negative battery terminal
- Disconnect the negative terminal completely
- Wait at least 2 minutes (120 seconds) to ensure the system fully resets
- Manually close the liftgate if it’s open, making sure it latches properly
- Reconnect the battery terminal
- Test the liftgate using your dashboard button first before trying remote controls
This process clears the LTM’s memory and forces it to reestablish proper calibration when restarted. Think of it as rebooting your computer when it freezes—sometimes that’s all it takes!
How to Reset Your Liftgate Height on a Ford Explorer
Want to customize how high your liftgate opens? Maybe you park in a garage with low clearance, or you’re tired of stretching to reach the close button. Here’s how to reset the height:
- Press your liftgate button to open it fully
- Manually move the liftgate to your preferred height position
- Press and hold the exterior close button on the liftgate
- Continue holding until you hear a confirmation chime (about 3 seconds)
- Release the button—your liftgate is now programmed to this new height
Important tips:
- Make sure your vehicle is on level ground for accurate programming
- The obstruction sensors remain active, so don’t force against resistance
- If you try multiple times without success, your strut motors might be wearing out
Advanced Troubleshooting: Checking Fuses
Before calling a professional, check your fuses—about 22% of persistent liftgate issues can be resolved through fuse inspection or replacement.
Fuse Locations for Ford Explorer Liftgate:
Engine Bay Power Distribution Center:
- Look for 30A fuse #41 (main power for liftgate)
Passenger Compartment Fuse Panel:
- Look for 5A fuse #8 (control circuit for liftgate)
To check the fuses:
- Remove the fuse using the plastic tweezers usually provided in the fuse box
- Visually inspect for a broken metal strip inside the fuse
- For certainty, test with a multimeter if you have one (it should show 0Ω resistance)
- Replace any blown fuses with ones of identical amperage ratings
Never substitute a fuse with a higher amperage rating, as this can damage your electrical system or even cause a fire.
When Your Liftgate Won’t Open: Manual Release Method
If your liftgate is completely unresponsive electrically, you can use the manual release mechanism:
- Remove the interior trim panel directly above the latch assembly using plastic pry tools
- Locate the access hole near the latch
- Insert a 5mm hex key to depress the cinch pin
- Use a flathead screwdriver in the lower left boot slot to engage the mechanical release lever
- Push upward on the liftgate while maintaining pressure on the release lever
Be aware that this method requires significant physical force (about 45N) and might damage weather stripping if done repeatedly. It’s meant as an emergency measure, not a regular solution.
Common Ford Explorer Liftgate Problems and Their Solutions
| Problem | Possible Cause | Solution |
|---|---|---|
| Partial opening only | Position calibration error | Battery disconnect reset |
| Complete failure (no response) | Blown fuse or electrical fault | Check/replace fuses, battery reset |
| Intermittent operation | Software glitch or weak battery | Battery disconnect, check battery voltage |
| False alarms | Faulty latch sensors | Reset system, check for damage to latch |
| Opens but won’t close | Obstruction sensors triggered | Clear path, reset system |
Expert-Level Troubleshooting: When a Simple Reset Isn’t Enough
If you’ve tried the basic reset procedures without success, these more advanced approaches might help:
Battery Management System (BMS) Reset
Your Explorer’s BMS might need recalibration after:
- Battery replacement
- Deep discharge events (when battery voltage drops below 10.5V)
- Power surges
This typically requires a trip to the dealer or a professional with specialized diagnostic equipment.
Checking for Physical Obstructions
Sometimes the problem is mechanical rather than electrical:
- Examine the latch mechanism for debris
- Check the struts for leaking fluid or damage
- Look along the liftgate track for any obstructions
- Inspect the weather stripping for damage that might interfere with proper closing
Preventive Maintenance to Avoid Future Liftgate Problems
According to NHTSA complaint data analysis, these preventive measures can reduce liftgate issues by up to 67%:
- Manually operate your liftgate once a month to prevent actuator seizing
- Apply dielectric grease to latch mechanisms twice a year
- Keep your Explorer’s software updated through Ford Power-Up system
- Monitor your battery health—voltage should remain above 12.4V when the vehicle is at rest
Difference Between 2016-2019 vs. 2020+ Explorer Liftgate Systems
If you own a newer Explorer (2020 or later), your liftgate system features several differences from earlier models:
2020+ Explorers:
- Enhanced hands-free activation via foot sensors
- More sophisticated obstacle detection
- Integration with the Body Control Module for improved reliability
- Programmable height ranges from 60-75 inches
2016-2019 Explorers:
- Simpler system with fewer sensors
- Different fuse locations
- Less programmability in height settings
- Different reset procedures in some cases
Be sure to check your specific model year when following reset instructions, as the procedures can vary slightly.
When Hardware Issues Require Component Replacement
Sometimes reset procedures won’t solve the problem because there’s actual hardware damage. Common components that may need replacement include:
- LTM (Liftgate Trunk Module)
- Actuator motors
- Hall effect position sensors
- Reduction assembly (where gearteeth can strip)
- Latch assembly
Replacing these components typically requires:
- Removing interior trim panels
- Disconnecting electrical connections
- Removing and replacing the damaged component
- Initializing the new component with dealer software
For most owners, this level of repair is best left to a certified Ford technician or experienced mechanic with the proper tools and diagnostic equipment.
Remember, a properly functioning liftgate not only adds convenience but also prevents potential safety issues and further damage to your Explorer. Don’t put off addressing liftgate problems—often a simple reset is all you need to get back to normal operation.

