You’ve got a check engine light and your scanner is pointing to Bank 2 Sensor 1 on your Ford F150. Don’t worry—this guide will show you exactly where to find it, how to replace it, and why it matters.
What Do “Bank 2” and “Sensor 1” Actually Mean?
Let’s clear up the confusion right away. These terms aren’t random mechanic jargon—they’re specific location markers.
“Bank” refers to which side of the engine we’re talking about:
- Bank 1: The side with cylinder #1 (typically cylinders 1-3-5-7)
- Bank 2: The opposite side (typically cylinders 2-4-6-8)
“Sensor 1” tells you which oxygen sensor in the sequence:
- Sensor 1: The upstream sensor (closest to the engine, before the catalytic converter)
- Sensor 2: The downstream sensor (after the catalytic converter)
Where Is Bank 2 Sensor 1 Located on Ford F150?
On the Ford F150, Bank 2 Sensor 1 is located:
- On the driver’s side of the engine
- In the exhaust manifold or exhaust pipe before the catalytic converter
- It’s the first oxygen sensor you’ll encounter on that side
Here’s a breakdown by common F150 engine types:
| Engine Type | Bank 2 Sensor 1 Location |
|---|---|
| 5.4L V8 | Driver’s side, before catalytic converter |
| 3.5L EcoBoost | Driver’s side, before catalytic converter |
| 2.7L EcoBoost | Driver’s side, before catalytic converter |
Why This Sensor Matters to Your F150
Your Bank 2 Sensor 1 isn’t just another part—it’s critical to how your truck runs. This sensor:
- Measures oxygen levels in your exhaust gases
- Helps your engine computer adjust the fuel mixture
- Improves fuel economy (up to 10-15% when working properly)
- Reduces harmful emissions
- Ensures your F150 passes emissions testing
When this sensor fails, you’ll likely notice:
- Check engine light
- Rough idling
- Decreased fuel economy
- Failed emissions tests
- Possible catalytic converter damage if ignored
Common Error Codes Related to Bank 2 Sensor 1
If your scanner shows these codes, your Bank 2 Sensor 1 might be the culprit:
- P0150: Oxygen Sensor Circuit Malfunction
- P0151: Oxygen Sensor Circuit Low Voltage
- P0153: Oxygen Sensor Circuit Slow Response
- P0154: Oxygen Sensor Circuit No Activity Detected
- P0050: HO2S Heater Control Circuit
These codes might point to the sensor itself—but could also indicate wiring issues or other problems.
Tools You’ll Need for Replacement
Ready to tackle this job? Here’s what you’ll need:
- O2 sensor socket (22mm) or 7/8″ wrench
- Ratchet and extension
- Jack and jack stands (if working from underneath)
- Anti-seize compound (small amount)
- Safety glasses and gloves
- Penetrating oil (for stubborn sensors)
Step-by-Step Replacement Guide
Safety First
- Ensure the engine is completely cool before starting
- Disconnect the negative battery terminal
- Raise and secure the vehicle with jack stands if working from underneath
Locating the Sensor
- Find the exhaust manifold on the driver’s side
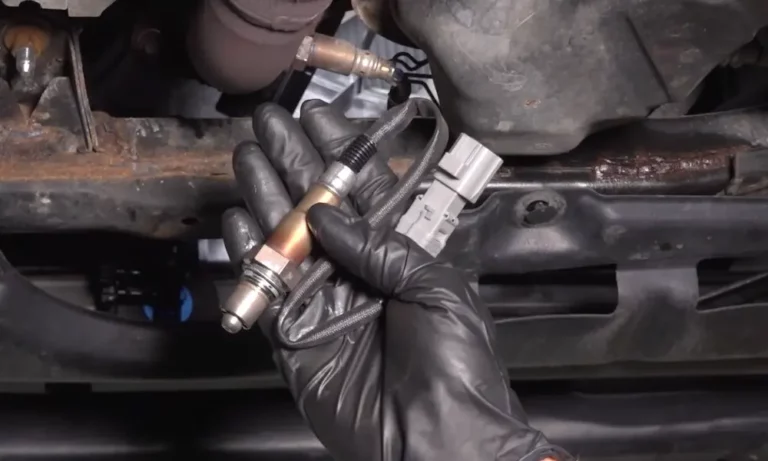
- Look for the first oxygen sensor in the exhaust stream
- You’ll see a wiring harness connected to a threaded sensor
Removing the Old Sensor
- Carefully disconnect the electrical connector by pressing the tab and pulling gently
- Spray penetrating oil on the sensor base if it appears rusty
- Use your O2 sensor socket to loosen the sensor (counterclockwise)
- If it’s stubborn, try more penetrating oil and wait 10 minutes
- Once loose, unscrew the sensor completely
Installing the New Sensor
- Apply a small amount of anti-seize compound to the threads of the new sensor (avoid getting it on the sensor tip)
- Hand-thread the new sensor to prevent cross-threading
- Tighten with your O2 sensor socket to approximately 30-35 ft-lbs (don’t overtighten!)
- Reconnect the electrical connector until it clicks
- Secure any loose wiring with zip ties
Finishing Up
- Lower the vehicle if raised
- Reconnect the battery
- Clear any error codes with your scanner
- Start the engine and check for exhaust leaks
OEM vs. Aftermarket Sensors: Which to Choose?
The sensor choice matters for your F150’s performance:
| Type | Pros | Cons |
|---|---|---|
| OEM (Motorcraft) | Exact match, reliable, longer lifespan | More expensive ($80-150) |
| Aftermarket | Less expensive ($30-80), widely available | Potentially shorter lifespan, may trigger CEL |
For trucks still under warranty or those you plan to keep long-term, OEM sensors are worth the investment.
Diagnose Before You Replace
Before spending money on a new sensor, confirm it’s actually bad:
- Check for exhaust leaks around the sensor
- Look for damaged wiring or connector issues
- Use an OBD2 scanner to view live data from the sensor
- Check if multiple sensors are showing codes (might indicate a fuel system issue)
A properly functioning Bank 2 Sensor 1 should fluctuate between 0.1 and 0.9 volts when the engine is at operating temperature.
Preventive Maintenance Tips
Keep your oxygen sensors working longer:
- Use quality fuel (low-quality fuel leaves more deposits)
- Change your air filter regularly
- Address any exhaust leaks promptly
- Don’t ignore check engine lights
- Consider replacing oxygen sensors preventively around 100,000 miles
Real-World F150 Sensor Issues
Many F150 owners report that Bank 2 Sensor 1 failures often happen between 80,000-120,000 miles. Common symptoms include:
- Rough idle, especially when the engine is cold
- Noticeable fuel economy drop (sometimes 2-3 MPG)
- Intermittent check engine light
- Failed emissions tests
- Hesitation during acceleration
Technical Details for DIY Mechanics
If you’re technically inclined, these details may help:
- Proper sensor ohm readings: 2-4 ohms for the heater circuit at room temperature
- Typical warm-up time: 1-2 minutes before the sensor begins effective operation
- Wire colors: Usually signal wire is gray, heater wires are white and black
- Torque specification: 30-35 ft-lbs (overtightening can damage threads)
The Impact of Oxygen Sensor Failure on Your F150
A failing Bank 2 Sensor 1 doesn’t just affect performance—it hits your wallet too:
- 10-15% reduction in fuel economy
- Potential catalytic converter failure ($1000+ repair)
- Failed emissions testing and registration issues
- Reduced engine performance
- Increased exhaust emissions
Replacing this $50-150 part promptly can save you hundreds in the long run.
A Note on Ford F150 Engine Designs
The F150 has seen various engine configurations over the years, but the Bank 2 Sensor 1 location remains consistent on the driver’s side for most models. This is because Ford maintains a standard cylinder bank numbering convention across most of their V-engine designs.
Remember that “Bank 2” isn’t universally the driver’s side on all vehicles—it’s specifically tied to which cylinder bank contains cylinder #2. For Ford F150s, this happens to be the driver’s side.
With this guide, you should be able to locate, diagnose, and replace your Ford F150’s Bank 2 Sensor 1 with confidence. Taking care of this critical sensor will keep your truck running efficiently and cleanly for miles to come.