Keeping up with your Honda CR-V oil change doesn’t have to be confusing — but use the wrong oil or skip the crush washer, and you’re looking at real engine damage. This guide covers the right oil, the right process, and the right reset steps for every CR-V generation. Stick around — the details in here could save you a costly repair.
What Oil Does Your Honda CR-V Actually Need?
The short answer: it depends on your year. Honda has changed oil specs across six generations, and using the wrong viscosity causes premature wear.
Here’s the quick breakdown:
- 1997–2001 (1st Gen): 5W-30 conventional oil
- 2002–2011 (2nd & 3rd Gen): 5W-20 synthetic blend
- 2012–2016 (4th Gen): 0W-20 full synthetic (5W-20 as a short-term alternative)
- 2017–present (5th & 6th Gen): 0W-20 full synthetic — required, not optional
The turbocharged 1.5-liter engine in 5th and 6th gen CR-Vs runs under extreme heat and pressure. Only full synthetic 0W-20 flows fast enough to protect the turbocharger shaft bearings the moment you start the engine.
Oil Capacity by Generation
Getting the capacity right matters just as much as the viscosity. Overfill by even half a quart and you can cause foaming, seal leaks, or worse.
| Model Years | Engine | Oil Capacity (with filter) | Drain Plug Torque |
|---|---|---|---|
| 1997–2001 | B20Z2 2.0L | 4.0 qts | 33 ft-lbs |
| 2002–2006 | K24A1 2.4L | 4.4 qts | 33 ft-lbs |
| 2007–2011 | K24Z1 2.4L | 4.4 qts | 29 ft-lbs |
| 2012–2014 | K24Z 2.4L | 4.23 qts | 30 ft-lbs |
| 2015–2016 | K24W9 2.4L | 4.6 qts | 30 ft-lbs |
| 2017–2021 | L15B7 1.5T | 3.7 qts | 30 ft-lbs |
| 2020–2022 | LFB2 2.0L Hybrid | 4.0 qts | 30 ft-lbs |
| 2023–2026 | L15BE 1.5T | 3.7 qts | 30 ft-lbs |
| 2023–2026 | 2.0L Hybrid | 4.2–4.6 qts | 30 ft-lbs |
One thing most people miss: about 1.2 quarts of old oil stays trapped inside the engine during a standard drain. It hides in oil passages, cylinder head recesses, and the VVT actuators. That’s normal — don’t chase the dry fill number. Add slightly less than the spec, run the engine, wait three minutes, then check the dipstick.
How Often Should You Change the Oil?
Your CR-V’s Maintenance Minder calculates oil life based on your actual driving habits. Under normal conditions, 5th and 6th gen turbocharged models can go 7,500 to 10,000 miles between changes.
But there’s a catch.
The Cold-Weather Fuel Dilution Problem
If you live in a northern state or do mostly short trips in winter, the 1.5T engine has a known issue: unburnt fuel washes down the cylinder walls and mixes into the oil. This thins the oil and destroys its ability to protect the turbocharger bearings and timing chain.
Honda issued technical service bulletins and updated the engine control software to help. Still, the safest approach in cold climates is to change the oil every 5,000 miles regardless of what the Minder says. It’s cheap insurance compared to a turbo replacement.
The Right Oil Filter for Your Honda CR-V
Every Honda CR-V oil change should include a new filter — no exceptions. The OEM part number is 15400-PLM-A02, a spin-on canister style with an M20 x 1.50 thread pitch.
This filter includes two critical components most people never think about:
Anti-drainback valve: Keeps oil in the filter when the engine is off. This means oil reaches the valvetrain instantly on startup — no dry-contact metal grinding.
Bypass relief valve: If the filter gets clogged, this valve opens and sends unfiltered oil directly to the bearings. It’s a failsafe that keeps the engine alive in emergencies.
Before installing a new filter, wipe the engine block mounting surface clean and check that the old rubber gasket didn’t stick to it. A double gasket will fail under pressure — quickly. Apply a thin film of fresh oil to the new filter’s gasket, thread it on by hand until the gasket contacts the surface, then turn it an additional ¾ to 1 full turn. Don’t use a wrench to tighten it.
The Drain Plug and Crush Washer: Don’t Skip This
The oil pan drain plug is M14 x 1.50 with a 17 mm hex head. Every single oil change requires a new 14 mm aluminum crush washer — part number 94109-14000.
This washer deforms under torque to seal microscopic gaps between the plug and the oil pan. Reusing the old washer — already flattened from the last service — means it can’t seal properly. Technicians then over-tighten to stop the leak, which strips the aluminum threads in the oil pan. An oil pan replacement runs hundreds of dollars. A pack of crush washers costs under $5.
Torque the drain plug to spec (see table above). Don’t guess — use a torque wrench.
Step-by-Step Honda CR-V Oil Change Process
Here’s the full procedure, start to finish:
- Warm up the engine to operating temperature, then shut it off
- Open the oil fill cap to allow smooth drainage
- Remove the splash shield (5th/6th gen): turn the quick-release fasteners 90° counter-clockwise and remove the Phillips screws
- Position a drain pan under the oil pan and remove the drain plug with a 17 mm socket
- Let the oil drain until it slows to a drip
- Clean the drain plug threads and the pan surface with a shop rag
- Install a new crush washer on the drain plug and torque it back in to spec
- Move the drain pan under the oil filter
- Remove the filter with an oil filter wrench — check that the old gasket didn’t stay on the engine block
- Lube the new filter’s gasket with clean oil and thread it on by hand — ¾ to 1 full turn past contact
- Add the correct amount of oil through the fill cap using a funnel
- Start the engine and watch for leaks at the drain plug and filter for 2–3 minutes
- Confirm the oil pressure light turns off immediately
- Shut off the engine, wait 3 minutes, and check the dipstick — fill to the upper mark
The official Honda procedure confirms this sequence for 2024 models, and it applies broadly across all modern CR-V generations.
Understanding the Honda Maintenance Minder Codes
Honda’s Maintenance Minder tracks engine revolutions, thermal cycles, temperatures, and drive duration to calculate actual oil degradation. The display shows remaining oil life as a percentage.
- 15% — Service due soon
- 5% — Service due now
- 0% — Service overdue (negative mileage flashes)
The system also shows alphanumeric service codes alongside the percentage:
| Code | Type | What It Means |
|---|---|---|
| A | Main | Replace engine oil |
| B | Main | Replace oil & filter + full inspection |
| 1 | Sub | Rotate tires |
| 2 | Sub | Replace air & cabin filter, inspect drive belt |
| 3 | Sub | Replace transmission fluid |
| 4 | Sub | Replace spark plugs, check valve clearance |
| 5 | Sub | Replace engine coolant |
| 6 | Sub | Replace rear differential fluid |
| 7 | Sub | Replace brake fluid |
A “B12” on your dash means oil and filter change, tire rotation, new air and cabin filters, drive belt inspection, and a full mechanical inspection. Sub-codes stack onto main codes — handle them all at once.
Code B inspections include measuring brake pad thickness, verifying the parking brake activates within 5–6 clicks, checking suspension ball joints for play, and inspecting steering boots and exhaust heat shields.
How to Reset the Maintenance Light After an Oil Change
1997–2001 (1st Gen)
No electronics here. Insert your ignition key into the small mechanical slot next to the maintenance indicator window on the dash cluster. Push it in to mechanically reset the color wheel back to green.
2002–2006 (2nd Gen)
Turn the ignition to ON (don’t start). Press the trip reset button until Trip B shows. Turn ignition OFF. Hold the trip reset button, turn ignition back to ON, and hold for 10 seconds until the maintenance light stops flashing.
2007–2011 (3rd Gen)
Turn ignition to ON. Press the select/reset knob until “Engine Oil Life” appears. Hold the knob for 10 seconds — the display will flash options. Rotate to select “Oil Life,” press to confirm, hold 5 more seconds until the display resets to 100%.
2012–2016 (4th Gen)
Turn ignition to ON. Press TRIP/RESET until “Oil Life” appears. Hold for 10 seconds until the display blinks. Release, then hold again for 5 seconds. Oil life resets to 100%.
2017–2026 (5th & 6th Gen)
Press the start/stop button twice without touching the brake. On the steering wheel, press Home → Settings → Maintenance Info → Oil Life. Hold the selector for 10 seconds, choose “All Due Items,” confirm.
For the touchscreen: press Home → Settings → Vehicle → Maintenance Info → Select Reset Items → All Due Items → Reset.
After the reset, verify the display shows 100% oil life and all active codes are cleared.
Don’t Forget TPMS After a Tire Rotation
If you rotated your tires (Sub-Code 1), recalibrate the TPMS. Set all four tires to the door jamb spec, then hold the TPMS button on the lower dash until the indicator blinks twice. Drive 10–15 minutes above 30 mph to complete calibration.
Other Fluids to Check at Every Honda CR-V Oil Change
The engine oil gets the attention, but these fluids matter just as much:
- AWD rear differential: Requires Honda Dual Pump Fluid II only. Generic gear oil causes clutch chatter and eventual failure.
- CVT transmission (2015–2016): Uses Honda HCF-2. The drain bolt takes an 18 mm crush washer; the check bolt takes a 20 mm washer — they’re not interchangeable. Both torque to 32 ft-lbs.
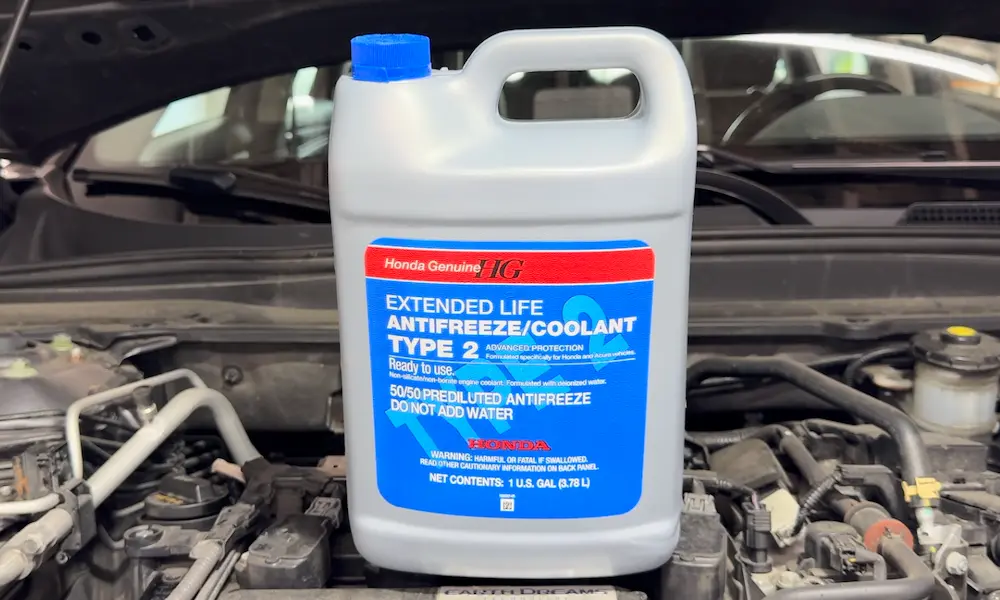
- Hybrid cooling loop (2020–2026): Uses Honda Long Life Type 2 Pre-Mix. This loop cools both the engine and high-voltage electronics. Let the coolant degrade and you risk inverter and battery pack damage.
Staying on top of these fluids during your regular Honda CR-V oil change intervals keeps the whole drivetrain healthy — not just the engine.