Stuck? Confused? You’re probably pressing the wrong thing. Knowing how to remove an Evenflo car seat from its base the right way saves you a serious headache — and protects the safety mechanisms your child depends on. This guide covers every major Evenflo model, plus the stubborn jams nobody warns you about. Keep reading.
Why Getting This Right Actually Matters
According to the NHTSA, car seats and boosters provide the best protection for children in crashes — but only when they’re used correctly. That includes removing and reattaching them properly.
Yanking your seat out the wrong way can:
- Damage the spring-loaded locking clamps inside the shell
- Jam the seat so badly it won’t budge without disassembly
- Create false locks that look secure but aren’t
The good news? Once you know your model’s specific release method, the whole thing takes about five seconds.
Know Your Evenflo Model First
Evenflo uses three completely different release systems depending on the seat type. Using the wrong technique on the wrong seat is why so many parents end up frustrated.
| Seat Type | Examples | Release Method |
|---|---|---|
| Infant carrier | LiteMax, SafeMax, NurtureMax | Rear dorsal lever + vertical lift |
| Rotational convertible | Revolve360, Revolve360 Slim | Arrow alignment + possible release tool |
| Integrated travel system | Shyft DualRide | Two separate handles (frame vs. carrier) |
Check your model before you do anything else.
How to Remove Evenflo Car Seat From Base: Infant Carriers
This applies to the LiteMax, LiteMax NXT, SafeMax, NurtureMax, and similar rear-facing infant carriers. These seats are built for daily on/off use, so the process is fast — once you know the steps.
Step 1: Lock the Handle in the Upright Position
This step trips up a lot of parents. Before you touch the release lever, the carry handle must be rotated fully upright and locked there.
Squeeze both hub buttons on the handle’s inner sides at the same time. Pivot the handle until it clicks into the vertical carry position.
Why does this matter? Evenflo explicitly requires this step before removal. An upright handle keeps your lift centered. If the handle’s angled forward or back, you introduce rotational force when you lift — and that torque binds the locking clamps against the base anchors.
Step 2: Find and Squeeze the Release Lever
The release lever sits on the upper rear of the seat shell — just below the headrest. It’s usually gray or a contrasting color so it’s easy to spot.
As shown in Evenflo’s official SafeMax demo, squeeze this lever upward into the shell and hold it. Don’t pulse it. Don’t tap it. Hold it continuously. This retracts the spring-loaded locking clamps at the bottom of the carrier.
Step 3: Lift Straight Up — Don’t Pull Forward
While squeezing the lever, grab the upright handle with your other hand and lift the seat straight up. Vertical only.
If you pull toward the car door or twist sideways, the anchor bars catch the clamp edges and the seat binds. Straight up clears everything cleanly.
Once the seat clears the base, release the lever.
Step 4: Test Your Reattachment Every Single Time
When you put the seat back, press down firmly until you hear a distinct click. Then pull up hard on the carry handle — without touching the lever — to confirm it’s locked.
If it lifts even slightly, it’s a false lock. Push it down again and repeat until that click is solid. A false lock is one of the main reasons parents report difficulty removing infant carriers later — one side locks, one doesn’t, and then nothing works as it should.
| Step | What You Do | What It Does |
|---|---|---|
| 1 – Handle up | Squeeze hub buttons, pivot vertical | Centers lift, prevents rotational binding |
| 2 – Squeeze lever | Press gray rear lever upward, hold | Retracts locking clamps from base anchors |
| 3 – Lift vertically | Pull straight up using handle | Clears base without catching anchor bars |
| 4 – Confirm lock | Pull handle up without lever | Verifies full engagement, no false lock |
How to Remove Evenflo Revolve360 From Base
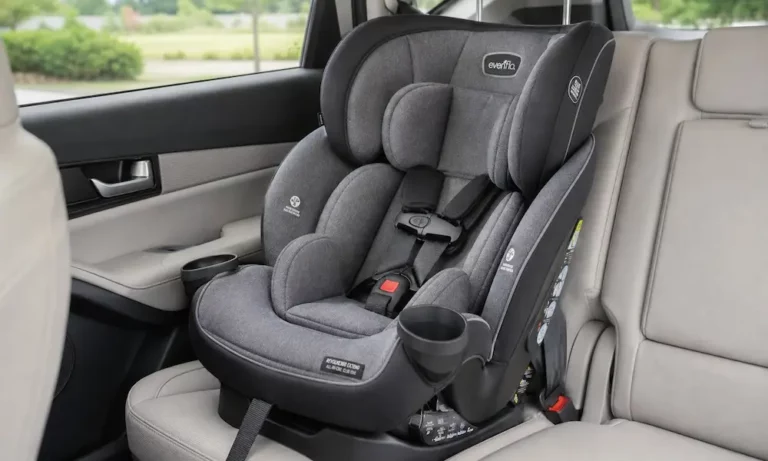
The Revolve360, Revolve360 Slim, and Revolve360 Extend work very differently from infant carriers. These seats aren’t designed for daily removal — the shell stays on the base for the life of the seat in that vehicle. You’d only remove it to move the seat to a new car or for deep cleaning.
There are two release methods, and which one you have changes everything.
Method 1: Arrow Alignment Only (Older Models)
Some earlier Revolve360 versions don’t need a tool. Here’s the sequence:
- Lift one of the gray rotation handles on the side of the seat to unlock the bearing
- Rotate the seat until the arrow on the seat front lines up exactly with the arrow on the base
- Lift the shell straight up
This non-key version is demonstrated clearly in this video. When the arrows align, the locking tabs line up with exit slots in the track — no tool needed.
Method 2: Release Tool Required (Updated Models)
Many Revolve360 Slim models and newer versions added a secondary lock. Evenflo’s official release tool demo walks through this step by step.
Here’s what you do:
- Recline the seat to its most reclined position
- Squeeze the rotation handle and spin the seat until the arrows align
- Locate the horizontal slot on the front center of the base
- Insert the plastic release tool (packed with the seat’s quick-start guide, stored in the back pocket) fully into the slot until you hear a soft thunk
- Lift the seat off using the harness straps for grip
No tool? A standard vehicle seat belt buckle tongue fits the slot perfectly and works as an emergency substitute. Reddit parents have confirmed this workaround repeatedly.
Don’t force the seat up without inserting the tool first. You’ll damage the rotational track permanently.
Fix: Seat Won’t Rotate at All
If the seat won’t spin, the backrest is probably too upright. Push the seat into a severely reclined position — really lean on it. This fix works every time. Reclining opens the clearance in the bearing track and frees the mechanism instantly.
How to Remove Evenflo Shyft DualRide From Base
The Shyft DualRide is a car seat and stroller in one — so it has two separate release handles for two different situations. Evenflo’s official Shyft demo shows both clearly.
Remove Everything (Stroller Mode)
Squeeze the lower handle on the stroller frame — not the upper handle on the carrier. This releases the frame from the base. As you lift, the wheels drop down automatically and lock into stroller position.
Use this when you’re heading somewhere on foot and want the full stroller setup.
Remove Just the Carrier (Leave Frame in Car)
The carrier alone weighs about 8 pounds. The full system with the frame is around 19 pounds. Big difference on stairs or in small spaces.
To carry just the infant seat:
- Confirm the stroller frame is locked into the base
- Squeeze the upper handle on the carrier shell only
- Lift the carrier straight out — the frame and wheels stay in the base
One important note: this separation only works when the frame is engaged with the base. You can’t separate carrier from frame when the stroller is deployed outside the car. Forcing it damages the alignment rails.
How to Remove the Base From the Vehicle
Sometimes you need to remove the entire base from the car — not just the seat from the base. This is where most of the serious jams happen, and it’s almost always a tension problem, not a broken part.
Removing a Base Installed With Lower Anchors
The lower anchor straps are designed to be extremely tight. The connector buttons physically cannot press if the strap is under tension. Trying to force them just causes finger pain and confusion.
Do this instead:
- Find the adjuster button on the anchor webbing
- Press it while pushing the entire base hard toward the vehicle seatback
- This compresses the cushion and creates slack in the strap
- Pull the slack webbing through the adjuster
- Now press the connector release buttons — they’ll move freely
- Unhook both connectors and wiggle straight out (not at an angle)
Removing a Base Installed With a Seat Belt
Seat belt installations use an Automatic Locking Retractor (ALR) — a one-way ratchet that locks the belt tight during install. You need to deal with the lock-off arm before you unbuckle anything.
Here’s the correct order:
- Push down hard on the lock-off arm to compress the seat beneath it
- While holding that downward pressure, actuate the gray lock-off release lever
- Swing the arm fully open
- Only now press the red seat belt buckle button to release it
- Let the belt retract slowly to reset the ALR
Critical warning: If you unbuckle the belt before opening the lock-off arm, the retractor yanks the belt up while it’s still clamped inside the locked arm. The base gets violently pulled sideways and becomes nearly impossible to remove without disassembling the base housing itself. This is not a recoverable situation through normal means.
Removing the Top Tether
For forward-facing installations, there’s also a top tether connecting the back of the base to a vehicle anchor point.
Don’t pull on the hook while the strap is tight — it won’t release. Press the gray adjuster button and pull slack into the strap first, then push the metal spring gate inward to unhook it. Store the tether hardware immediately in its storage compartment under the base — loose metal hooks become dangerous projectiles during hard stops.
| Installation Type | Why It Gets Stuck | How to Fix It |
|---|---|---|
| Lower anchors | Strap too tight to press buttons | Push base into seatback to create slack first |
| Seat belt + lock-off | Compressed cushion jams the arm | Press down on arm, then actuate lever |
| Seat belt ALR | Belt retracted while arm still locked | MUST open arm before unbuckling — no exceptions |
| Top tether | Webbing too taut to unhook | Press adjuster, create slack, then push spring gate |
Keep the Mechanisms Clean (The Right Way)
Crumbs and debris in the base tracks cause jams over time. Clean them out regularly with a hand vacuum or crevice tool — especially in the Revolve360’s rotational track.
Never spray lubricant on any locking mechanism. Evenflo explicitly prohibits this, and for good reason — lubricants degrade plastic, attract grit, and can reduce the friction the locking sears need to hold during a crash.
For cleaning the hardware, use a soft cloth with mild soap and warm water only. For disinfecting, Evenflo permits 70% isopropyl alcohol applied lightly — not soaked — to plastic and metal surfaces. Let it air dry completely before reinstalling the seat.
Fabric covers and padding can usually go in a cold, delicate machine wash cycle followed by a low-heat tumble dry for 10–15 minutes. With the padding off, that’s your best chance to vacuum out all the hidden debris in the base tracks before it causes problems later.