That little TPMS warning light is annoying — but ignoring it is worse. This guide walks you through exactly how to replace a tire pressure sensor, from pulling the wheel to completing the relearn. Stick around to the end, because skipping the final digital step is where most DIYers go wrong.
What Does a Tire Pressure Sensor Actually Do?
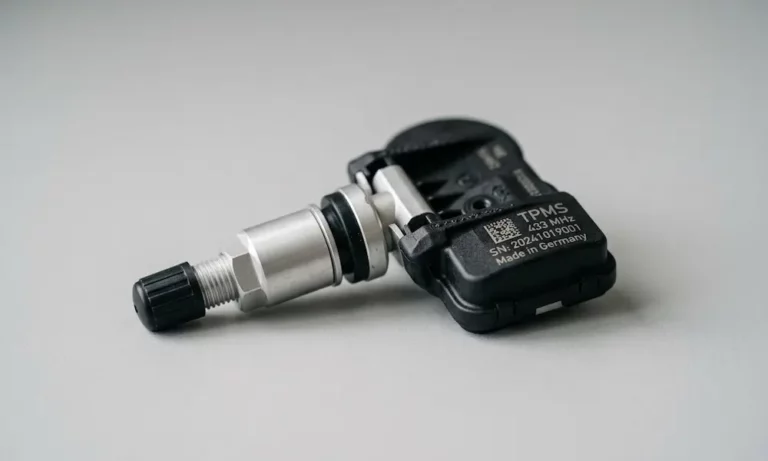
Your tire pressure sensor sits inside the wheel, mounted to the valve stem. It measures pressure every 30 seconds while the car’s parked, and transmits instantly if pressure drops suddenly while you’re driving. Each sensor contains a pressure transducer, temperature sensor, microcontroller, radio frequency transmitter, and a battery — all sealed in a compact housing.
This level of responsiveness is why TPMS is considered a core active safety component — not just a dashboard nuisance.
Snap-In vs. Clamp-In: Know Your Sensor Type First
Before you buy a replacement, you need to know which style you have. Getting this wrong wastes money and time.
| Feature | Snap-In Sensors | Clamp-In Sensors |
|---|---|---|
| Material | Flexible rubber | Metal (aluminum or brass) |
| Mounting | Pulled through valve hole | Secured with a hex nut |
| Max Pressure | Up to 65 PSI | Exceeds 65 PSI |
| Best For | Standard passenger cars | European/performance vehicles |
| Repair Style | Replace the whole unit | Rebuild kits often available |
Snap-in sensors use a rubber stem that snaps through the rim’s valve hole. Clamp-in sensors use a rigid metal stem with a hex nut and rubber grommet. North American vehicles mostly use snap-in. European and Asian imports lean toward clamp-in.
Tools You Need Before You Start
Don’t pull a wheel apart only to realize you’re missing something critical. Here’s the full list:
| Tool | Why You Need It |
|---|---|
| Jack and jack stands | Safe vehicle elevation |
| Lug wrench or impact driver | Wheel removal |
| Valve core removal tool | Full tire deflation |
| Bead breaker or tire machine | Separating tire from rim |
| Inch-pound torque wrench | Precision fastener tightening |
| TPMS activation/scan tool | Programming and relearn |
| Soapy water (2% solution) | Leak detection after install |
The torque wrench isn’t optional. Over-tightening can crack the sensor housing. Under-tightening causes slow leaks. Neither outcome is good.
Step-by-Step: How to Replace a Tire Pressure Sensor
Step 1 – Remove the Wheel Safely
Park on a flat surface. Engage the parking brake. Place wheel chocks on the opposite wheels. Lift the vehicle with your jack and lower it onto jack stands before touching anything else.
Remove the lug nuts and pull the wheel off.
Step 2 – Fully Deflate the Tire
Remove the valve cap. Use your valve core tool to unscrew the internal core. Wait until the rushing air sound completely stops. Don’t rush this step — attempting bead separation on a pressurized tire can cause violent displacement and serious injury.
Step 3 – Break the Tire Bead
The bead is the steel wire-reinforced loop that holds the tire onto the rim. Breaking it loose is the most physically demanding part of the job.
A tire machine handles this easily with hydraulic or pneumatic force. At home, a tool like the BeadBuster lets you apply controlled mechanical pressure without damaging the rim. Position the tool squarely on the rim flange — not on the rim face itself.
Good news: you don’t need to fully unmount the tire. Breaking the bead just near the valve stem creates enough of a gap to reach the sensor.
Step 4 – Remove the Old Sensor
With the bead pushed down, the sensor is visible at the valve stem base.
- Clamp-in sensor: Use a socket to remove the exterior hex nut, then pull the stem through.
- Snap-in sensor: Use a valve stem puller or carefully cut the rubber stem.
Once it’s out, inspect the rim’s valve hole. Clean away any corrosion, old rubber, or debris. Galvanic corrosion — caused by dissimilar metals reacting — is common, especially on aluminum stems in steel wheels. Clean it up thoroughly or the new sensor’s seal won’t seat properly.
Step 5 – Install the New Sensor
Align the new sensor so its body rests flush against the rim’s interior drop center. If it sticks out, the tire bead will strike it during inflation.
Here are the torque specs you must hit:
| Component | Torque Range | Unit |
|---|---|---|
| Clamp-in hex nut | 35–80 | Inch-pounds |
| Snap-in mounting screw | 11.5 | Inch-pounds |
| Valve core | 2–4 | Inch-pounds |
| Wheel lug nuts | 80–100+ | Foot-pounds |
For clamp-in sensors: Slide the new rubber grommet and washer onto the stem from the exterior, then thread the hex nut by hand first to avoid cross-threading. Torque to spec.
For snap-in sensors: Apply tire soap to the rubber stem. Pull it straight through the valve hole with a stem puller. Any angular force can tear the rubber.
Step 6 – Remount and Seat the Bead
Push the tire back onto the rim and inflate it. The bead needs a high, quick air volume to seat — you’ll hear a pop when it locks into place.
If you don’t have a tire machine with a bead-seating jet, try this: wrap a heavy-duty ratchet strap around the center of the tire tread and tighten it. This compresses the tread and pushes the sidewalls outward toward the rim flanges, helping create the initial seal for inflation. Keep your hands away from the gap between tire and rim during this process — bead seating force can cause severe injuries.
After inflation, check that the tire’s concentricity mounting ring is flush and visible all the way around both sides of the rim. That confirms the tire is properly centered.
The Relearn: Don’t Skip This Step
Installing the sensor physically is only half the job. Your car’s computer doesn’t automatically recognize the new sensor’s unique ID. You need to complete a TPMS relearn procedure.
There are three main methods:
| Relearn Type | How It Works | Common Brands |
|---|---|---|
| Auto Relearn | Drive 10–20 minutes; system detects new sensor | Chrysler, Jeep, many European brands |
| Stationary Relearn | Use dash buttons or key fob to enter learn mode | Ford, GM, Nissan |
| OBD-II Relearn | Scan tool writes sensor ID directly to the computer | Toyota, Honda, Nissan, most Asian imports |
GM vehicles: Set the parking brake. Turn the ignition to the run position. Enter learn mode via the Driver Information Center or by holding the lock and unlock buttons on your key fob until the horn chirps. Then use a TPMS activation tool on each tire in a clockwise pattern starting from the front left.
Ford vehicles: Ford uses an ignition-based sequence involving the brake pedal and multiple ignition cycles.
Toyota and Lexus: These vehicles often have a Main/2nd switch for two sensor sets (summer/winter). Hitting the reset button won’t register a new sensor ID — you need an OBD-II scan tool to write the new ID to the ECU.
Honda: Many Honda models use an indirect system or require driving at 30–60 mph for calibration.
Pro tip: do your stationary relearn in an open parking lot, away from the shop floor. Other electronic devices can interfere with the radio frequency handshake between the tool and the vehicle. If a sensor won’t initialize, push the vehicle forward a foot or two — brake rotors and calipers can sometimes block the signal.
Check for Leaks After Installation
Don’t skip this. Mix a 2% soap solution and spray it around the valve stem base and into the valve opening.
| What You See | Likely Cause | Fix |
|---|---|---|
| Bubbles at stem base | Damaged grommet or under-torqued nut | Re-clean rim hole, re-torque to spec |
| Bubbles from valve opening | Loose or faulty valve core | Tighten or replace the valve core |
| Bubbles at tire bead | Debris between bead and rim | Clean rim flange and reseat the bead |
| Slow loss, no bubbles | Tread puncture or internal damage | Inspect tread for foreign objects |
After the soap test passes, use your scan tool to confirm the sensor is actively transmitting accurate pressure data. This verifies the battery is working and the radio signal is reaching the receiver.
How Long Do TPMS Sensors Last?
Sensors typically last 5 to 10 years. The battery is sealed inside potting compound — you can’t replace it alone. When the battery dies, the whole sensor goes.
To extend sensor life:
- Avoid tire sealants unless the label specifically says they’re TPMS-safe. Chemical sealants can clog the pressure transducer.
- Use plastic valve caps with rubber seals, not metal ones. Metal caps cause galvanic corrosion, which can make caps impossible to remove without snapping the stem.
- Replace the service kit (grommet and valve core) every time a tire comes off the rim. Fresh seals prevent slow leaks.
- Inspect sensors at every tire rotation. If corrosion is visible or the battery is nearing end of life, replace the sensor proactively.
Sensors are also affected by every tire rotation and replacement. Treating each service as a sensor inspection keeps you ahead of failures instead of reacting to them.
What If the TPMS Light Stays On After Replacement?
If the warning light won’t go off after a completed relearn, run through this checklist:
- Did you complete the correct relearn method for your specific make and model?
- Is the scan tool updated with current sensor protocols?
- Did you check for RF interference from nearby electronics?
- Is the sensor ID correctly written to the ECU (especially on Toyota/Honda)?
- Is there a second sensor on another wheel that’s also failing?
A scan tool reading should show a live pressure value from each sensor. If one reads zero or shows an error code, that’s your culprit.
Knowing how to replace a tire pressure sensor correctly means your car’s safety systems stay accurate and reliable — and that annoying dashboard light stays off for good.