Your Elantra’s temperature gauge is creeping up, the heater blows cold air, or you’ve got a P0128 code staring you down. A failing thermostat is likely the culprit. This guide walks you through everything — diagnosis, tools, step-by-step replacement, and bleeding the system — so you can tackle this repair with confidence and keep your wallet happy.
What Does the Thermostat Actually Do?
Think of the thermostat as a traffic cop for your coolant. When the engine’s cold, it stays closed and traps heat inside the block so the engine warms up fast. Once temperatures hit the target range — between 180°F and 217°F depending on your model year — it opens and sends hot coolant to the radiator to cool down.
Get this cycle wrong and you’re either driving a cold, inefficient engine or heading toward a very expensive overheating bill.
Signs Your Hyundai Elantra Thermostat Is Failing
Don’t wait for smoke. Your Elantra gives you warning signs early.
Watch for these red flags:
- Temperature gauge takes forever to reach the middle (stuck open)
- Temperature gauge shoots into the red zone fast (stuck closed)
- Heater blows cold air even after the engine warms up
- Poor fuel economy with no other explanation
- Gurgling or bubbling sounds from under the hood
- Dashboard warning light or check engine light on
The most common code you’ll see is P0128, which means the engine control module detected that your engine isn’t reaching its target temperature within the expected window.
Here’s a quick breakdown of what each symptom means:
| Diagnostic Sign | Probable Failure Mode | System Impact |
|---|---|---|
| Code P0128 | Stuck Open | Slow warm-up, cold heater, lower fuel efficiency |
| Code P0115 | Sensor/Circuit Error | ECU loses communication with temp sensor |
| Gurgling Noises | Air in the System | Air pockets in heater core or radiator |
| Rapid Temp Spike | Stuck Closed | Immediate risk of engine damage |
| Fluctuating Gauge | Air Pockets or Failing Thermostat | Irregular coolant flow or bad sensor reading |
A stuck-open thermostat won’t destroy your engine overnight. A stuck-closed one can warp your cylinder head in minutes. Don’t ignore the gauge.
How the Elantra’s Thermostat Changed Across Generations
Here’s the thing — a 2012 Elantra and a 2022 Elantra are very different beasts under the hood. Knowing your generation saves you time and avoids costly mistakes.
2011–2016 Elantra (Nu Engine, 1.8L / 2.0L)
This is the most DIY-friendly generation. The thermostat sits where the lower radiator hose meets the engine block — an “inlet-side” design. You’ll need to remove the air intake box to get clear access, but the housing only uses two bolts.
Pay close attention to the jiggle valve — a small brass pin on the thermostat flange. It must point straight up during installation. This tiny pin lets air escape when you bleed the system. Get it wrong and you’ll be fighting air pockets for days.
2017–2020 Elantra (2.0L MPI)
Hyundai squeezed the engine bay tighter on this generation, moving the thermostat underneath the alternator. It’s more of a reach, but it’s doable.
Important: Hyundai issued Technical Service Bulletin TSB 16-01-034-2 specifically for this generation because the factory thermostats were prone to sticking open. This TSB also sets higher torque specs than the older models — up to 24 Nm (about 18 ft-lbs). Don’t skip this detail.
This generation also uses an integrated housing that combines the thermostat and the coolant temperature sensor. Disconnect the electrical harness before you pull the housing off.
2021–2024 Elantra (Smartstream + Hybrid)
This is where things get complex. The newer Elantras use a Coolant Control Valve or Integrated Thermal Management Module instead of a simple mechanical thermostat. It uses an electric motor or multi-way valve to direct coolant to the radiator, heater core, oil cooler, and — on hybrid models — the high-voltage inverter loop.
The 1.6L Hybrid has a completely separate cooling loop for the inverter. An air pocket in that loop can shut down the hybrid system to protect the electronics. This job is best left to a shop with the right diagnostic tools unless you’re very confident.
| Model Era | Engine | Thermostat Location | Key Detail |
|---|---|---|---|
| 2011–2016 | 1.8L / 2.0L Nu | Lower Hose Junction | Jiggle valve must face upward |
| 2017–2020 | 2.0L MPI | Under Alternator | Follow TSB 16-01-034-2 torque specs |
| 2021–2024 | 2.0L Smartstream | Control Valve Module | Electronic integration with ECU |
| 2021–2024 | 1.6L Hybrid | Integrated Module | Dual cooling loops; complex bleeding |
Tools and Supplies You’ll Need
Don’t start this job without the right gear. Here’s your complete checklist:
Tools:
- 3/8-inch drive ratchet with 10mm, 12mm, and 13mm sockets
- 3-inch and 6-inch socket extensions
- Constant-tension hose clamp pliers (don’t skip these — standard pliers can damage the spring clamps Hyundai uses)
- Torque wrench
- Flathead screwdriver
- Plastic scraper for gasket removal
- 90-degree pick tool (2017–2020 models)
Supplies:
- New thermostat and gasket or O-ring (never reuse the old seal)
- Hyundai-spec P-OAT coolant — typically pink or blue
- Distilled water (50/50 mix if using concentrated coolant — tap water causes scale buildup)
- Drain pan with at least 10-quart capacity
- Shop rags
- Spill-free coolant funnel kit (highly recommended)
- Nitrile gloves and safety glasses
Hyundai Elantra Thermostat Replacement: Step-by-Step
Step 1: Cool the Engine Completely
This is non-negotiable. A hot cooling system holds pressure that can exceed 15 PSI. Opening it while hot sends scalding coolant and steam straight at your face. Wait until the engine is stone cold — ideally overnight.
Once it’s cold, slowly turn the radiator or expansion tank cap counterclockwise to release any remaining pressure before removing it fully.
Step 2: Drain Enough Coolant
You don’t need to drain the whole system. Position your drain pan under the radiator and open the petcock or remove the lower radiator hose to drain about one gallon. That’s enough to drop the level below the thermostat housing.
Step 3: Access the Thermostat Housing
For 2011–2016 models, remove the plastic air intake duct and airbox to get clear tool access.
For 2017–2020 models, you’ll also need to raise the vehicle and pull the lower splash shield to reach the drain plug and the housing from below.
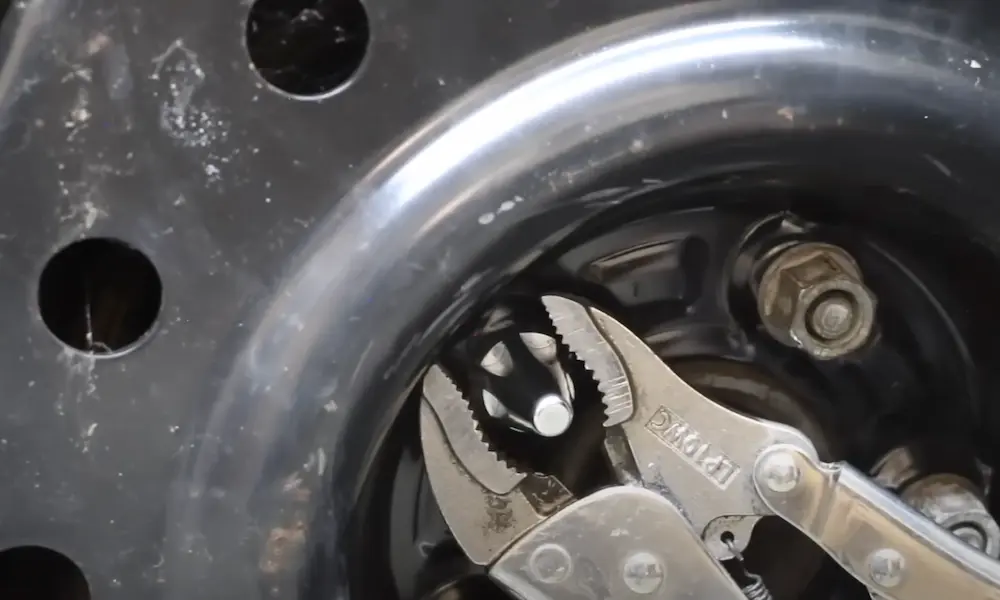
Move the hose clamp back using your hose clamp pliers. Then twist the radiator hose gently to break the seal — don’t yank it. Pulling too hard tears the internal reinforcement fibers inside the hose.
Step 4: Remove the Old Thermostat
Remove the housing bolts with your ratchet. Keep shop rags ready because residual coolant will drip when the housing pulls away — and you don’t want that on the alternator. Remove the old thermostat and gasket and toss them both.
Clean the mating surfaces thoroughly. Use a plastic scraper to remove every trace of old gasket material. The surface must be perfectly smooth or the new gasket will leak.
Step 5: Install the New Thermostat
Place the new thermostat in the seat with the spring side facing the engine. For models with a jiggle valve, that valve must sit at the highest point on the flange — straight up.
Install the new gasket or O-ring. Start the housing bolts by hand first to avoid cross-threading, then torque them to spec with your torque wrench.
Here are the correct torque values by generation:
| Model Year Range | Engine | Torque (Nm) | Torque (Ft-lbs) |
|---|---|---|---|
| 2011–2016 | 1.8L / 2.0L Nu | 10 Nm | 7.4–8.9 ft-lbs |
| 2011–2019 | 2.0L Nu | 9.8–11.8 Nm | 7.2–8.7 ft-lbs |
| 2017–2020 | 2.0L MPI | 20–24 Nm | 15–18 ft-lbs |
| 2021–2024 | 2.0L Smartstream | 10.8 Nm | 8.0 ft-lbs |
Overtightening cracks the housing — especially on plastic units. Follow the numbers.
How to Bleed the Cooling System After Hyundai Elantra Thermostat Replacement
This step is where a lot of DIYers drop the ball. Air trapped in the system can cause a “dry” overheat where the engine gets dangerously hot while the thermostat stays closed because it’s measuring air temperature instead of coolant temperature.
Here’s the full bleeding procedure:
- Attach a spill-free funnel kit to the radiator neck and fill it with the correct P-OAT coolant
- Start the engine and set the cabin heater to maximum heat, fan on low
- Watch the funnel — air bubbles will rise and “burp” out as the system circulates
- Gently squeeze the upper radiator hose periodically to help move trapped air toward the radiator
- Continue until the engine reaches operating temperature and the thermostat opens — you’ll see the coolant level in the funnel drop suddenly as the radiator enters the loop
- Run the engine until the electric cooling fans cycle at least once — this confirms the whole system is working
- Shut it off, let it cool, then top off the coolant in both the radiator and the expansion tank
If you hear gurgling after the repair, you still have air in the system. Run the bleed procedure again.
DIY vs. Professional Cost Breakdown
Here’s what a Hyundai Elantra thermostat replacement actually costs:
| Component / Service | DIY Cost | Professional Cost |
|---|---|---|
| Thermostat (Aftermarket) | $10–$67 | $20–$80 |
| Thermostat (Genuine OEM) | $25–$135 | $45–$160 |
| P-OAT Coolant (per gallon) | $15–$23 | $30–$45 |
| Labor (1.5–3 hrs) | $0 | $120–$340 |
| Total Estimated Cost | $45–$180 | $165–$970 |
The 2021–2024 models can run close to $1,000 at a dealership because the integrated control valve part alone costs $200+, and calibrating it takes time.
On parts quality: OEM parts from a Hyundai dealer cost more but give you the exact opening temperature your ECU expects. Brands like Beck Arnley or Gates are solid aftermarket alternatives. Budget brands like Motorad are widely available but carry mixed reviews — some users report them sticking open within a few months.
Coolant and Environmental Safety
Used coolant is toxic and classified as hazardous waste. Its sweet smell attracts pets and wildlife, but ethylene glycol is lethal if ingested. Never pour it down a drain or onto the ground.
Most auto parts stores accept used coolant for recycling. Store it in a sealed, labeled container until you can drop it off.
Always wear nitrile gloves and safety glasses throughout the repair — even cold coolant can irritate skin and eyes.
Keep the Rest of the Cooling System Healthy
A thermostat replacement is a good opportunity to inspect the rest of the system:
- Radiator hoses: Squeeze them near the clamps. If they feel crunchy or have soft spots, electrochemical degradation is setting in. Replace them
- Radiator cap: A cap that can’t hold pressure drops your coolant’s boiling point and makes the thermostat cycle erratically. Test it or just replace it — they’re cheap
- Water pump: If your new thermostat doesn’t fix the overheating, suspect the water pump. A slipping serpentine belt or failed impeller cuts coolant flow and mimics a stuck-closed thermostat
Most thermostats last 50,000 to 100,000 miles. Fresh P-OAT coolant at the right intervals extends that lifespan significantly. Treat this repair as part of a system check, not just a part swap.