That little tire pressure light on your dashboard isn’t something to ignore. A failing sensor can mean bad readings, a constant warning light, or worse — a blowout you never saw coming. This guide covers everything about Toyota TPMS sensor replacement: how it works, what fails, how to fix it, and what it’ll cost you. Stick around — there’s a tricky ECU issue most guides miss entirely.
What Is a Toyota TPMS Sensor (and Why Should You Care)?
The TREAD Act of 2000 made tire pressure monitoring mandatory on all U.S. vehicles from the 2008 model year onward. Toyota responded by fitting direct TPMS sensors into nearly every model — Camry, RAV4, Tacoma, you name it.
Each sensor sits inside your wheel, measures real tire pressure, and transmits that data wirelessly to your car’s computer. When pressure drops 25% below the recommended level (found on your door jamb sticker), the system lights up your dashboard.
Direct vs. Indirect TPMS: What’s the Difference?
Most modern Toyotas use a direct system. A few older or budget models use indirect systems that rely on wheel speed sensors. Here’s how they compare:
| System Type | How It Measures | Hardware Needed | Accuracy |
|---|---|---|---|
| Direct TPMS | Internal pressure transducer in each wheel | Dedicated battery-powered sensor per tire | High — shows exact PSI per tire |
| Indirect TPMS | Wheel rotation speed via ABS sensors | Uses existing ABS sensors | Moderate — detects differences, not exact PSI |
Direct systems give you real numbers. Indirect systems just notice when one tire spins faster than the others. For most Toyota drivers, you’ve got direct sensors — and those are what this guide focuses on.
How Toyota TPMS Sensors Actually Work
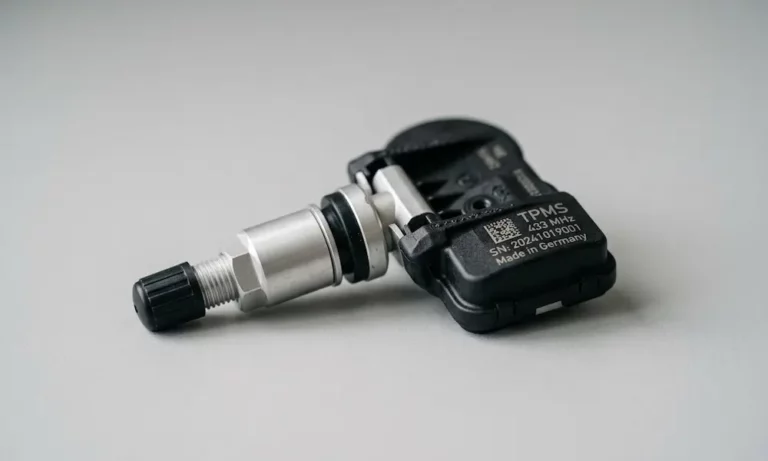
Inside that small plastic housing is a pressure transducer, a microcontroller, a radio transmitter, and a lithium battery. Sensors made by Pacific Industrial, TRW, or Denso sit at the base of your valve stem inside the tire.
Your sensor broadcasts a unique ID number — either seven or eight hexadecimal digits — to your car’s ECU. If that ID doesn’t match what the ECU has stored, you’ll get a warning light even if your tires are perfectly inflated.
Sensor Frequencies: 315MHz vs. 433MHz
Get this wrong and your new sensor won’t talk to your car at all.
| Vehicle Model | Year Range | Frequency | Typical Manufacturer |
|---|---|---|---|
| Toyota Camry | 2018–2024 | 315MHz | Pacific |
| Toyota Tacoma | 2016–2023 | 315MHz | Pacific |
| Toyota RAV4 | 2019–2025 | 315MHz | TRW / Pacific |
| Toyota Crown Signia | 2025 | 433MHz | Pacific |
Most U.S. Toyotas run 315MHz. Newer models are shifting to 433MHz. Always confirm the frequency for your specific year and trim before ordering a replacement.
Reading Your TPMS Warning Light
Your dashboard light tells you exactly what’s happening — if you know how to read it.
Solid Light
A steady, non-flashing light means one or more tires are low on pressure. The sensors are working fine. Inflate your tires to the pressure listed on your door jamb sticker. The light should turn off.
Flashing Light
A light that blinks for 60–90 seconds after startup and then stays solid means the ECU can’t communicate with a sensor. That’s a hardware or programming problem, not just low air.
Common TPMS Sensor Failure Modes
| Failure Mode | What Happens | Typical Cause |
|---|---|---|
| Battery depletion | Sensor stops transmitting | Normal aging — usually 5–10 years |
| Physical impact | Sensor cracks or shatters | Potholes, curb strikes, road debris |
| Mechanical damage | Sensor breaks during tire service | Bead breaker or tire iron contact |
| Galvanic corrosion | Valve core seizes, slow leak develops | Road salt and moisture on metal stems |
The battery inside a Toyota TPMS sensor can’t be replaced separately. The whole sensor is sealed in protective compound. When the battery dies, you replace the sensor. If one has failed due to age, the others are probably close behind — many shops recommend replacing all four at the same time to avoid repeat labor costs.
How to Replace a Toyota TPMS Sensor: Step-by-Step
This job requires a tire machine, torque wrench, and a TPMS scan tool. If you’re doing it at home, make sure you’ve got the right equipment before starting.
Safety First
Park on a flat surface. Engage the parking brake. Use a hydraulic jack and secure the vehicle with jack stands at Toyota’s designated lift points. Wear safety glasses and mechanic’s gloves.
Removal and Installation
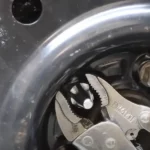
- Remove the wheel and completely deflate the tire by pulling the valve core.
- Break the bead carefully. Position the valve stem at 10 o’clock or 2 o’clock relative to the bead breaker blade. This keeps the sensor body away from the machine’s blade.
- Pull back the tire to access the sensor inside the wheel.
- For clamp-in sensors: Remove the exterior hex nut and pull the sensor through the rim hole.
- For snap-in sensors: Cut or pull the rubber stem through.
- Clean the rim hole with a wire brush to remove corrosion and rubber residue.
- Insert the new sensor and fit the new grommet, washer, and hex nut for clamp-in styles.
- Torque the sensor nut to spec with an inch-pound torque wrench.
Critical Torque Specifications
Getting these numbers right protects both the sensor and your wheel.
| Component | Torque (Imperial) | Torque (Metric) |
|---|---|---|
| Sensor retaining nut (clamp-in) | 35–45 inch-pounds | 4.0 Nm |
| Sensor mounting screw (internal) | 11.5 inch-pounds | 1.3 Nm |
| Valve core (nickel-plated) | 1.5–3.5 inch-pounds | 0.17–0.4 Nm |
One critical detail: Toyota specifies an electroless nickel-plated valve core, not a standard brass one. Using brass in an aluminum stem triggers galvanic corrosion — the two metals react with road salt and moisture, causing the core to seize. That leads to slow leaks or complete stem failure.
Wheel Lug Nut Torque by Model
While the wheels are off, torque the lug nuts back to the correct spec. These vary more than most people realize.
| Vehicle Model | Year Range | Lug Nut Torque | Thread Size |
|---|---|---|---|
| Tacoma (aluminum wheel) | 2024–2025 | 97 ft-lb | M14 x 1.5mm |
| Tacoma (steel wheel) | 2024–2025 | 154 ft-lb | M14 x 1.5mm |
| Tacoma (all) | 2016–2023 | 83–85 ft-lb | M12 x 1.5mm |
| Camry | 2018–2025 | 76–80 ft-lb | M12 x 1.5mm |
| Corolla | 2019–2025 | 76 ft-lb | M12 x 1.5mm |
| 4Runner | 2010–2024 | 82 ft-lb | M12 x 1.5mm |
| Highlander | 2020–2025 | 76–103 ft-lb | M12 x 1.5mm |
The 2024–2025 Tacoma switched to larger M14 studs. If you’re working on a fourth-gen Tacoma, don’t use the old torque spec — you’ll either strip the threads or leave the wheel dangerously loose.
Programming Your New Sensor: The OBDII Relearn Process
A new sensor means a new ID number. Your ECU doesn’t know it yet. You’ve got to teach it.
The OBDII Relearn Method
This is the standard relearn procedure for most U.S. Toyota vehicles:
- Hold a TPMS scan tool against the tire sidewall near the valve stem. The tool wakes up the sensor and reads its unique ID.
- Plug the tool into the OBDII port under the driver’s side dashboard.
- Select “Write” or “Relearn” on the tool. It transfers the captured IDs directly into the ECU.
- Drive for 5–10 minutes at speeds above 12–20 mph. This lets the ECU sync with the sensors and confirm consistent data.
Some newer Toyota models support an Auto Relearn feature — the car detects new sensors during a normal drive. Even so, professionals usually recommend the OBDII method to make sure each ID gets correctly assigned to the right wheel position on your display.
Resetting via the Dashboard Menu (Camry, RAV4, 4Runner)
For simple pressure resets — after tire rotation or seasonal inflation changes — skip the scan tool entirely:
- Use the steering wheel controls to open Settings (the gear icon)
- Navigate to Vehicle Settings → TPWS
- Select Set Pressure or Identify Each Tire
- Hold OK until the tire pressure light flashes three times
That tells the system to accept current pressures as the new baseline.
The ECU Lock: The Mistake Most Guides Don’t Mention
Here’s where Toyota TPMS replacement trips up even experienced technicians.
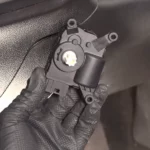
Toyota vehicles have a “SET” or “TPMS RESET” button — usually under the steering wheel or in the glove box. This button tells the ECU to find the sensor IDs it already knows and reset the pressure baseline.
If someone pushes that button after installing new sensors but before programming them, the ECU enters a listening loop. It’s waiting for IDs it already recognizes. When you try to program the new IDs via the OBDII port, it rejects every command. The scan tool shows “Transfer Failure.”
To fix an ECU lock, you need an advanced TPMS tool with an “Unlock ECU” function. That clears the loop and restores normal programming.
The correct order is always: install → program via OBDII → then press the SET button. Not the other way around.
OEM vs. Aftermarket Sensors: What’s Worth Your Money?
You’ve got three real options when it comes to replacement parts.
| Part Type | Cost Per Sensor | Brand Examples | What You Get |
|---|---|---|---|
| OEM (Original Equipment) | $60–$120 | Pacific, TRW, Denso | Guaranteed compatibility, longest battery life |
| Tier 1 Aftermarket | $35–$55 | Denso, Schrader | Often the same factories as OEM parts |
| Universal Programmable | $20–$40 | Autel MX-Sensor, VDO | Works on nearly any vehicle once programmed |
Shops often stock universal programmable sensors like the Autel MX-Sensor because one part covers hundreds of vehicle applications. For you as the owner, they perform identically to factory sensors once they’re installed and programmed.
Labor at a dealership or tire shop typically runs $50–$150 per vehicle on top of the parts cost. Many shops discount labor when you’re buying new tires at the same time — the wheels are already coming off anyway.
Managing Two Sets of Wheels (Winter Tires)
Got a separate winter wheel set? You’re dealing with eight sensors instead of four.
Many Toyota SUVs and trucks — including the RAV4 and Land Cruiser — have a Main/2nd toggle switch in the glove box or knee bolster. It stores two complete sets of sensor IDs. Swap to your winter wheels, flip the switch, done.
No switch on your vehicle? Use sensor cloning. A technician programs aftermarket sensors to copy the exact ID numbers of your original set. The ECU thinks the original sensors are still present. You swap wheels with zero reprogramming needed.
Seasonal Pressure Drops: Not Always a Broken Sensor
Every 10°F drop in temperature causes tire pressure to fall by about 1 PSI. That’s basic physics. When autumn hits and your TPMS light comes on for the first time, the sensors are probably fine — your tires just need air.
Check pressure with a manual gauge. Inflate to the number on your door jamb sticker. The light should go out.
Also worth knowing: don’t use aerosol tire sealants unless they’re labeled TPMS-safe. Standard sealants clog the tiny pressure port on the sensor body. Once that’s blocked, the sensor can’t read pressure at all. If sealant has been used, clean or replace the sensor.
During every tire change, ask your technician to inspect the valve stem and rubber grommet condition. Rubber snap-in stems dry out and should ideally be replaced at the same time as your tires.