Your Jeep Grand Cherokee’s AC blows cold on one side and hot on the other. Or maybe there’s an annoying clicking noise behind the dash every time you start the car. Sound familiar? This guide covers everything you need to know about Jeep Grand Cherokee blend door actuator replacement — from diagnosing the problem to finishing the fix without losing your mind.
What Does a Blend Door Actuator Actually Do?
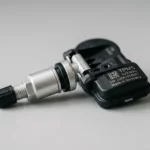
The blend door actuator is a small electric motor that controls airflow temperature inside your Grand Cherokee’s cabin. It moves a physical door inside the HVAC housing, mixing hot air from the heater core with cold air from the AC evaporator.
Three types of doors work together inside your climate system:
- Recirculation door – switches between fresh outside air and cabin air
- Mode door – directs air to floor vents, dash vents, or the defroster
- Blend door – mixes hot and cold air to hit your target temperature
If you’ve got dual-zone climate control, your Jeep has multiple blend door actuators — one for the driver’s side and one for the passenger’s side. When one fails, temperature splits across the cabin are a dead giveaway.
How to Tell Your Blend Door Actuator Is Failing
Don’t guess. These symptoms point directly at a bad actuator.
That Clicking Sound Behind the Dash
The most obvious sign is a rhythmic clicking or tapping noise from behind the instrument panel. It often continues for 30 to 40 seconds after you turn the ignition off. That sound is a stripped gear — the motor keeps spinning, but the teeth on the drive gear just skip over the damaged section repeatedly.
Temperature Problems That Don’t Make Sense
- Heat stuck on full blast no matter where you set the dial
- Driver side blows freezing air while passenger side works fine
- No airflow at all from certain vents
- Climate controls respond but nothing changes
Electronic Trouble Codes
A standard OBD2 scanner usually won’t communicate with your HVAC module. You need an OEM-level scan tool to pull climate system codes. Common faults show up as “circuit open,” “performance error,” or “out of range.”
WJ owners (1999–2004) have a built-in shortcut: hold the AC and Recirculation buttons while rotating the driver-side temperature knob to trigger the self-diagnostic mode. The display flashes specific codes.
| Diagnostic Code (WJ) | What It Means |
|---|---|
| 19, 20 | Recirculation door travel range issue |
| 24 | Blend door actuator motor circuit fault |
| 51, 52 | Current or past recirculation door failure |
Generation-by-Generation Breakdown
Your repair approach depends entirely on which Grand Cherokee you own. The WJ, WK, and WK2 generations each have distinct failure points.
WJ (1999–2004): The Broken Axle Problem
The WJ has a well-known design flaw. The plastic limit pin on the blend door axle breaks under repeated stress. Once that pin fails, the actuator pushes the blend door with full force until the door itself snaps.
The factory fix requires pulling the entire dashboard — that’s often 8+ hours of shop labor. The smart alternative uses the glove box opening instead.
Shortcut repair steps:
- Drop the glove box by pressing the rubber bump stops inward
- Locate the actuator to the left of the opening
- If the axle is broken, cut a small access window in the HVAC housing
- Insert new metal blend doors through the window
Metal replacement kits from HeaterTreater use aluminum or stainless steel components instead of the original plastic. That solves the underlying problem permanently rather than just replacing like for like.
Don’t overlook the recirculation door. On WJ models, this door sits in the upper right area behind the glove box and commonly breaks off its hinges. When it falls into the blower motor intake, it blocks airflow completely. Quick test: check for suction at the exterior vent near the wipers. If it doesn’t change when you hit the recirculation button, the door has come loose.
WK (2005–2010): Shaft Shearing and Smarter Fixes
The WK generation continued the trend of awkward access. But Dorman’s OE FIX kits let you handle this without removing the whole instrument panel.
When the blend door shaft breaks on a single-zone system, a relocation kit moves the motor to a more accessible spot on the passenger side of the air distribution box. Here’s how it works:
- Open and drop the glove box
- Remove the original air temperature actuator and check the door shaft
- Install a mounting plate over the actuator location as a drilling template
- Use a hole saw to cut a new entry point into the HVAC case
- Insert a repair sleeve that engages the broken shaft and connects to the new actuator position
| Dorman Kit | Application | What It Does |
|---|---|---|
| 604-386 | WK Single-Zone | Relocates the actuator |
| 604-387 | WK Single/Dual | Repairs the actuator arm |
| 604-388 | WK Dual-Zone | Fixes the blend door shaft |
WK2 (2011–2021): The Cracked Gear Issue
The WK2 is the most common generation showing up with blend door complaints. In most cases, the motor itself is perfectly fine. The culprit is a cracked plastic intermediate gear that sits between the motor and the blend door axle.
The computer’s load detection system is designed to cut power when the door hits the end of its travel. But a slight delay in response means the motor over-drives the door, cracking those plastic gears over time.
Good news: replacing just the gear is significantly cheaper than swapping the whole actuator.
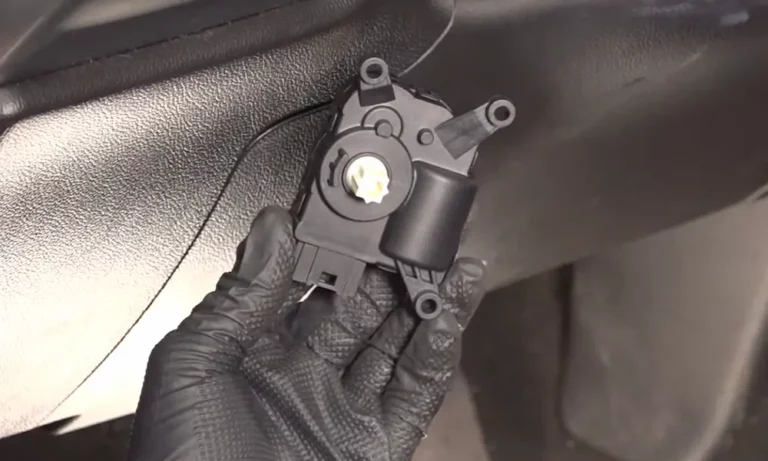
Passenger side replacement is the easier job. Access it through the glove box opening. Unbolt the actuator from the side of the center stack. Most people finish this in under an hour. Full video walkthrough here.
Driver side replacement is a different story entirely.
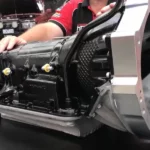
Driver Side: The Difficult One
The driver-side actuator sits in a tight space surrounded by structural brackets and knee airbag components. Budget a solid afternoon for this one.
Key steps:
- Remove the silencer panel under the steering column (about six bolts)
- Disconnect the hood release and electrical switches for lights and gas cap
- Pull the metal knee bolster plate (four bolts) to expose the HVAC ducting
- Remove the lower air duct — the plastic fastener often breaks, so have a zip tie ready for reinstallation
- The upper screw on the actuator is in an extremely tight spot
Pro tip from the Reddit community: tape or glue a Torx bit into a ratcheting wrench to create an ultra-low-profile tool that fits where standard sockets can’t reach.
When installing the new gear, align it center-to-center with the blend door gear. Some aftermarket gears aren’t keyed, so you can install them wrong if you’re not paying attention.
Calibrating the System After Replacement
This step is non-negotiable. According to NHTSA technical service documentation, any time you disconnect or replace a blend door actuator, the climate control module needs to relearn the physical limits of door travel. Skip this and the system over-drives your new part immediately.
Battery Disconnect Method
This is the most thorough reset. On WK2 models, the battery sits under the passenger seat.
- Disconnect the negative cable
- Wait 20–30 minutes for capacitive charges to fully dissipate
- Reconnect the terminal
- On the next ignition cycle, the HVAC module automatically sweeps every door to find end-stop positions
Fuse Pull Method
Prefer not to lose your radio presets? This alternative works well:
- Turn the ignition to “On” and turn the HVAC system on
- Turn the ignition back to “Off”
- Find the HVAC fuse in the under-hood power distribution center
- Pull it for 1–2 minutes, then reinstall
- Turn the key to “On” and listen for the motors cycling behind the dash
Manual Knob Calibration
Works for minor synchronization issues:
- Turn the ignition to “On” without starting the engine
- Rotate both temperature knobs to full cold, then full heat
- Wait 30 seconds for the system to sync
| Calibration Method | Time Needed | Best For |
|---|---|---|
| Battery Disconnect | ~30 minutes | Full system reboot |
| Fuse Pull | ~2 minutes | Targeted HVAC module reset |
| Control Sweep | ~30 seconds | Minor sync issues |
| Bidirectional Scan Tool | Immediate | Professional verification |
Choosing the Right Part
The aftermarket for Grand Cherokee HVAC parts is massive. Here’s a quick breakdown of what’s available and what you’re actually getting.
| Part Type | Brand | Price Range | Where to Buy |
|---|---|---|---|
| Actuator (WK2) | TRQ | $28–$45 | 1A Auto |
| Actuator (WK2) | Duralast | $35–$55 | AutoZone |
| Blend Door Gear Kit | Dorman | $23–$35 | Advance Auto Parts |
| Actuator (WJ) | Generic | $17–$25 | eBay |
| Metal Blend Door Kit | HeaterTreater | $100+ | Specialty Retail |
Plastic vs. metal: Budget plastic parts are prone to the exact same failure that broke your original component. If you’re fixing a WJ or WK with a history of broken doors, metal replacement kits cost more upfront but eliminate the repeat repair cycle.
For the WK2 with a cracked gear, a $23 Dorman gear kit fixes the problem without replacing the whole actuator — that’s the smart move if the motor tests fine.
Tools You’ll Actually Need
Don’t start this job without these on hand:
- ¼” and ⅜” drive ratchets with extensions
- T20 and T25 Torx drivers (or bits)
- Plastic trim removal tools
- Needle-nose pliers
- Work gloves
- Zip ties (for the WK2 lower duct fastener)
- A low-profile ratcheting wrench for the driver-side upper screw
For the WK2 driver side specifically, the ultra-low-profile tool trick makes or breaks the job. Standard socket wrenches simply won’t fit in that space.