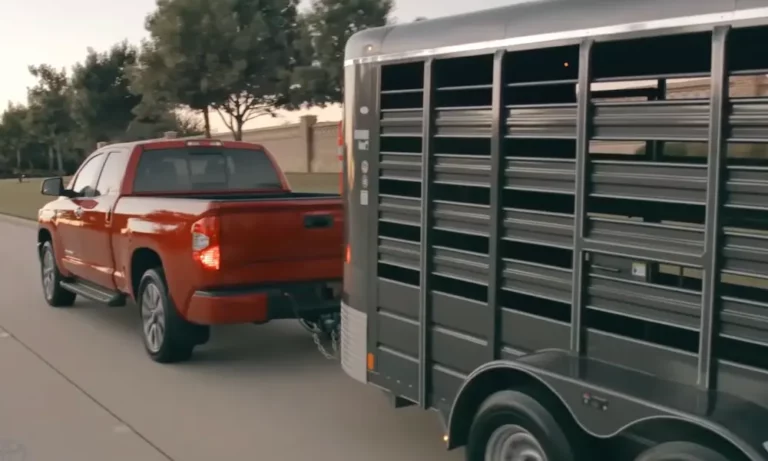
When you’re pulling a trailer and discover your trailer brakes not working, it’s more than just inconvenient—it’s dangerous. Whether you’re dealing with weak stopping power, complete brake failure, or that dreaded grinding noise, this guide walks you through everything you need to diagnose and fix the problem safely.
Understanding Your Trailer Brake System
Before diving into troubleshooting, you need to know what type of brake system you’re dealing with. The three main types each have different failure points and repair approaches.
Electric Brakes: The Most Common Choice
Electric brakes dominate the trailer world for good reason. They use an electromagnet (called a “puck”) that activates when you press your tow vehicle’s brake pedal. The system needs a brake controller in your truck and a 7-pin connection to work properly.
Key components include:
- Brake controller (mounted in your tow vehicle)
- Electromagnets at each wheel
- Wiring harness and connectors
- Brake shoes or pads
The beauty of electric brakes lies in their adjustability. You can fine-tune the braking force through your controller. However, they’re more susceptible to electrical issues like corroded connections and wiring problems.
Hydraulic (Surge) Brakes: Self-Contained Power
Hydraulic brakes work independently of your tow vehicle’s brake system. When you slow down, the trailer pushes against the hitch, compressing a hydraulic actuator that applies the brakes. It’s like having a mini brake system built into your trailer.
Essential parts include:
- Surge actuator/coupler
- Master cylinder
- Brake fluid and lines
- Wheel cylinders
- Brake shoes
These systems excel in harsh environments like saltwater and don’t need a brake controller. But when they fail, you’re often dealing with fluid leaks or internal component problems.
Electric-Over-Hydraulic: Best of Both Worlds
EOH systems combine electric control with hydraulic power. An electric signal operates a hydraulic pump, giving you precise control with serious stopping power. They’re perfect for heavy-duty applications but require specific brake controllers and proper wiring.
Trailer Brake System Comparison
| Feature | Electric Brakes | Hydraulic Brakes |
|---|---|---|
| Activation | Electromagnet via brake controller | Trailer surge against tow vehicle |
| Controller Required | Yes (7-pin connection) | No |
| Best For | Light to moderate loads | Heavy loads, boat trailers |
| Maintenance | Frequent electrical checks | Periodic fluid checks |
| Saltwater Performance | Prone to corrosion | Better resistance |
Recognizing the Warning Signs
When trailer brakes not working becomes your reality, the symptoms tell a story about what’s gone wrong.
Weak or No Braking Power
This is the big one—when you hit the brakes and feel like you’re trying to stop a runaway freight train. Common causes include worn brake pads, failed electromagnets, or electrical problems cutting power to your brake system.
Intermittent Brake Function
Your brakes work sometimes but not others? This screams electrical issues. Loose connections, corroded contacts, or a failing brake controller often cause this maddening inconsistency.
Locked-Up Wheels
When your trailer wheels won’t turn, you’ve got the opposite problem. Over-adjusted brakes, stuck magnets, or blocked hydraulic lines can cause dangerous wheel lockup.
Uneven Braking
If your trailer pulls to one side during braking, you’re dealing with uneven brake application. One side might have worn components, disconnected parts, or adjustment issues.
Strange Noises and Smells
Squealing means worn pads crying for help. Grinding indicates metal-on-metal contact—expensive damage happening in real time. A burning smell? Your brakes are overheating and losing effectiveness fast.
Fluid Under Your Trailer
For hydraulic systems, visible brake fluid means you’ve got leaks. This isn’t a “fix it later” situation—brake fluid loss leads to complete brake failure.
Getting to the Root of the Problem
Effective diagnosis starts with understanding your brake system and following a logical sequence.
Electric Brake Troubleshooting
Start with your brake controller. Check if it’s getting power—a dead controller can’t send signals to your trailer brakes. Look for blown fuses in your tow vehicle’s fuse box.
Test the ground connection next. A poor ground causes more electric brake problems than you’d expect. The ground wire must connect to clean, rust-free metal on your vehicle’s frame.
Use a multimeter to check voltage output from your controller. Low voltage often points to damaged wiring between your truck and trailer.
If your controller shows “NC” (no connection), inspect your trailer plug thoroughly. Corroded or bent pins kill electrical connections. Clean everything with a wire brush and apply dielectric grease.
Check each brake magnet for wear. If one magnet fails, replace both on that axle to maintain even braking force.
Hydraulic Brake Diagnosis
Begin with the obvious—brake fluid level in the master cylinder. Low fluid is a common and easily preventable cause of brake failure.
Look for leaks under your trailer and along brake lines. Even small leaks can introduce air into the system, compromising braking performance.
Test your master cylinder by manually operating the surge actuator. You should see a stream of brake fluid from the output line. No fluid flow means internal problems requiring master cylinder replacement.
Check individual wheel cylinders by removing brake drums and having someone operate the actuator. The wheel cylinder pushrods should move in and out smoothly.
If you find rust in wheel cylinders or the master cylinder runs dry, plan on rebuilding the entire system. Rust particles will contaminate everything and cause ongoing problems.
Common Problems and Their Causes
| Symptom | Electric Brake Causes | Hydraulic Brake Causes |
|---|---|---|
| Weak/No Braking | Worn pads, bad controller, wiring issues, low voltage | Worn pads, low fluid, leaks, frozen cylinders |
| Intermittent Operation | Loose connections, failing controller | Fluid leaks, air in system |
| Locked Wheels | Over-adjusted, stuck magnet | Over-adjusted, bad master cylinder |
| Uneven Braking | Uneven wear, disconnected components | Uneven wear, air in lines |
| Noise/Smell | Worn pads, overheating | Worn pads, overheating |
Step-by-Step Repair Solutions
Once you’ve identified the problem, it’s time to fix it. Here’s how to tackle the most common issues.
Adjusting Electric Brakes
Electric brakes need adjustment every 3,000 miles or three months. It’s easier than you think.
Manual Adjustment Process:
- Secure the trailer with wheel chocks, then jack up one side until the wheel spins freely
- Remove the adjustment port cover (usually a rubber or plastic plug)
- Locate the star wheel adjuster inside the brake assembly
- Turn the adjuster with a brake spoon, tightening one click at a time
- Spin the wheel between clicks to check resistance
- Stop when the wheel drags slightly, then back off until it spins with minimal resistance
- Repeat on the other side
Breaking in New Electric Brakes
New brakes need proper break-in to seat correctly:
- Find an open area like an empty parking lot
- Accelerate to 40 MPH then use only the manual brake controller (not your foot brake) to slow to 20 MPH
- Repeat this process 20-30 times for manual brakes, 12-15 times for self-adjusting
- Let brakes cool between repetitions
- Check for heat – properly broken-in brakes should reach 350-400°F
Fixing Hydraulic Brake Issues
Bleeding the Hydraulic System:
Air in hydraulic lines kills braking performance. Here’s how to get it out:
- Fill the master cylinder three-quarters full with DOT-3 or DOT-4 brake fluid
- Start with the master cylinder – use the breakaway lever to pump out air bubbles
- Move to wheel cylinders starting with the rear axle, farthest from the master cylinder
- Attach a clear hose to each bleeder valve, submerging the other end in clean brake fluid
- Have someone pump the actuator while you open and close bleeder valves
- Continue until fluid runs clear without bubbles
- Keep the master cylinder topped off throughout the process
Replacing a Master Cylinder:
- Drain existing fluid and disconnect brake lines using proper line wrenches
- Remove mounting bolts and slide out the old unit
- Bench bleed the new cylinder before installation to remove internal air
- Install and reconnect everything securely
- Bleed the entire system to remove any air introduced during replacement
Electrical Repairs
Fixing Corroded Connections:
- Clean all contacts with a wire brush
- Apply dielectric grease to prevent future corrosion
- Replace damaged wiring – avoid “scotch lock” connectors
- Ensure tight, secure connections throughout the system
Testing Electrical Components:
Use a multimeter to verify voltage at your brake controller output. You should see consistent voltage when brakes are applied. For a quick field test, hold a compass near the brake drum while someone applies the brakes – a spinning needle indicates power reaching the magnet.
Verifying Your Repairs Work
After fixing your trailer brakes not working situation, thorough testing ensures your safety and peace of mind.
Breakaway Switch Test
This emergency system activates if your trailer separates from your tow vehicle. With everything connected, pull the breakaway switch pin and try driving forward. Your trailer should lock up completely if the system works properly.
Make sure your breakaway battery stays charged – a dead battery means no emergency stopping power.
Manual Wheel Test
Jack up each wheel and have someone apply the brakes. Try rotating the lifted wheel by hand – it should resist strongly or be impossible to turn. This confirms individual brake engagement.
Road Testing
In a safe, open area, use your brake controller’s manual lever while driving slowly. You should feel the trailer pulling as its brakes engage independently of your truck’s brakes. This also helps you adjust the controller’s gain setting for optimal performance.
Listen and Look
Have someone listen at each wheel during brake application. Electric brakes make a distinct buzzing sound when engaging. Check for any burning smells or smoke after testing – a little heat is normal, but excessive heat indicates problems.
Preventing Future Brake Problems
Regular maintenance prevents most trailer brake failures and saves you money in the long run.
Monthly Checks
Before every trip, spend five minutes checking:
- Electrical connections for corrosion
- Brake fluid level (hydraulic systems)
- Breakaway cable condition
- All brake and turn lights
Quarterly Maintenance
Every three months or 3,000 miles:
- Adjust electric brakes
- Inspect brake components for wear
- Clean and lubricate moving parts
- Test the entire brake system
Annual Service
Once a year or every 12,000 miles:
- Complete brake inspection
- Replace worn components
- Bleed hydraulic fluid
- Professional system evaluation if needed
Maintenance Schedule Quick Reference
| Task | Frequency | Details |
|---|---|---|
| Pre-trip Check | Before each trip | Connections, fluid, breakaway cable, lights |
| Adjustment | Every 3 months/3,000 miles | Brake adjustment, component inspection |
| Full Service | Annual/12,000 miles | Complete inspection, component replacement, fluid service |
| Break-in | After 200 miles (new brakes) | Proper seating procedure for new components |
Smart Maintenance Tips
Keep electrical connections clean and protected. Use dielectric grease on all connections and consider running wires through protective conduit.
For hydraulic systems, only use fresh DOT-3 or DOT-4 brake fluid from sealed containers. Old fluid absorbs moisture and causes internal corrosion.
Replace brake components in pairs – if one side wears out, the other isn’t far behind. This maintains even braking and prevents dangerous pulling.
Environmental Considerations
Saltwater environments demand extra attention. Rinse electrical connections and brake components with fresh water after saltwater exposure. Consider upgrading to stainless steel hardware in coastal areas.
Heavy use or mountain driving increases brake wear significantly. Inspect more frequently and consider upgrading to larger brakes or different brake types if you regularly tow in demanding conditions.