Got a ticking 5.3 and a repair quote that made your stomach drop? You’re probably wondering if there’s a way to fix it without pulling the heads. Good news — some methods actually work. Bad news — none of them are permanent. Here’s everything you need to know before you pick up a hammer or hand over your keys.
Why the 5.3 Has a Lifter Problem in the First Place
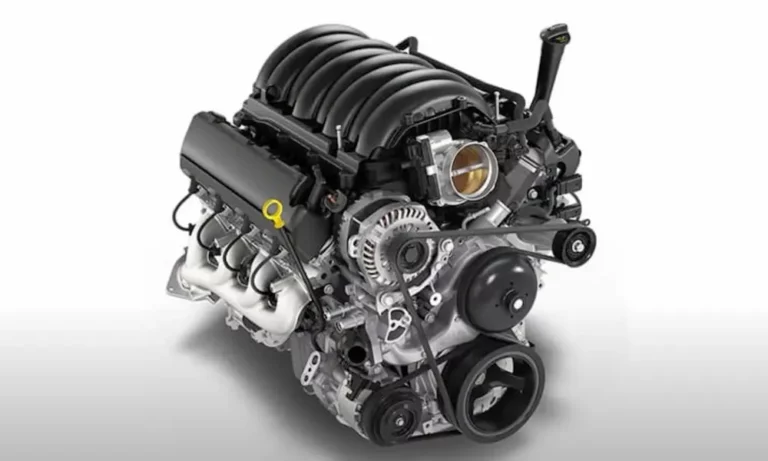
The GM 5.3L engine earned a loyal following for being tough and reliable. Then GM added Active Fuel Management (AFM) to improve fuel economy, and things got complicated.
AFM works by shutting down four of the eight cylinders during light driving — cylinders 1, 4, 6, and 7. It uses special collapsible lifters that telescope inward when deactivated. A unit called the Lifter Oil Manifold Assembly (VLOM) directs oil pressure to control this process.
The problem? Those collapsible lifters have tiny internal locking pins. Over time, carbon sludge, oil varnish, or worn springs cause those pins to stick. The lifter gets stuck collapsed — and that cylinder goes dead.
The result is a loud tick, a rough idle, and a repair bill that can hit $5,000 or more at a dealership.
Here’s a quick breakdown of the key hardware involved:
| Component | What It Does | Where It Lives |
|---|---|---|
| VLOM (Lifter Oil Manifold Assembly) | Controls oil flow to AFM lifters via solenoids | Intake valley under the intake manifold |
| AFM Lifters (Cylinders 1, 4, 6, 7) | Collapsible two-piece units for deactivation | Lifter bores inside plastic trays |
| Standard Lifters (Cylinders 2, 3, 5, 8) | Solid hydraulic rollers — always active | Lifter bores inside plastic trays |
| Lifter Trays (Guides) | Keep lifters from rotating in the bore | Bolted in the intake valley |
| VLOM Filter Screen | Tiny mesh protecting oil pressure sensors | Beneath oil pressure sensor in valley cover |
How to Tell If Your 5.3 Lifter Has Failed
Don’t guess — listen and scan. These symptoms point directly at a lifter problem.
The Sounds
A failed AFM lifter produces a rhythmic metallic tick that speeds up with engine RPM. That’s because it runs at camshaft speed — exactly half of crankshaft speed. It’s not subtle. It sounds like a typewriter stuck inside your engine.
A chirping or squeaking noise usually points to a failed lifter roller or scored camshaft lobe — a more serious situation.
The Codes
Plug in an OBD2 scanner and look for these:
- P0300 — Random misfire
- P0301, P0304, P0306, P0307 — Cylinder-specific misfires on AFM cylinders
- Flashing check engine light — Severe misfire actively damaging your catalytic converter
According to GM’s own service bulletin, a flashing check engine light means stop driving immediately. Unburned fuel hitting a hot catalytic converter causes serious secondary damage fast.
| Symptom | Likely Cause | Codes |
|---|---|---|
| Rhythmic metallic ticking | Collapsed or stuck lifter | P0300, P0301–P0307 |
| Rough idle / shaking | Dead cylinder throwing off balance | P0300, P0307 |
| Engine goes into limp mode | ECM protecting against total failure | Multiple warnings |
| Chirping or squeaking | Lifter roller failure or cam lobe wear | P0300, P0308 |
| High oil consumption | Worn rings or PCV system issues | None |
5.3 Lifter Replacement Without Removing Head: The Methods
Here’s the honest truth: 5.3 lifter replacement without removing head isn’t always possible, but there are three methods that can restore a stuck lifter temporarily. Each one has its place — and its limits.
Method 1: The Mechanical Shock Technique
This is the most popular heads-on lifter hack, and it works specifically for AFM lifters that are stuck in the collapsed position.
Here’s what you do:
- Remove the intake manifold, valve cover, and the rocker arm for the affected cylinder
- Pull the pushrod out of the hole — this exposes the oil channel leading straight down to the lifter
- Grind the end of an old pushrod or metal punch into a concave shape — this is critical. A flat or pointed tool will punch straight through the lifter
- Insert the tool through the pushrod hole until it seats firmly on the lifter
- Strike it with a hammer — sharp and firm
- A successful release often launches the tool right back out of the hole
After the release, drop the pushrod back in and tap it with a rubber mallet. If the lifter feels solid and springy, you got it. If it feels mushy, it’s done — no more chances.
What can go wrong: The internal spring may be broken rather than just stuck. No amount of hammering fixes that.
Method 2: Compressed Air Pressure
This method uses a burst of compressed air to force the lifter pin open hydraulically.
With the pushrod removed, spray a penetrating solvent down the bore first. Then press an air nozzle with a rubber tip firmly into the hole to create a seal and blast a short burst of high-pressure air. If the lifter releases, the pushrod will jump noticeably when you reinstall it and test it.
This works best on mildly stuck lifters with minimal carbon buildup. It’s gentler than the hammer method and worth trying first.
Method 3: Chemical Flush
Adding high-detergent additives or a small amount of automatic transmission fluid to the crankcase before an oil change can sometimes dissolve the varnish locking the lifter pins in place.
This isn’t a fix — it’s a prep step or a last-resort for early-stage sticking. It can’t repair broken springs or mechanical wear. But if you’re dealing with a mildly sticky lifter on a clean engine, it’s a $10 thing to try before the hammer comes out.
Lifter Extraction Tools: Pull It Without Pulling the Head
If the lifter needs to come out entirely, specialized pullers like the Performance Tool W84004 or the OEMTOOLS 25048 let you extract a lifter through the pushrod channel without removing the cylinder head.
These tools use an expandable collet that grips the inside of the lifter. A slide hammer then pulls it straight up through the head.
But there’s a catch — two of them, actually:
- The lifter must be in its fully extended (non-collapsed) state for the collet to get a grip
- These tools can’t address the plastic lifter trays underneath — and that’s where the real problem lives
The Lifter Tray Problem Nobody Talks About
This is the part that kills most heads-on repair attempts.
LS lifters don’t sit loose in the block. They sit inside plastic guides called lifter trays. Those trays have keyways that lock each lifter in alignment with the camshaft lobe. If the lifter rotates even slightly out of alignment, the roller stops rolling and starts dragging sideways across the spinning lobe — destroying both the lifter and the camshaft in minutes.
The tray bolts that hold these guides in place sit recessed under the cylinder head casting overhang. You simply can’t reach them without removing the head.
| Shortcut Risk | What Happens | Long-Term Result |
|---|---|---|
| Skipping tray replacement | Brittle old trays crack during extraction | Lifter rotation destroys engine |
| Leaving tray bolts in place | Can’t torque them properly — trays loosen | Vibration wears out lifter bores |
| Skipping cam inspection | Scored lobes aren’t visible | New lifter fails immediately |
| Contaminated bore | Metal shavings trapped during extraction | Scored block, oil pressure loss |
Some mechanics try workarounds — using magnets or wooden dowels to hold lifters while manipulating the trays through the cam tunnel. These methods are notoriously difficult and risky, and dropping a component into the oil pan turns a bad day into a catastrophic one.
The Camshaft Is Probably Already Damaged
Here’s the hard truth most repair shops won’t volunteer upfront.
When a collapsed lifter stops transferring cam motion to the pushrod, that pushrod starts hammering against the lifter cup at hundreds of times per second. Pushrods bend into L-shapes. The lifter roller skips across the cam lobe, generating enough heat to cause blue or black discoloration and surface pitting.
Once a cam lobe is pitted, it acts like sandpaper on every new lifter you install. The failure repeats — and this time, metal shavings travel through the entire oiling system.
Experienced GM technicians estimate a 90% chance the camshaft is damaged once a lifter has failed. That number makes the heads-on hack look a lot less attractive.
The Permanent Fix: AFM Delete
If you want to stop the cycle of lifter failures for good, a full mechanical AFM delete is the answer. Yes, it requires pulling the heads. But it removes every AFM component and returns the engine to a standard V8 configuration.
What a full delete requires:
- 16 standard lifters — LS7 hydraulic rollers are the go-to choice
- Non-AFM camshaft — Critical. The AFM cam has different lobe profiles for cylinders 1, 4, 6, and 7. Running standard lifters on an AFM cam causes significant compression loss
- New lifter trays — Updated LS2-style guides for proper alignment
- Smooth valley cover — Replaces the solenoid-packed VLOM; oil towers in the block get physically plugged
- ECM reprogramming — Without a software flash, the computer keeps commanding deactivation on hardware that no longer exists, triggering constant misfires
Important assembly notes:
The 5.3L uses torque-to-yield head bolts — they physically stretch when tightened and can’t be reused. Buy new ones every time you pull the heads.
| Fastener | Pass 1 | Pass 2 | Pass 3 |
|---|---|---|---|
| M11 Head Bolts | 22 lb-ft | +90° | +70° |
| M8 Head Bolts | 22 lb-ft | — | — |
| Rocker Arm Bolts | 22 lb-ft | — | — |
| Lifter Tray Bolts | 89 lb-in | — | — |
| Intake Manifold | 44 lb-in | 89 lb-in | — |
When installing new lifters, soak them in clean engine oil first to purge air. Lifter preload on the non-adjustable pedestal rockers is set by pushrod length — roughly ¾ turn past zero lash for a street build.
The Cost Reality Check
| Repair Option | Average Cost (USD) | How Long It Lasts |
|---|---|---|
| Shock/hack method (DIY) | $0–$300 | Temporary — high risk |
| Single-bank OEM repair | $1,200–$2,500 | Resets the clock; fails again |
| Full mechanical delete | $3,500–$6,000 | Permanent solution |
| Remanufactured long block | $5,000–$8,000 | Maximum reliability + warranty |
A standard dealership repair with OEM parts resets the clock — but doesn’t remove the underlying design flaw. Many owners face the exact same failure 60,000 miles later.
If metal debris has already traveled through the engine, a remanufactured long block with a 3-year unlimited-mile warranty is often the smarter financial move.
Prevent It Before It Starts
If your engine is currently healthy, keep it that way.
Oil maintenance matters most. The VLOM filter screen that protects the oil pressure sensors clogs easily with sludge. Change your oil every 5,000 miles using dexos1 Gen 2 or Gen 3 certified full synthetic. Avoid long idle periods — they reduce consistent oil pressure to the top end.
Consider a Range Technology AFM/DFM disabler. This OBD2 plug-in device tells the ECM conditions for deactivation are never met — so the solenoids never fire and the lifters never collapse. It’s not a fix for existing damage, but it’s excellent prevention on a healthy, low-mileage engine. Install it early and you may never need this article again.