Think your 6L80 is on its way out? Slipping gears, shuddering at highway speeds, or a burnt fluid smell are all signs something’s wrong. The good news — a proper 6L80 transmission rebuild can turn a failing unit into something stronger than it ever was from the factory. Read this guide to the end before you spend a single dollar.
What Makes the 6L80 Tick
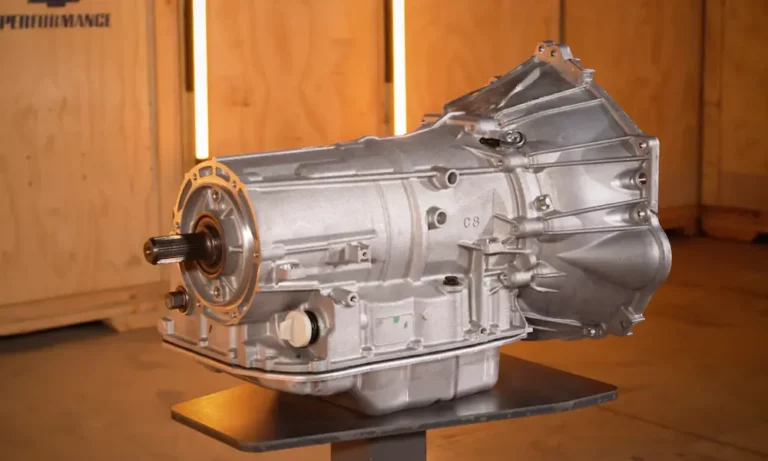
The GM Hydra-Matic 6L80 debuted in the 2006 Cadillac STS-V and Corvette. It’s a six-speed, electronically controlled unit built to handle the torque from GM’s Gen IV small-block V8s. According to ATRA’s technical breakdown, the 6L80 delivers a 6.04:1 overall ratio spread, which translated to roughly a 4–7% fuel economy improvement over the four-speed units it replaced.
Unlike older transmissions that used bands, the 6L80 runs a clutch-to-clutch shifting strategy. No bands. All clutch packs. That’s impressive engineering — but it also means when something goes wrong hydraulically, it tends to cascade fast.
As Novak Conversions explains, the unit has four underdrive gears and two overdrive gears, with no true 1:1 direct drive ratio — a departure from older GM automatic designs.
| Gear | Ratio | Type |
|---|---|---|
| 1st | 4.027:1 | Underdrive |
| 2nd | 2.364:1 | Underdrive |
| 3rd | 1.532:1 | Underdrive |
| 4th | 1.152:1 | Underdrive |
| 5th | 0.852:1 | Overdrive |
| 6th | 0.667:1 | Overdrive |
| Reverse | 3.064:1 | Reverse |
The Three Most Common Failure Points
Before any 6L80 transmission rebuild begins, you need to understand why these units fail. There are three culprits that show up again and again.
The Torque Converter Is the #1 Killer
Monster Transmission’s failure data puts this plainly: the factory torque converter causes more catastrophic 6L80 failures than every other internal component combined. The stock lockup clutch lining is thin — built for smooth engagement and fuel economy, not durability.
When it starts failing, you’ll feel a shudder that feels like driving over a rumble strip, usually between 35 and 60 mph under light throttle. That’s the friction material flaking off. Those particles then travel through the fluid and:
- Wear the oil pump rotor
- Stick the TCC regulator valve
- Clog the TEHCM’s internal pressure circuits
Over 60% of failed 6L80 units show metallic converter dust in the pan. If you see it, the converter already started the damage.
The 3-5-R Wave Plate Fracture
This one hits hard because it takes out three gears at once: 3rd, 5th, and Reverse. The factory wave plate is prone to fatigue cracking. When it breaks, Gears Magazine notes the resulting metal fragments often destroy the 3-5-R clutch drum entirely.
GM updated the 3-5-R drum design. You can identify the updated version by a dot-matrix QR label on the drum surface. If your unit has an old drum, replace it during the rebuild — don’t wait.
Oil Pump Bore Wear
The vane-style oil pump is extremely sensitive to dirty fluid. Next Gen Drivetrain’s analysis shows that as the pressure regulator valve and boost valve wear in their bores, line pressure drops — but only under load. The result: a transmission that feels fine around town but slips when you ask for real power.
What a Proper 6L80 Transmission Rebuild Actually Involves
A soft parts kit swap isn’t a rebuild. It’s a delay. A real 6L80 rebuild addresses the factory engineering weaknesses while it’s on the bench.
Teardown Inspection — What to Look For
Pull the 18-bolt pan first. What you find inside tells the whole story before you even touch the valve body.
| Inspection Point | Bad Sign | What It Means |
|---|---|---|
| Pan debris | Large metal chunks | Planetary or wave plate failure |
| Fluid color | Black / burnt smell | Severe clutch overheating |
| TEHCM filter gasket | Missing or damaged | Line pressure loss |
| 1-2-3-4 piston | Visible cracks | Delayed forward engagement |
| Center support | Etched gaskets | Internal cross-leaks, shift flare |
The Specialized Tools You Can’t Skip
The 6L80 rebuild requires Kent-Moore J-tools. Trying to do this without them risks destroying components you just paid to replace.
- J-46624 Seal Installer Set: A three-piece Teflon seal installation kit. The protector cone shields the seal during installation, the pusher seats it in the groove, and the sizer compresses it back to operating diameter so nothing tears during assembly.
- J-46625 Holding Fixture: Mounts the case to a bench and lets you rotate it during assembly. You need this.
- J-24396 Clutch Alignment Tool: Centers the clutch plate splines so the hub slides in clean.
- T-135PRBRAC Leak Tester: Pressure tests the 1-2-3-4 and 3-5-R drums for invisible cracks. Skip this and you might reinstall a cracked drum.
Hydraulic Fixes — The Sonnax Zip Kit
Sonnax’s 6L80 upgrade lineup includes the Zip Kit (Part No. 6L45-6L90-MINI), which tackles hydraulic pressure loss with drop-in parts that don’t require reaming. It directly addresses:
- Low line pressure and overheating
- Harsh or slipping TCC apply
- Solenoid codes like P0776
- 4-5-6 clutch failure from regulator valve wear
This isn’t optional for a long-lasting rebuild — it’s standard practice among serious builders.
Hard Part Upgrades for Real-World Durability
Stock components can’t always handle the demands of towing or performance driving. Sonnax’s technical resources outline the key replacements:
| Part | Upgrade | Why It Matters |
|---|---|---|
| 4-5-6 Clutch Hub/Shaft | 300M high-strength steel | Prevents shaft fracture under high torque |
| 1-2-3-4 Piston | Billet aluminum/steel | Eliminates OE cast piston cracking |
| 4-5-6 Apply Piston | High-capacity billet | Adds clutch surface area, removes wave plate |
| 3-5-R Apply Ring | Upgraded steel | Allows an additional friction plate |
Killing the Heat Problem
Heat is the silent destroyer of every 6L80 transmission. It breaks down Dexron VI fluid, hardens rubber seals, and causes flare shifts. Monster Transmission’s common problems guide is direct about this: high thermal loads — especially in trucks that tow — accelerate bearing and bushing wear at a rate the factory fluid change schedule doesn’t account for.
Thermal Bypass Delete for 2014+ Vehicles
2014-and-later 6L80 applications use a thermal bypass valve that restricts cooler flow until the fluid warms up. When it sticks closed, the transmission overheats even without a load. TransParts Warehouse covers the fix: a bypass delete kit (like the TransGo STL010) eliminates the valve entirely, giving you constant cooler flow. Temperature drops are significant — well worth the simple installation.
If you’re unsure whether the delete is right for your use case, this Silverado community discussion breaks down the tradeoffs honestly.
Deep Aluminum Pans
Swapping the stock stamped steel pan for a cast aluminum deep pan from B&M or PML adds real benefits. PML’s 6L80 deep pan adds roughly 2 quarts of fluid capacity, which increases thermal mass and slows heat buildup. The cooling fins on the exterior help shed heat to the air. A magnetic drain plug captures ferrous debris before it reaches the filter — and makes future fluid services faster.
Rebuild vs. Remanufactured: Which One Makes Sense?
Reddit’s transmission building community puts local rebuild costs at roughly $4,200 to $4,850 for a full job. A remanufactured unit from a reputable supplier runs $5,300 to $6,800. The difference is what you get.
| Feature | Local Rebuild | Factory Reman |
|---|---|---|
| Clutches/Seals | Standard kit | Upgraded high-energy materials |
| Torque Converter | Often reused or stock relined | New billet multi-plate converter |
| TEHCM/TCM | Original reused | New or remanufactured |
| Oil Pump | Cleaned and reinstalled | Remachined and re-bushed to spec |
| Testing | Road test only | Full dyno validation |
| Warranty | 12 months / 12,000 miles | 3–6 years / Unlimited mileage |
A local rebuild makes sense when you want a custom setup — a specific stall converter, tailored shift tuning, or you’re pulling the unit yourself to save on labor. A reman makes sense when you want a warranty that actually covers you and a unit that’s been dyno-verified before it ships.
Installation and Programming — Don’t Skip These Steps
Bolting in a freshly rebuilt 6L80 and driving it cold is a great way to destroy your investment in the first 100 miles.
The Installation Checklist
The Moveras 6L80 installation guide outlines the critical steps:
- Flush the cooler lines properly. An aerosol flush can won’t cut it. Use a heated back-flush machine. Old converter debris in the cooler will contaminate a new build immediately.
- Inspect the flex plate for cracks — common on high-mileage trucks.
- Clean and grease the crankshaft pilot bore to ensure proper converter hub alignment.
- Check all grounds. Poor grounds cause voltage spikes that kill the TEHCM. This is one of the most overlooked steps.
The Fast Learn Procedure
The 6L80 TEHCM must be programmed using GM’s SPS2 system through Techline Connect. Monster Transmission’s installation guide is clear: you cannot skip this. The TCM needs to learn the exact fluid volume required to apply each clutch pack.
The procedure requires:
- A battery maintainer keeping voltage between 12V–16V during programming
- Vehicle on level ground, engine at idle
- Three shift cycles from Park to Reverse before initiating the Fast Learn sequence via scan tool
Skip the Fast Learn and the transmission will shift harshly or hunt between gears until it learns — or until it damages something trying.
What the 6L80 Can Be With the Right Build
The 6L80 has real weaknesses from the factory. The torque converter, the wave plate, the thermal bypass valve, the oil pump bores — these aren’t surprises to anyone who works on them regularly. But the aftermarket has answered every single one of those weaknesses with better parts.
A rebuild that uses a billet converter, a Zip Kit, 300M steel shafts, an updated 3-5-R drum, a deep pan, and a proper bypass delete creates a transmission that’s genuinely stronger than what GM shipped. Pair it with correct SPS2 programming and a cleaned cooling circuit, and you’ve got a unit that’ll handle whatever you throw at it.
The 6L80 specs and identification guide from Gearstar is worth bookmarking as a reference for confirming part numbers and application-specific details during your build.
Whether you’re doing a bench build at home, working with a local shop, or ordering a reman unit — knowing what this transmission actually needs is the difference between a repair that lasts a year and one that outlasts the vehicle.