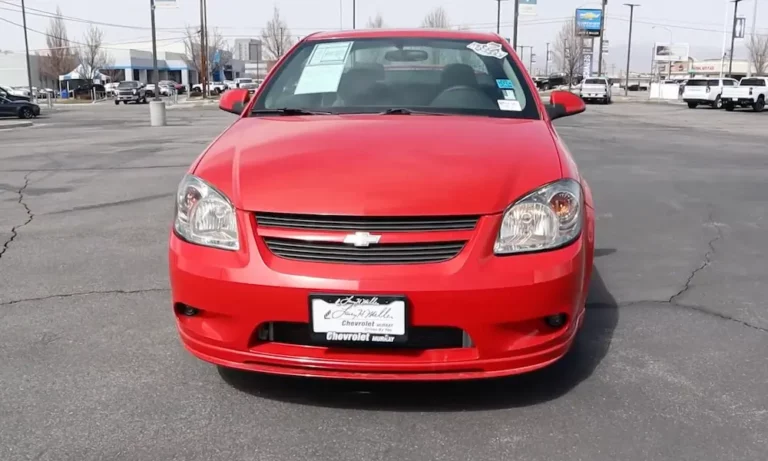
Got a puddle of gas under your Cobalt? You’re dealing with one of the most dangerous problems these cars face. Chevy Cobalt fuel line leaks affect hundreds of thousands of vehicles and create serious fire risks. Here’s everything you need to know to fix it safely and affordably.
The Real Problem Behind Chevy Cobalt Fuel Line Leaks
Your Cobalt’s fuel lines are rotting from the inside out. GM wrapped the metal fuel lines near your left rear wheel with foil heat shields to protect them from exhaust heat. Sounds smart, right? Wrong.
These heat shields create a perfect trap for water and road salt. The moisture sits against the fuel line coating, slowly eating through the protective layer. Once that coating fails, the metal underneath corrodes fast.
NHTSA investigations found this happens at three specific spots:
- Where polymer blocks attach fuel lines to the car’s underbody
- Under insulation wraps near the exhaust pipe and muffler
- Where foil-covered shields trap moisture and create concentrated corrosion
The worst part? GM designed it this way. They knew the heat shields would trap moisture, but they shipped millions of cars anyway.
Which Cobalts Are Affected
Not all Cobalts have this problem. The fuel line leak issue mainly hits:
- 2005-2010 Chevrolet Cobalts (all trim levels)
- 2008-2009 Chevrolet HHRs (same platform, same problem)
If you live in the “salt belt” states, your risk jumps dramatically. About 85% of complaints come from areas where winter road salt accelerates the corrosion process.
States with the highest failure rates include:
- Michigan, Ohio, Pennsylvania
- New York, Wisconsin, Minnesota
- Illinois, Indiana, Iowa
- Any state that dumps salt on roads all winter
How to Spot a Chevy Cobalt Fuel Line Leak
Stop driving immediately if you notice any of these signs:
Immediate Danger Signals
- Strong gas smell while driving or after parking
- Visible fuel puddles under your car (especially near the left rear wheel)
- Wet spots or stains on your garage floor or driveway
- Fuel odor inside the cabin (extremely dangerous)
Secondary Warning Signs
- Hard starting when the engine’s hot
- Engine sputtering under acceleration
- Poor fuel economy
- Check engine light (sometimes)
Don’t mess around with fuel leaks. Gas dripping near your hot exhaust system can ignite without warning. One mechanic put it bluntly: “Gas is dripping near the exhaust and that can spell disaster.”
The Government Investigation That Went Nowhere
Between July 2020 and August 2023, NHTSA investigated Cobalt fuel line failures. Here’s what they found:
| Investigation Results | Numbers |
|---|---|
| Vehicles affected | 614,000+ |
| Complaints received | 208 total |
| Complaints with visible leaks | 39 cases |
| Average failure mileage | 111,000 miles |
| Geographic concentration | 85% from salt belt states |
Despite these alarming numbers, NHTSA closed the investigation in August 2023 without ordering a recall. Their reasoning? The failures are “highly detectable” and GM’s complaint rates were supposedly low.
Translation: They’re saying it’s your problem to fix.
Related Recalls You Should Know About
While the main fuel line corrosion issue wasn’t recalled, GM has issued several fuel system recalls for Cobalts:
- Recall 09V-419: 2006-2007 Cobalts for fuel pump module leaks (specific regions only)
- Recall 12V-459: 2007-2009 Cobalts for fuel pump module cracks
- Multiple other recalls for fuel pump assembly issues
Check if your VIN is covered by entering it on NHTSA’s recall lookup tool.
Professional Repair Costs (Prepare Your Wallet)
Dealers and shops love fuel line jobs because they’re labor-intensive. Here’s what you’ll pay:
| Repair Type | Cost Range | What’s Included |
|---|---|---|
| Basic section repair | $250-$500 | Replace damaged section only |
| Complete line replacement | $600-$1,100 | Full system, both lines |
| Dealer estimate | $800-$1,100 | Premium labor rates |
Why so expensive? Mechanics often need to drop the engine cradle and move rear suspension components for full access. You’re paying for 4-6 hours of labor at $100+ per hour.
DIY Repair Options That Actually Work
Smart Cobalt owners fix this themselves for a fraction of dealer costs. Here are your options:
Budget Fix: Compression Fitting Repair ($30-$50)
Perfect for single-section failures. You’ll cut out the bad section and splice in new tubing with compression fittings.
What you need:
- 3/8″ steel fuel tubing
- Compression fittings (5/8″ and 9/16″)
- Tubing cutter and pipe bender
- Basic hand tools
Pros: Cheap, fast, gets you back on the road
Cons: Other sections will probably fail later
Complete Replacement Kits ($40-$200)
Several companies make complete replacement systems:
- Covers filter to mid-section
- Nylon construction resists corrosion
- Basic protection, budget-friendly
- Braided stainless steel construction
- SAE tested to 6000 PSI
- Professional-grade materials
- Premium stainless steel won’t corrode
- 2-day free shipping
- Best long-term solution
AGS Pre-Bent Kit
- Galvanized steel with exact factory bends
- CNC precision for perfect fit
- Good middle-ground option
Individual Parts Approach ($7-$98)
Buy exactly what you need:
- Basic repair kits with compression fittings: $7-$8
- Individual fuel line sections: $6.99-$98.99
- Custom lengths cut to order
Step-by-Step DIY Repair Process
Safety first: Work outside, away from heat sources. Keep a fire extinguisher nearby. Relieve fuel system pressure before starting.
Locating the Leak
Most leaks happen near the left rear wheel where heat shielding traps moisture. You’ll see dark stains or active dripping in this area.
Basic Repair Steps
- Remove heat shield clips and plastic brackets holding the damaged section
- Cut out corroded area using tubing cutters (cleaner than a hacksaw)
- Measure replacement length needed (always add extra for bending)
- Bend new tubing to match original routing
- Install compression fittings on both ends
- Test for leaks before final installation
Complete Replacement Process
- Disconnecting fuel filter and associated lines
- Cutting lines at multiple attachment points
- Following manufacturer instructions for new kit installation
- Reusing original quick-connect fittings where possible
Essential Tools for DIY Success
Must-have tools:
- Fuel line disconnect tools (3/8″ size for Cobalts)
- Tubing cutter (not a hacksaw – you need clean cuts)
- Pipe bender for custom routing
- Jack stands rated for your car’s weight
- Safety equipment (gloves, eye protection)
Nice-to-have tools:
- Magnetic parts tray
- Fuel pressure gauge
- Work light or headlamp
- Creeper for comfort
Preventing Future Fuel Line Failures
Once you fix the immediate problem, protect your investment:
Smart driving habits:
- Never let your tank drop below 1/4 full (fuel cools the pump)
- Avoid driving through deep puddles in winter (road salt splash)
- Park in garages when possible
Maintenance strategies:
- Inspect fuel lines every oil change
- Apply protective coating to vulnerable areas
- Consider upgrading to stainless steel lines in high-corrosion zones
- Wash the undercarriage regularly in winter
Why This Problem Exists (And GM Knew It)
GM’s engineering team made a critical design flaw. They wrapped fuel lines in foil heat shields to protect against exhaust heat, but created moisture traps instead.
The AGE coating protection system was supposed to prevent corrosion. But when water and road salt get trapped under the heat shield, they concentrate against the coating until it fails.
Once the coating degrades, bare metal corrodes rapidly. It’s not a matter of if, but when.
GM knew about this problem by 2009 when they started getting complaints. They issued limited recalls for some fuel pump issues but never addressed the systematic fuel line corrosion. By the time NHTSA investigated, hundreds of thousands of vehicles were affected.
Long-Term Solutions That Work
Upgrade materials: Stainless steel and nylon lines resist corrosion better than factory steel. They cost more upfront but last longer.
Improve routing: Some DIY mechanics reroute lines away from heat shield areas entirely. This requires custom bending but eliminates the moisture trap problem.
Regular inspection: Check your fuel lines every few months, especially if you live in salt belt states. Catching corrosion early prevents dangerous leaks.
Protective coatings: Apply marine-grade anti-corrosion products to replacement lines. It’s cheap insurance against future failures.
The Bottom Line on Chevy Cobalt Fuel Line Leaks
Your Cobalt’s fuel line leak isn’t a minor maintenance issue – it’s a serious safety hazard that could cost you everything. GM designed a flawed system, the government chose not to force a recall, and now you’re stuck with the repair bill.
The good news? You can fix this problem yourself for $30-$200 instead of paying a dealer $600-$1,100. Whether you choose a quick compression fitting repair or invest in a complete stainless steel replacement system, don’t delay this repair.
Fuel leaking near hot exhaust components creates extreme fire risk. One garage fire or highway incident could cost far more than any repair bill.
Fix the leak, upgrade the materials, and get back to enjoying your Cobalt safely.