Dealing with oil leaks in your Chevy Cruze can be frustrating, but you’re not alone. Identifying the common areas of oil leaks in your Cruze—such as the valve cover, oil pan, and oil filter housing—can help you tackle the issue more effectively. You’ll discover signs to watch for and fixes to consider, making it easier to keep your car running smoothly. Stick around to learn how to solve your oil leak problems.
Common Causes of Oil Leaks in Chevy Cruze
Oil leaks in the 2014 Chevy Cruze can arise from several common issues. These include problems with the valve cover gaskets, oil pan gasket, or timing cover gasket. Additionally, difficulties with the PVC tube assembly may contribute to the leaks.
Faulty Valve Cover Gaskets
The valve cover gasket seals the space between the valve cover and the engine. Over time, this gasket can become brittle or cracked. When this happens, oil starts to leak out, sometimes pooling around the engine. It might even drip onto parts like the exhaust manifold, which can cause burning oil smells.
Check around the edges of the valve cover to detect leaks early. An easy sign to look out for is oil on top of other engine parts. Once you spot this, it’s time to replace the gasket. Regular checks can prevent more severe damage since oil leaking onto hot surfaces can be risky.
Damaged Oil Pan Gasket
The oil pan gasket seals the joint between the oil pan and the bottom of the engine. It’s crucial for keeping oil from leaking. Frequent exposure to heat and oil can cause it to degrade. As it breaks down, you’ll often see oil pooling under your car.
On the 2014 Chevy Cruze, if you notice oil spots where you park, this could be the reason. It’s wise to inspect the oil pan area for cracks or worn-out gaskets. Fixing this involves replacing the gasket, a relatively straightforward task that can halt further oil loss and related problems.
Worn Out Timing Cover Gasket
The timing cover gasket seals the area between the timing cover and the engine block. Over time, it may weaken due to engine heat and constant use. When it wears out, oil can start to leak, especially when the engine is running.
Symptoms can include oil leaks near the timing cover area. You might also see oil dripping from the bottom of the engine. Addressing a faulty timing cover gasket promptly can prevent more significant issues. Regular maintenance checks will help you identify and solve these leaks before they grow.
PVC Tube Assembly Issues
The PVC (Positive Crankcase Ventilation) tube assembly is part of the engine’s ventilation system. It helps manage oil pressure by allowing gases to escape. If this tube becomes clogged or broken, it can lead to pressure buildup. This might cause oil to leak from other engine seals.
Inspect the PVC tube assembly regularly for blockages or damage. Ensure it is clear of obstructions to maintain proper ventilation. If there’s a clog or the tube is damaged, replace it to restore proper function. This small fix can help prevent bigger oil leak problems in your engine.
Diagnostic Steps
When tackling an oil leak in your Chevy Cruze, you’ll need to follow a few diagnostic steps to identify the root cause. These methods, such as visual inspection, pressure testing, and using an oil leak dye test, are straightforward and effective.
Visual Inspection
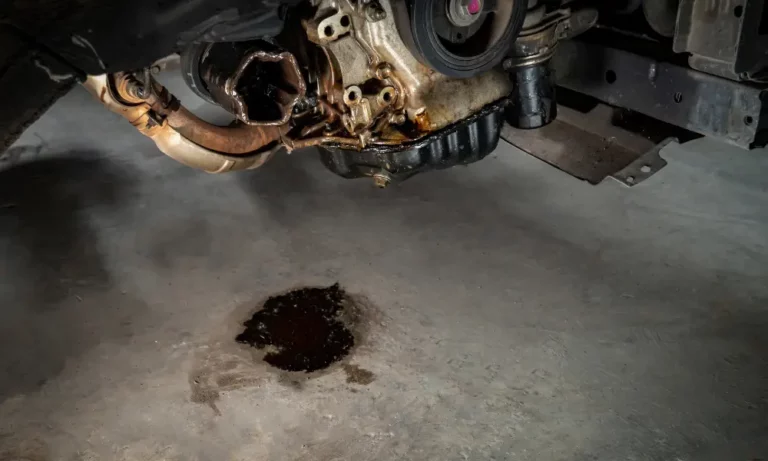
Start by visually examining the area around your car’s engine for any obvious oil drips or stains. Open the hood and use a flashlight to check for signs of oil around seals, gaskets, and the oil filter. Pay attention to the oil feed line.
Look beneath your vehicle to see if oil has pooled or dripped onto the ground. Sometimes, leaks might not reach the ground if they aren’t significant, so ensure you check the entire engine area. Keep an eye out for oily residue or burning oil smells while the engine runs.
Pressure Testing
Pressure testing helps pinpoint the source of persistent oil leaks. This involves applying pressure to the engine’s oil system to recreate leak conditions. A technician or local mechanic may be needed to perform this procedure.
They will connect a special tool to the engine and assess whether any seals or gaskets are faulty. This method is especially useful after a visual inspection if the source of the leak isn’t immediately clear. It’s a bit more technical, but a good mechanic will know how to do it right.
Oil Leak Dye Test
An oil leak dye test can be very effective in identifying elusive leaks. Purchase a UV dye specifically designed for oil systems and add it to your engine. Run the engine for a short time to let the dye circulate.
Afterward, use a UV flashlight to inspect the engine. The dye will glow under the light, showing you exactly where the oil is leaking. This method is particularly helpful when a mechanic is trying to diagnose multiple leak areas. It provides a clear and visual indication of the problem spots.
Taking your Cruze for a short test drive after any repairs allows you to see if the leak persists, confirming the issue is resolved.
Repair And Maintenance
Repairing and maintaining an oil leak in your Chevy Cruze can involve a few different steps. Understanding how to handle valve covers, seals, and other components helps you address the problem effectively and maintain your car’s performance.
Replacing Valve Cover and Seals
The valve cover on your Chevy Cruze is crucial for preventing oil leaks. If you’re dealing with a bad valve cover, you’ll likely need to replace it along with the seals. First, remove the old valve cover carefully. Check the valve cover gasket for signs of wear or damage. If it’s cracked or old, replace it with a new gasket to ensure a tight seal. Installing a new GM valve cover can be a good option as it’s designed specifically for your model, guaranteeing proper fit and function.
After removing the old parts, clean the area thoroughly before installing the new cover and seals. Apply sealant around the edges as needed, but be careful not to overapply, as this can lead to other problems.
Fixing Timing Cover and Crankshaft Seal
The timing cover gasket and crankshaft seal can also be culprits in oil leaks. If oil is leaking from the timing cover area, check the gasket for any wear or cracks. You may need to remove the timing cover to access the gasket and replace it properly.
Next, examine the crankshaft seal. If you find it’s leaking, replacing the crank seal is essential to stop the oil from seeping. An oil seal sleeve may be required for a snug fit and to prevent further leakage. Always inspect these parts regularly and replace them when necessary to avoid more significant issues down the line.
Installing a New GM Valve Cover
Using a new GM valve cover can provide you with peace of mind, as it is specifically made for your Chevy Cruze. This replacement ensures proper alignment and minimizes the chances of oil leaks due to poor fitting or material defects.
Installation involves setting the cover onto the engine block after cleaning the surfaces and replacing any worn gaskets. Ensure that all bolts are tightened to the correct specifications to avoid warping the cover, which might cause another leak. Always double-check for missing parts or damage before closing up your engine.
Sealant and Heli-Coil Application
In some oily messes, using a sealant helps secure the seals and prevent leaks. Apply it with care, focusing on the areas where leaks are most likely to occur. Heli-Coil inserts can be a lifesaver if you’ve stripped threads in your engine block. They help restore these threads, ensuring that components like bolts hold securely. Adding a sealant along with the Heli-Coil can further enhance the tightness and reduce the likelihood of future leaks.
Use these materials sparingly. Overuse can result in clogs or even damage engine components. Always follow manufacturer instructions for the best outcome.
Professional Mechanic Services
While some repairs can be done at home, others should be left to a professional mechanic. Complex issues, such as those involving the timing system or hard-to-reach areas, can benefit from a trained eye. Local mechanics might offer insights specific to Chevy Cruze models that ensure more efficient repairs.
Taking your car to a reputable shop also allows for comprehensive inspections. Mechanics can spot additional issues that might have gone unnoticed, potentially saving you from more severe repairs later. Don’t hesitate to consult a professional when in doubt about your repairs.
Preventative Measures
Taking steps to prevent oil leaks in your Chevy Cruze can save you from costly repairs and maintain your car’s efficiency. Focus on regular maintenance tasks and professional check-ups to keep your engine in top shape.
Regular Oil Change
Changing your oil regularly is key to preventing leaks. When oil gets old, it loses its ability to protect your engine’s components. Fresh oil helps keep the engine parts lubricated, which reduces wear and tear. It’s recommended to change the oil every 3,000 to 5,000 miles.
During an oil change, always use the right type of oil for your Chevy Cruze. Consult your owner’s manual to ensure you are using a compatible oil grade and brand. This can prevent issues like seal degradation or oil breakdown. Use a reliable service for oil changes, whether it’s a professional garage or a well-equipped DIY setup at home.
Routine Mechanical Check-Up
Regular check-ups by a qualified mechanic are essential for spotting potential problems early. During these visits, mechanics can inspect key parts like gaskets, seals, and the oil feed line. Worn or damaged parts can be replaced before they lead to leaks.
Ask your mechanic to perform a comprehensive check, including the PCV valve and other components that are prone to wear. A good mechanic will inform you about any necessary repairs or parts that need monitoring. Keeping a record of these check-ups can also help track any recurring issues, ensuring your Chevy Cruze remains leak-free.
Special Considerations for 1.4L Turbo Engines
When dealing with 1.4L turbo engines, you need to pay attention to specific issues like handling increased pressure and ensuring that all seals perform properly. These factors are crucial to prevent oil leaks and other potential problems.
Handling Increased Pressure
1.4L turbo engines create more pressure than non-turbo engines. This increased boost can lead to stress on engine parts if not managed correctly.
A common area for concern is the valve cover. The pressure can push oil past worn seals or gaskets. Keeping the valve cover in good condition helps prevent leaks at the top of the engine.
Another thing to watch out for is the boost control. If it malfunctions, it might cause excessive pressure buildup in the engine. Ensure the turbo boost is set correctly to avoid undue stress on engine components. Regular checks can help maintain optimal pressure levels and keep your engine running smoothly.
Ensuring Proper Seal Performance
Seals and gaskets are crucial in preventing oil leaks, especially in 1.4L turbo engines. A common problem area is the front of the motor. Over time, seals can wear out and become less effective under the high pressure produced by the turbo.
Regular inspection of seals can catch potential leaks early. Focus on areas like the oil feed line to the turbo, which can be prone to leaks if seals harden or crack.
It’s important to replace seals and gaskets with ones made for turbo engines. These are built to withstand higher pressures. Maintaining these parts helps ensure your engine remains leak-free and running efficiently. If you notice oil seepage, address it promptly to avoid more extensive repairs.