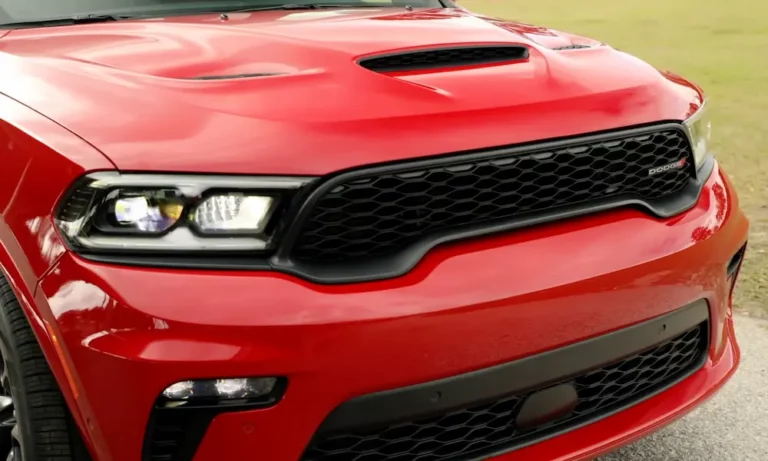
Finding your Dodge Durango’s battery shouldn’t feel like a treasure hunt. But depending on your model year, it might be exactly that. This guide covers every generation — from the 1998 originals to today’s dual-battery setups — so you know exactly where to look, what tools you need, and what to watch out for.
Where Is the Battery on a Dodge Durango?
Here’s the short answer: it depends on the year.
- 1998–2003: Engine bay, driver or passenger side
- 2004–2010: Engine bay, near the firewall or behind the headlight
- 2011–present: Under the front passenger seat
That last one catches a lot of people off guard. Dodge moved the battery inside the cabin starting with the 2011 redesign — and for good reason. But it also means the replacement process is totally different from what most people expect.
Let’s break it down by generation.
1998–2003 Durango: Under the Hood
On the first-generation Durango, the battery sits in the front corner of the engine bay. Depending on the trim, it could be on the driver’s side or the passenger’s side.
The 5.2L and 5.9L Magnum V8 engines are big, though. So the battery isn’t always visible the moment you pop the hood. The air filter housing often blocks the terminals, and you’ll likely need to remove a plastic shroud or the air cleaner assembly to get clear access.
What you need:
- 10mm wrench for the terminal clamps
- 13mm socket for the hold-down bracket
One thing to know: Disconnecting the battery on these early models can trigger a radio security lockout. You’ll need a four-digit code from your owner’s manual or a dealership to get your audio system back.
The standard battery for this era is a BCI Group 65, rated between 650–800 cold cranking amps (CCA). Given how hard a large V8 is on a battery, plan on replacing it every four years.
| Feature | 1998–2003 Spec |
|---|---|
| Battery location | Engine bay (driver or passenger side) |
| Battery group size | BCI Group 65 or 27 |
| Common tools needed | 10mm wrench, 13mm socket |
| Likely interference | Air filter housing, plastic engine cover |
| Electronics risk | Radio security code required |
2004–2009 Durango: Hemi Era, Still Under the Hood
The second-generation Durango brought in the iconic 5.7L Hemi V8, but the battery stayed in the engine bay. You’ll typically find it near the firewall or tucked behind the passenger-side headlight assembly.
The bigger deal with this era is what happens when you disconnect the battery. These models use more sophisticated control modules — the ECM and TCM both store “learned” driving behaviors. Pull the battery, and the transmission resets its adaptive memory. Your shifts may feel off for several drive cycles while the system relearns your driving style.
Pro tip: Use a memory saver before you disconnect. It keeps the modules powered during the swap and saves you from a week of awkward gear changes.
The replacement steps are standard:
- Remove the hold-down bracket (10mm or 13mm bolt)
- Loosen the negative clamp first
- Then the positive
- Lift out the Group 65 battery
- Reverse the process for installation
2011–Present Durango: Battery Under the Passenger Seat
This is the one that surprises everyone. Starting with the 2011 redesign, Dodge moved the Durango to a unibody platform shared with the Jeep Grand Cherokee — and relocated the battery to a compartment under the front passenger seat.
Why? Two reasons. First, the newer Hemi engines run hot, and engine-bay heat kills batteries faster. Second, placing the battery lower in the cabin improves weight distribution in a three-row SUV.
This generation also switches to AGM (Absorbent Glass Mat) batteries — not flooded lead-acid. AGM batteries are sealed, vibration-resistant, and won’t off-gas under the seat. Still, every Durango from 2011 on includes a small plastic vent tube that channels any gases through the floor pan to the outside. Don’t forget to reconnect that tube after a swap.
How to Access the Battery (2011–2024)
The full step-by-step access procedure goes like this:
- Slide the front passenger seat to its highest and furthest-forward position
- Lift the carpet or plastic panel behind the seat tracks — it pops up by hand or with a trim tool
- Disconnect the negative terminal first, always
- Use a 13mm socket with a long extension to reach the hold-down bolt at the base of the battery well
- Lift the battery out and disconnect the vent tube before pulling it free
- Drop in the new battery, reconnect the vent tube, and reverse the steps
The dead-battery problem: If the battery is fully dead, the power seat won’t move — and you can’t reach the battery. Here’s what to do: use the remote jump-start posts under the hood to feed power to the vehicle’s electrical bus. That gives the seat motor enough juice to slide forward. More on those posts below.
| Model Years | Battery Location | Why It’s There |
|---|---|---|
| 1998–2003 | Engine bay, front | Shared Dakota platform, traditional layout |
| 2004–2010 | Engine bay, rear/side | Hemi engine access |
| 2011–present | Under front passenger seat | Thermal protection, weight balance |
2016–Present: Two Batteries? Yes, Really.
If your Durango has the 3.6L Pentastar V6 and came with an Engine Stop-Start (ESS) system, there’s a second battery hiding under that passenger seat alongside the main one.
The main battery is a large AGM unit (Group 94R/H7). The auxiliary battery — a smaller Group MTX-AUX14 — keeps your Uconnect screen, climate control, and lights running during those brief moments when the ESS shuts the engine off at a red light. When the engine restarts, the main battery handles the starter motor’s power draw.
When that auxiliary battery starts to fail, you’ll see a “Stop-Start Unavailable” message on the dash. That’s your cue.
V8 models don’t use the ESS system. The 5.7L R/T, 6.4L SRT, and 6.2L Hellcat all run a single high-capacity AGM battery. Simpler setup, but they need serious CCA — up to 900 — to turn those big engines over.
| Engine / Trim | Stop-Start (ESS)? | Battery Setup | Group Size |
|---|---|---|---|
| 3.6L V6 (SXT, GT) | Yes (2016+) | Dual: main + aux | 94R/H7 + Aux 14 |
| 5.7L V8 (R/T, Citadel) | No | Single | 94R/H7 |
| 6.4L V8 (SRT) | No | Single | 49/H8 |
| 6.2L V8 (Hellcat) | No | Single | 49/H8 |
Remote Jump-Start Posts: Your Best Friend
Because the battery is buried under the seat, Dodge built a remote jump-start system into the engine bay of every 2011–2024 Durango. You can charge, jump-start, and run diagnostics without ever touching the interior compartment.
Pop the hood and look on the passenger side near the firewall. You’ll find:
- A red plastic cap marked with a + sign — that’s the remote positive post. Flip it open to connect your jumper cable.
- A metal grounding stud bolted to the frame or engine block — that’s your negative connection point.
The Right Jump-Start Order
Connect cables in this sequence to protect the electrical system:
- Red cable → positive terminal of the donor vehicle
- Red cable → red-capped remote positive post on the Durango
- Black cable → negative terminal of the donor vehicle
- Black cable → remote grounding stud on the Durango (not the battery negative itself)
Using the grounding stud instead of the battery’s negative post matters. It minimizes the risk of a spark near the battery well, where gases can accumulate if the battery’s failing.
The Intelligent Battery Sensor: Don’t Skip This Step
Modern Durangos have an Intelligent Battery Sensor (IBS) on the negative terminal. This sensor tracks the battery’s charge level, temperature, and current draw — and tells the alternator how hard to work.
Here’s the catch: if you swap in a new battery without registering it, the alternator might keep charging at a higher voltage designed for your old, worn-out battery. That’s hard on a brand-new unit and shortens its lifespan significantly.
Some Durangos eventually self-register after a few sleep cycles and drive cycles. But the safest move is using a scan tool to run a Battery Sensor Reset or Battery Replacement Registration right after the swap. Any shop with a proper diagnostic tool can do this in minutes.
Picking the Right Battery: Group Size Matters
Installing the wrong battery isn’t just inconvenient — it can be dangerous in a tight under-seat compartment. Here’s what the different generations need:
| Spec | 1998–2010 | 2011–Present (Standard) | 2016–Present (Stop-Start) |
|---|---|---|---|
| Primary group size | BCI Group 65 | DIN H7 (94R) | DIN H6 (48) |
| Auxiliary battery | N/A | N/A | Aux 14 |
| Chemistry | Flooded lead-acid | AGM | AGM (required) |
| Cold cranking amps | 650–750 | 800 | 700–800 |
One thing to watch: the Group 94R uses a reversed terminal layout compared to a standard Group 94. The “R” means the positive and negative posts are on opposite sides. If you grab the wrong one, the terminals won’t reach — or worse, they’ll reach the wrong cables. Double-check before you buy.
For 2011-and-newer Durangos, flooded lead-acid batteries aren’t recommended, even if they fit the tray. AGM batteries are sealed and vibration-resistant, which matters when a battery lives on the floor of an SUV cabin. They also recharge faster, which the ESS system depends on.
Fleet and Pursuit Models: A Unique Challenge
Law enforcement Durangos add another layer of complexity. Pursuit packages often include a 220-amp alternator and an 800+ CCA heavy-duty battery — similar to what you’d find in a Ram diesel truck.
The battery is still under the passenger seat. But many Pursuit models have a police partition bolted to the floor in a way that blocks the access panel entirely. Fleet technicians sometimes have to loosen or fully remove the partition just to change the battery.
On top of that, police upfitter wiring for light bars, radar, and computers often runs right through the floor well. Pulling the battery without checking the routing first can damage that specialized wiring harness — which is not a cheap fix.
The Durango Pursuit Upfitter Guide recommends using dedicated grounding points in the rear cargo area and behind the center console for permanent equipment installs. This keeps accessory wiring off the battery terminals and prevents interference with the vehicle’s CAN bus — the network that lets all the control modules talk to each other.
Quick Reference: Dodge Durango Battery Location by Year
- 1998–2003: Engine bay, front corner (driver or passenger side)
- 2004–2009: Engine bay, near the firewall or behind the passenger headlight
- 2011–2024: Under the front passenger seat (accessed by sliding the seat forward and lifting a floor panel)
- 2016+ V6 with ESS: Two batteries under the passenger seat — one main AGM, one small auxiliary
If you’re still not sure, the official owner’s manual for your specific year is the definitive reference. And if the battery’s completely dead and the seat won’t budge — head straight for those remote jump-start posts under the hood. They’re there for exactly this situation.