Staring at a blank screen when you shift into reverse? You’re dealing with one of the most common Dodge Journey headaches. The good news: this isn’t rocket science, and you don’t need a dealer to solve it. Here’s what’s actually wrong with your backup camera—and how to fix it without spending $900.
What Your Screen Is Actually Telling You
Your backup camera doesn’t just “break randomly.” The specific symptom you’re seeing is a diagnostic clue that points directly to the problem.
The Total Black Screen
If your Uconnect display goes completely black when you shift into reverse, you’re looking at a power failure. The camera isn’t getting electricity, or it’s so dead that it can’t send any signal back to your screen.
Here’s what causes it:
The trunk sensor trick. Your Journey has a safety feature that disables the camera if the liftgate is open. A faulty trunk sensor can tell your computer the gate is open when it’s not, killing the camera feed. Check your dashboard—if you see a “trunk is not closed” warning, that’s your culprit.
Blown fuse. Fuse F107 protects your camera system. If it’s blown, you get nothing. More importantly, if it blows twice, you’ve got a short circuit somewhere in the wiring.
Dead camera module. The camera’s internal electronics can fail completely, especially on 2019-2020 models affected by the microprocessor recall.
The Blue Screen or “Camera Unavailable” Message
This is completely different from a black screen. When you see a blue screen or an error message saying the camera is unavailable, your Uconnect system is actively working. It’s receiving the reverse signal, it’s looking for the camera, but the data stream is corrupted or missing.
The main cause? Thermal fatigue cracks in the camera’s microprocessor solder. The camera gets power, but its internal processor is fried and can’t send video data.
This symptom is the signature failure mode in the 2019-2020 Dodge Journey recall, affecting 77,671 vehicles. If you own one of these models, stop reading and call your dealer for a free camera replacement.
Flickering, Glitching, or Rolling Image
Does your camera work sometimes but cut out when you open the liftgate? Do you see static lines or a rolling image? You’ve got a broken wire.
Solid-state electronics either work or they don’t. Intermittent failures mean something mechanical is breaking contact. In 99% of cases, that’s the liftgate wiring harness—the rubber boot that protects wires between your liftgate and the vehicle body.
These wires bend and stretch thousands of times. Cold weather makes the insulation brittle. Eventually, the copper cracks, and the wire makes and breaks contact as the liftgate moves.
Check These Three Things Before You Touch a Wrench
You don’t need to buy parts yet. These zero-cost checks solve the problem more often than you’d think.
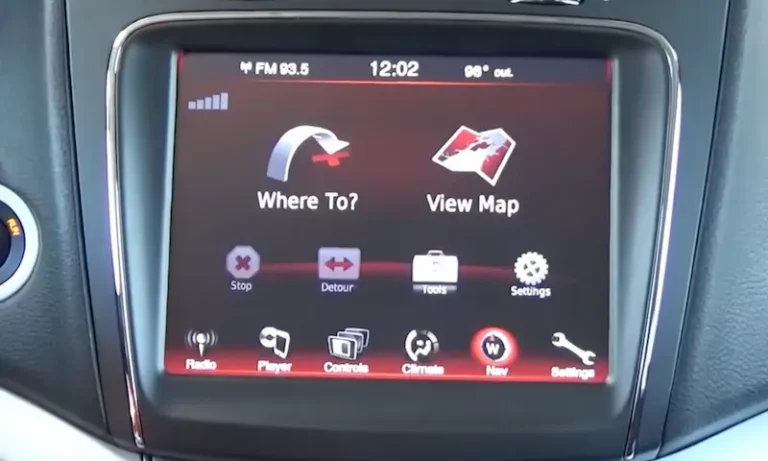
Step 1: Check Your Uconnect Settings
Someone—maybe a dealer tech, maybe you—disabled the camera in your Uconnect software. It takes 30 seconds to check.
Tap Settings on your touchscreen, then Safety & Driving Assistance. Look for “Parkview Backup Camera” and make sure it’s checked. If the box is empty, tap it to re-enable the camera.
This setting can reset after a dead battery, a jump start, or routine service. It’s embarrassingly common.
Step 2: Reboot Your Uconnect System
Your Uconnect is a computer. Like any computer, it crashes. A soft reset fixes glitches that cause persistent camera errors.
For the 8.4 Uconnect system:
- Turn the ignition to “Run” (engine can be off)
- Press and hold both the Volume knob and the Tuner knob simultaneously
- Keep holding for 10-20 seconds
- The screen will flash the Dodge logo, then go black
- Release the buttons and wait 30-60 seconds for the reboot
If the reset fixes your camera (even temporarily), the problem is software, not hardware. Your next step is to check for Uconnect software updates.
If the reset does nothing, you’ve got a hardware problem—fuse, wiring, or camera.
Step 3: Check Fuse F107
This is your first hardware check. Fuse F107 is a 10 amp (red) mini-fuse that protects your backup camera circuit.
Here’s where it gets tricky: it’s not in your main engine bay fuse box. It’s in a secondary fuse box underneath the passenger glove box.
- Open the passenger door and look in the footwell
- Find the fuse box cover (black plastic panel) under the glove box
- Pop off the cover (check the back for a fuse diagram)
- Locate F107 and pull it using the fuse puller tool clipped inside the box
- Hold it up to light and inspect the metal link inside
If the link is broken or burnt, replace the fuse. But here’s the critical part: if the replacement blows again, you have a short circuit. The most common cause is damaged wiring in the liftgate harness.
The Liftgate Harness: The Number One Hardware Failure
If your camera flickers, glitches, or works intermittently, this is almost always the culprit. The liftgate wiring harness is a known weak point on 2011-2017 Dodge Journeys.
The “Wiggle Test” (Confirms the Diagnosis in 10 Seconds)
This simple physical test will prove whether your harness is bad:
- Start the vehicle and engage the parking brake
- Shift into reverse (camera should be active)
- Open the liftgate
- Locate the rubber boot at the top of the liftgate where it connects to the roofline
- While watching the Uconnect screen, firmly grab and wiggle the rubber boot and the wires inside
If the image flickers, appears, or disappears in sync with your wiggling, you’ve confirmed a broken wire. That’s a 100% positive diagnosis.
The fix is to replace the entire liftgate wiring harness. You can repair individual wires, but it’s time-consuming and unreliable unless you perfectly seal the splices.
The replacement part is Mopar part number 68096863AF, which fits 2011-2020 models. It costs about $105-$112 from online Mopar dealers.
How to Replace the Liftgate Harness
This is a DIY-friendly repair if you’re comfortable removing interior trim panels.
- Open the liftgate and remove the large inner plastic trim panel (held by screws and pop clips)
- Disconnect the camera, lock actuator, and light connectors inside the liftgate
- Pry the rubber boot out of its socket in the liftgate’s metal body
- Remove the necessary trim panels inside the vehicle’s C-pillar to access the other end of the harness
- Disconnect the main harness connector from the vehicle body
- Pull the new harness through by taping its connector to the old one
- Seat the new rubber boot firmly in place
- Reconnect all components
- Test everything before you reinstall the trim panels
If It’s Not the Harness, It’s the Camera Module
You’ve checked the fuse. You’ve rebooted Uconnect. You’ve done the wiggle test. The camera still shows a permanent black or blue screen.
By process of elimination, you’ve isolated the problem to the camera module itself.
The camera sits in an exposed position on the liftgate. Water, mud, and debris accumulate there. Over time, moisture penetrates the seals, corrodes connections, or shorts internal electronics.
On 2019-2020 models, the internal microprocessor fails from thermal fatigue, even when the camera has power.
How to Replace the Camera Module
This is a straightforward plug-and-play repair.
- Remove the liftgate’s inner plastic trim panel
- Disconnect the camera’s electrical connector
- From inside the liftgate, remove the six 10mm nuts holding the outer applique (the trim piece with the Dodge logo and liftgate handle)
- Pop off the outer applique to expose the camera
- Remove the two Torx T20 screws holding the camera
- Install the new camera and reassemble in reverse order
Parts options:
- OEM Mopar camera (56054158AG): $458
- Aftermarket cameras (Dorman, TRQ): $104-$170
- Budget aftermarket options: $65
Aftermarket cameras are designed to plug directly into your factory harness. They work fine.
Check Your VIN: You Might Qualify for a Free Fix
Before you buy anything, check if your Journey is covered by an active safety recall.
2019-2020 Models: Recall 25V552 (FCA #59C)
77,671 Dodge Journey vehicles built between May 2, 2019 and December 21, 2020 are affected by a camera microprocessor defect.
Symptoms include a blank, black, blue, or inverted screen. Dealers will replace the camera for free.
Call Chrysler customer service at 800-853-1403 with recall number 59C, or check your VIN on the NHTSA website.
2018 Models: Recall U56
Certain 2018 Dodge Journey vehicles experience a loss of backup camera image, but the defect isn’t in the camera—it’s in the rearview mirror.
On some 2018 models (those with sales code GN4), the camera display and processing are integrated into the rearview mirror itself, not the Uconnect screen. Dealers will replace the mirror for free.
What the Dealer Will Charge You (Spoiler: It’s Ridiculous)
If your Journey isn’t under recall and you take it to a dealer or shop, here’s what you’ll pay.
The national average for a backup camera replacement is $713-$741. That breaks down to:
- Labor: $61-$90 (less than one hour)
- Parts: ~$652
The labor cost is reasonable. The parts cost is where you’re getting fleeced. The actual OEM Mopar camera costs $458 retail. The $652 estimate includes a $200 dealer markup.
And that $713-$741 estimate doesn’t include the $122-$179 “Electrical System Diagnosis” fee they’ll charge just to perform the same checks you’ve already done.
Your real out-the-door cost: $835-$920 for a repair that takes less than an hour.
DIY Cost Breakdown: What You’ll Actually Pay
Here’s what the same repair costs if you do it yourself:
| Component | Type | Part Number | Cost |
|---|---|---|---|
| Liftgate Harness | OEM Mopar | 68096863AF | $105-$112 |
| Camera Module | OEM Mopar | 56054158AG | $458 |
| Camera Module | Aftermarket (Dorman/TRQ) | Various | $104-$170 |
| Camera Module | Budget Aftermarket | Various | $65 |
The difference between a $110 harness and a $920 dealer visit is staggering.
Your Step-by-Step Diagnostic Game Plan
Here’s the exact order to diagnose Dodge Journey backup camera problems:
1. Check your model year first
- 2019-2020: Check your VIN for Recall 25V552. Call your dealer for a free camera replacement.
- 2018: Check your VIN for Recall U56. You might need a free mirror replacement.
2. Software checks (if not under recall)
3. Hardware checks
- Inspect Fuse F107 under the passenger glove box
- If the fuse is good (or blows again), perform the “wiggle test” on the liftgate harness
4. Isolate the failure
- If the wiggle test is positive: Replace the liftgate harness ($110)
- If the wiggle test is negative: Replace the camera module ($65-$458)
This methodical approach prevents you from replacing parts you don’t need. It also saves you from paying a dealer $835 to tell you what you already know.
Your backup camera isn’t broken forever. It’s one of four fixable problems: a setting, a glitch, a wire, or a camera. Now you know which one it is—and exactly how to fix it.