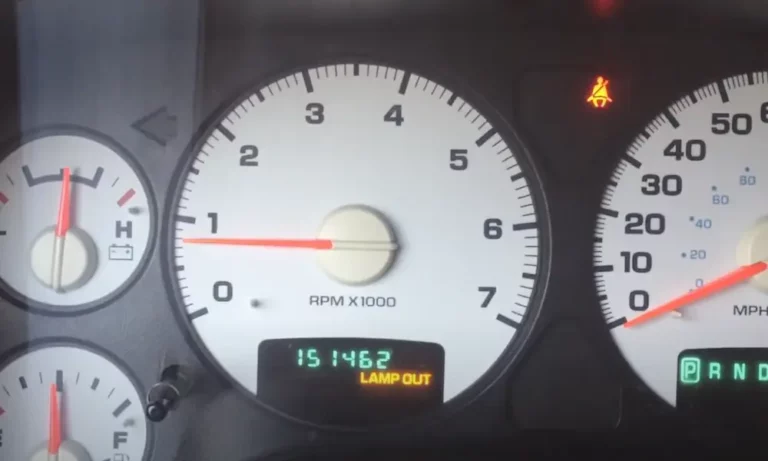
That flashing “lamp out” warning on your Dodge Ram’s dashboard can be more than just annoying—it’s trying to tell you something important about your vehicle’s lighting system. But what makes this warning particularly frustrating is that it often appears even when all your lights seem to be working perfectly.
If you’ve been searching for ways to silence that warning light and stop the incessant dinging, you’re in the right place. This guide will walk you through every potential fix, from the quick and simple to the more involved solutions.
What Does the “Lamp Out” Warning Actually Mean?
The lamp out warning in your Dodge Ram is designed to alert you when one of your vehicle’s exterior lights isn’t functioning properly. This monitoring system is particularly common in Ram trucks from the early 2000s.
When working correctly, this feature helps you identify burned-out bulbs that might compromise your safety or result in a traffic ticket. However, the system can sometimes trigger false alarms due to various electrical quirks.
Common Causes of Dodge Ram Lamp Out Warnings
Actually Burned-Out Bulbs
This might seem obvious, but the most straightforward cause is exactly what the warning suggests—a burned-out bulb. Even when a light appears to be working, it could have:
- A partially broken filament making intermittent contact
- A bulb that works when cold but fails when hot
- A bulb that works but doesn’t draw the expected amount of current
Check each exterior light carefully, including headlights, taillights, brake lights, turn signals, reverse lights, and license plate lights.
Poor Electrical Connections
Loose or corroded connections can trigger the lamp out warning even when the bulbs themselves are fine. The most common connection issues include:
- Corroded socket contacts
- Loose bulb fit within the socket
- Damaged wiring near the light assembly
- Poor ground connections at the tail lights
Heat-Damaged Components
The intense heat generated by headlights can damage nearby components over time, especially:
- Headlight socket assemblies
- Wiring harness connections
- Plastic components that have melted or warped
Aftermarket Modifications
If you’ve upgraded to LED lights, you’re more likely to experience this warning. Here’s why:
- LEDs draw significantly less power than traditional bulbs
- The truck’s monitoring system expects a certain level of resistance
- Without the expected resistance, the system thinks the bulb is out
How to Diagnose the Specific Problem
Before diving into repairs, you need to pinpoint which light is causing the issue.
Complete Exterior Light Check
Perform this check at night or in a dark garage for best results:
- Turn on your headlights (both low and high beams)
- Check your parking lights
- Activate each turn signal
- Press the brake pedal (have someone help you verify these)
- Turn on your hazard lights
- Shift into reverse to check backup lights
- Ensure your license plate lights are working
Use the “Rotating Technique”
For bulbs that appear to be working:
- Remove the bulb from its socket
- Rotate it 180 degrees
- Reinstall it in the socket
- Test to see if the warning disappears
This simple trick has solved the problem for many Ram owners by improving the contact between the bulb and socket.
Quick Fixes to Try First
Replace All Exterior Bulbs
Even if the bulbs look fine, replacing them is a cost-effective first step. For Dodge Rams:
- Taillights typically use 3057 or 3050 bulbs
- Headlights vary by model year and type (halogen vs. HID)
- Consider buying bulbs in pairs to ensure even brightness
Clean and Secure All Connections
Follow these steps for each light housing:
- Disconnect your battery (safety first!)
- Remove the bulbs from their sockets
- Clean the socket contacts with electrical contact cleaner
- Apply a small amount of dielectric grease to the bulb base
- Reinstall the bulbs, ensuring a snug fit
- Reconnect the battery and test
Check and Clean Ground Connections
Poor grounding is a common culprit, especially for tail light issues:
- Locate the ground wire connections (usually attached to the vehicle body near the lights)
- Remove the ground screws/bolts
- Clean both the wire terminal and the metal contact point on the vehicle
- Ensure you’re making metal-to-metal contact (no paint in between)
- Reattach the ground connection firmly
Advanced Solutions for Persistent Problems
Replace Headlight Socket Assemblies
If cleaning doesn’t work, the socket assembly might be damaged:
- Purchase a new high-temperature headlight socket assembly
- Disconnect the battery
- Access the back of the headlight assembly
- Disconnect and remove the old socket
- Install the new socket and reconnect
- Test to see if the warning is resolved
Add Resistors for LED Upgrades
If you’ve installed LED lights, adding load resistors can trick the system:
- Purchase 25W 6ohm resistors (one for each LED light)
- Connect each resistor in parallel with the LED light
- Mount resistors to a metal surface (they get hot!)
- Secure all connections with electrical tape or heat shrink tubing
| LED Type | Recommended Resistor | Installation Location |
|---|---|---|
| Headlights | 50W 6ohm | Mounted to metal, away from plastic |
| Turn Signals | 25W 6ohm | Parallel with LED connection |
| Brake/Tail | 25W 6ohm | Connected to brake light circuit |
ECM Maintenance for Electrical Issues
For persistent issues, the Electronic Control Module connections might need attention:
- Locate the ECM (between the fuse panel and fender)
- Carefully disconnect all connectors
- Inspect for corrosion or damage
- Clean contacts with electrical contact cleaner
- Apply dielectric gel to all connections
- Reconnect everything securely
Last-Resort Solutions
If you’ve tried everything else, consider these more involved approaches:
Component Replacement
Dealers might recommend replacing:
- Front Control Module (FCM) – approximately $350
- Power Distribution Center (PDC) – approximately $450
Before spending this much, try all the previous solutions first.
Wiring Bypass for Persistent Issues
Some Ram owners have successfully resolved stubborn problems by:
- Installing an independent relay system for headlights
- Bypassing the factory wiring with heavier gauge wire
- Creating dedicated circuits for problematic lights
This approach requires moderate electrical knowledge but can permanently solve the issue when nothing else works.
Prevention Tips to Avoid Future Problems
Once you’ve fixed your lamp out warning, these maintenance practices can prevent it from returning:
- Apply dielectric grease to all bulb connections during replacement
- Keep water out of light assemblies by checking seals
- Use only high-quality replacement bulbs
- Clean ground connections annually
- Avoid touching bulb glass with bare fingers when installing
Real Solutions from Ram Owners
Ram owners have shared these successful fixes:
- “I fixed mine by removing the bulbs, cleaning the sockets with electrical contact cleaner, and applying dielectric grease.”
- “Adding load resistors to my LED tail lights completely solved the lamp out warning.”
- “The issue was a tiny crack in one brake light bulb. It looked fine but was making intermittent contact.”
- “Cleaning the ground connection at the rear of the truck fixed my problem after trying everything else.”
By systematically working through these solutions, you can finally silence that annoying light and ensure your Dodge Ram’s lighting system is functioning as it should. Remember, this warning exists for safety reasons, so don’t ignore it—solve it!