Hearing a groan or shudder from your CR-V’s rear end during tight turns? That’s your differential fluid waving a white flag. A Honda CR-V differential fluid change is one of the most overlooked maintenance tasks — and skipping it can cost you thousands. This guide covers everything: the right fluid, exact capacities, torque specs, and step-by-step instructions. Read to the end before you touch a wrench.
Why Your CR-V’s Rear Differential Fluid Is Different
Most people assume differential fluid is just gear oil. In a Honda CR-V, that assumption is expensive.
Honda’s AWD system uses a Dual Pump System — a reactive setup that only engages rear-wheel drive when the front wheels slip. Inside the rear differential housing sit two hydraulic pumps, a wet multi-plate clutch pack, and a control valve body.
Here’s how it works:
- Both pumps spin at the same speed during normal driving
- The front wheels slip → the front pump spins faster → hydraulic pressure builds
- That pressure engages the clutch pack → torque transfers to the rear wheels
The fluid in this system isn’t just keeping gears lubricated. It’s acting as hydraulic fluid and a wet clutch friction medium at the same time. The moment that fluid degrades, clutch engagement suffers and internal wear accelerates.
The Only Fluid You Should Use
Honda’s fluid specification has evolved over the years. Early owner’s manuals allowed Dexron III ATF as an emergency fill. That caused clutch shudder and accelerated wear across the fleet, so Honda retroactively standardized one fluid for all CR-V generations.
Use Genuine Honda Dual Pump Fluid II. That’s it.
- US Part Number: 08200-9007 or 08200-9007A (sold in quart bottles)
- European Part Number: 0829399902HE (sold in one-liter bottles)
- Approved aftermarket alternative: ENEOS Import DPS Fluid
Never use standard hypoid gear oils rated API GL-4 or GL-5. They don’t contain wet clutch friction modifiers. You’ll know immediately — the noise from the rear axle will be immediate and severe, and the damage won’t be far behind.
Since every CR-V generation needs more than one quart for a standard service fill, always buy at least two quarts before you start.
Fluid Capacities by Generation
Don’t guess on this. Fill it short and the clutch runs dry. Overfill and you’ve got a mess.
| Generation | Model Years | Service Fill | Dry/Rebuilt Fill |
|---|---|---|---|
| 1st Gen | 1997–2001 | 1.10 qts | 1.30 qts |
| 2nd Gen | 2002–2006 | 1.06–1.27 qts | 1.27–1.48 qts |
| 3rd Gen | 2007–2011 | 1.27 qts | 1.59 qts |
| 4th Gen | 2012–2016 | 1.27–1.32 qts | 1.59 qts |
| 5th Gen | 2017–2022 | 1.32 qts | 1.59 qts |
| 6th Gen | 2023–2026 | 1.32 qts | 1.59 qts |
Torque Specs and the Mistake That Destroys Housings
This section might be the most important thing you read today.
The rear differential housing is cast aluminum. The drain and fill plugs are steel. Impact drivers routinely deliver 150–250 ft-lbs of torque. The aluminum threads inside the housing shear at 80–121 ft-lbs. The NHTSA published a Technical Service Bulletin in November 2023 documenting widespread housing thread failures caused by exactly this mistake.
The specified torque for both plugs is 35 ft-lbs (47 Nm). Some older guides say 32 ft-lbs — use 35 ft-lbs as the modern standard.
Rules that aren’t optional:
- Thread plugs in by hand first
- Finish tightening with a calibrated manual torque wrench
- Never use an impact driver on these plugs
- Replace the aluminum crush washers at every single service
Washer sizes differ by year:
| Model Years | Drain Plug | Washer (Drain) | Fill Plug | Washer (Fill) | Torque |
|---|---|---|---|---|---|
| 1997–2011 | 20mm | 94109-20000 | 20mm | 94109-20000 | 32–35 ft-lbs |
| 2012–2026 | 18mm | 90471-PX4-000 | 20mm | 94109-20000 | 35 ft-lbs |
Step-by-Step Honda CR-V Differential Fluid Change
Here’s the full procedure. Take your time — the tight clearances under the diff make this fiddly but totally doable.
What You’ll Need
- 2 quarts of Genuine Honda Dual Pump Fluid II
- New crush washers (matched to your year)
- 3/8-inch drive ratchet and an 18-inch breaker bar
- Calibrated manual torque wrench
- Fluid transfer hand pump or large syringe
- Drain pan
- Penetrating oil (PB Blaster works well)
- Brake cleaner and rags
The Procedure
Step 1: Warm up the fluid.
Drive the vehicle to get the fluid to operating temperature. Warm fluid drains faster and carries contaminants out with it.
Step 2: Secure the vehicle on a level surface.
Use a lift or jack the rear up on level blocks. A flat, level surface gives you an accurate fill level reading.
Step 3: Spray the plugs with penetrating oil.
Apply PB Blaster to both the drain and fill plugs. Wait five minutes.
Step 4: Remove the fill plug first.
Use your 18-inch breaker bar to loosen the upper fill plug. Remove it completely. This is critical — if the fill plug is seized and you’ve already drained the fluid, you’re stuck with an empty diff and a vehicle that can’t move.
Step 5: Drain the fluid.
Position your drain pan under the housing. Remove the lower drain plug on the driver’s side with your 3/8-inch ratchet. Let it drain completely.
Step 6: Clean and reinstall the drain plug.
Wipe the magnetic tip clean of any metal debris. Fit a new crush washer, thread it in by hand, then torque to 35 ft-lbs with your manual torque wrench. No impact driver.
Step 7: Pump in the new fluid.
Screw your hand pump onto the quart bottle. The clearance under the differential is too tight for direct pouring, so the pump is non-negotiable here. Fill through the upper fill port until fluid reaches the bottom edge of the fill hole and just starts to drip out. That drip means it’s full.
Step 8: Reinstall the fill plug.
New crush washer, thread in by hand. If clearance is tight, use a 3-inch extension on your torque wrench to reach it. Torque to 35 ft-lbs.
Step 9: Clean up the housing.
Spray brake cleaner on the housing and wipe it down. A clean housing makes it easy to spot any future weeping at a glance.
Diagnosing Shudder and Performing Clutch Burnishing
That groaning noise during a parking lot turn isn’t just annoying — it’s a symptom you can actually fix.
The cause is stick-slip friction inside the wet clutch pack. The friction modifiers in old fluid break down under heat and mechanical stress. The clutch plates can’t slip smoothly anymore, so they grab and release — and you hear it.
How to do a clutch burnishing:
- Complete a full drain and fill with fresh Dual Pump Fluid II
- Find a clear parking lot
- Drive tight figure-eight patterns, 5–10 times in each direction
- This forces the clutch plates to slip under load, driving fresh friction modifiers into the porous plate material
If the original fluid was heavily contaminated, do a second drain and fill right after burnishing. Residual oxidized fluid trapped in the clutch assembly will contaminate the fresh charge otherwise. For severely degraded systems, a complete flush kit containing three liters of fluid clears everything out properly.
How Often Should You Change It?
Honda’s Maintenance Minder system uses Code 6 to signal rear differential fluid replacement on AWD models. It tracks driving habits and operating conditions dynamically — so “every X miles” isn’t a fixed answer for everyone.
| Schedule | Initial Change | Subsequent Changes | Triggers |
|---|---|---|---|
| Normal | 7,500–15,000 miles | Every 30,000 miles | Standard driving, no towing |
| Severe | 7,500 miles | Every 15,000 miles or 2 years | Towing, mountain driving, temps above 110°F or below -20°F |
One important caveat: the Maintenance Minder can’t detect actual fluid condition or level. It predicts wear based on driving data. Monthly visual checks under the vehicle remain your responsibility regardless of what the dashboard says.
Resetting the Maintenance Minder After Service
Once you’ve completed the Honda CR-V differential fluid change, reset the system manually. It won’t reset itself.
| Model Years | Interface | Steps |
|---|---|---|
| 2023–2026 (9-inch screen) | Center Touchscreen | Accessory mode on → Home → Settings → Vehicle → Maintenance Info → Reset Items → Select rear differential (Item 6) → Confirm |
| 2017–2026 (7-inch screen) | Steering Wheel Controls | Accessory mode on → Home button → Settings → Maintenance Reset → Highlight Code 6 → Hold selector wheel 10 seconds |
| 2012–2016 | TRIP/RESET Button | Accessory mode on → Press TRIP/RESET until OIL LIFE displays → Hold 10 seconds until screen blinks → Release → Hold again 5 seconds |
| 2002–2011 | SELECT/RESET Knob | Accessory mode on → Press knob until ENGINE OIL LIFE displays → Hold 10 seconds until it blinks → Hold again 5 seconds to reset to 100% |
If you skip the reset, the system keeps calculating based on old data and you’ll get a false service reminder — or miss a real one. Two minutes to reset saves a lot of confusion later.
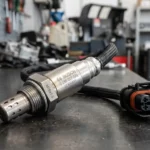
Inspecting a Replacement Differential Unit
If your differential carrier has failed mechanically, a used OEM unit is usually the most practical fix. Before you install a replacement, check these specific points:
- Drain and fill plug threads — look for any stripping or deformation from previous impact tool use
- Axle seals and input shaft seal — minor weeping is fixable; heavy staining means the unit may have run dry
- Input flange rotation — spin it by hand; smooth with light resistance is correct; grinding means worn bearings
- Input shaft play — minimal in-and-out or side-to-side movement only
- Aluminum housing — check for cracks and inspect all mounting points
- Mount bushings — replace them if worn while you’re already in there
Before removing the driveshaft, mark its orientation relative to the flange. Reinstalling it in the same position maintains rotational balance. The four 10mm flange bolts are your last step before torquing everything down and filling with fresh fluid.