That clicking sound from your dashboard isn’t your Jeep talking to you — it’s a cry for help. A failing blend door actuator can leave you sweating in July or freezing in January. This guide walks you through everything: symptoms, diagnosis, the actual replacement steps, and what to do after. Stick around — there’s a calibration trick at the end most people skip.
What Does a Blend Door Actuator Actually Do?
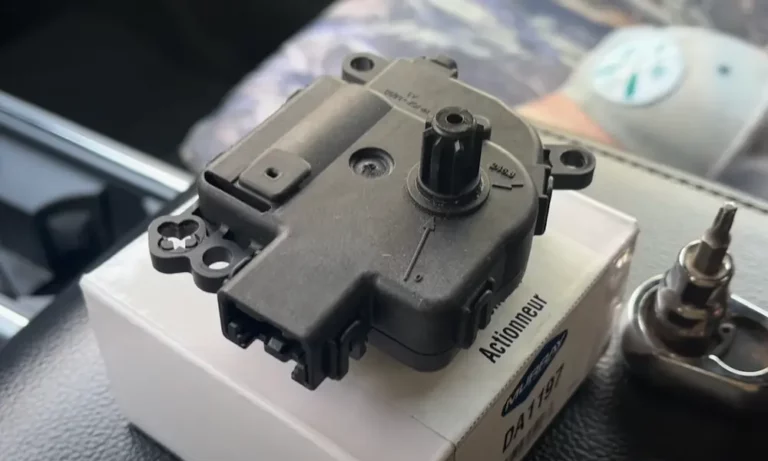
Your Jeep’s HVAC system uses small electric motors — called blend door actuators — to control flaps inside the heater box. These flaps mix hot and cold air to hit whatever temperature you set on the dial.
Think of it like a valve. You want 72°F? The actuator moves the door to a specific spot. Too hot? It shifts. Too cold? It adjusts. When the actuator fails, that door gets stuck — and you’re stuck with it.
Depending on your Wrangler, you’ve got between two and five of these actuators. Each one handles a different job: temperature, airflow direction, and recirculation.
| Platform | Actuator Count | Actuation Type | Main Failure Mode |
|---|---|---|---|
| Wrangler TJ (Pre-2007) | 1–2 | Cable/Vacuum | Cable snap or vacuum leak |
| Wrangler JK (2007–2018) | 3 | Full electronic | Internal gear shearing |
| Wrangler JL (2018–Present) | 4–5 (dual zone) | CAN-bus digital | Software sync or gear failure |
Signs Your Blend Door Actuator Is Failing
Don’t guess. These are the specific symptoms that point directly to the actuator.
That Clicking Sound Under the Dash
This is the big one. A repetitive clicking or ticking noise coming from behind your dashboard — especially when you start the car — is almost always a stripped gear inside the actuator.
The gears are made from nylon or acetal plastic. Over time, they dry out and become brittle. When the actuator tries to move a door that’s even slightly stuck, the teeth shear right off. The motor keeps spinning, but the gear just skips.
Some Jeep owners also report clicking after they park. That’s the system trying to “home” the actuators after shutdown. Creepy, but totally explainable.
Your Cabin Temperature Won’t Change
If the air stays lukewarm no matter where you turn the dial, the blend door is stuck in the middle position. If it’s locked on full hot or full cold, the actuator failed at one of its travel limits.
Try this quick test: move the temp knob from minimum to maximum. If you get zero change in air temperature, that’s your primary thermal confirmation of actuator failure.
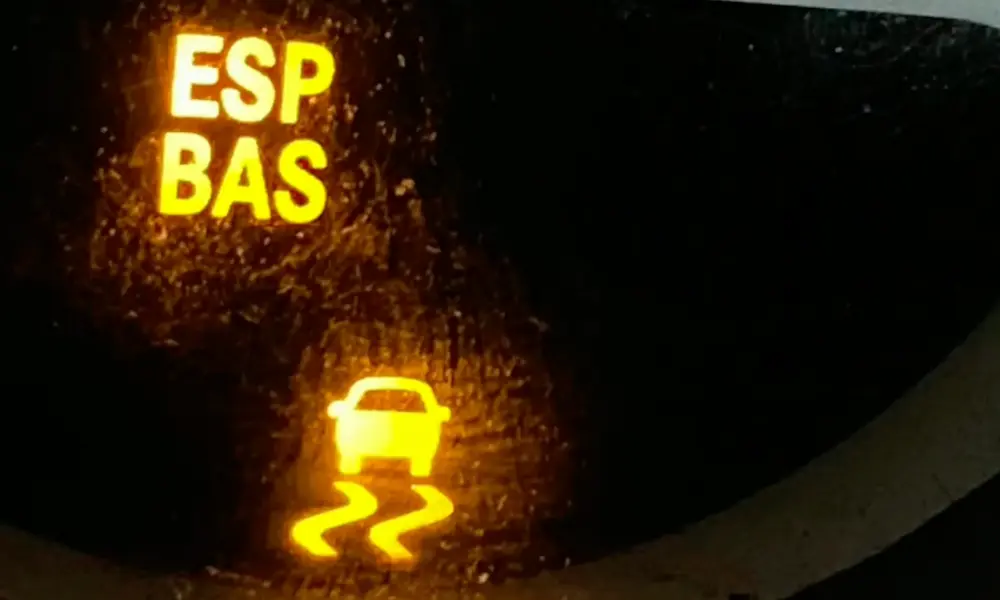
The Defrost Light Blinks on Startup
This one catches people off guard. When the actuator’s gear slips, the HVAC module detects a mismatch between where it told the door to go and where it actually is. On most Wrangler JK models, it reports this error by flashing the defrost light for 30–60 seconds after you start the car.
If you see that blinking light regularly, don’t ignore it.
Diagnose Before You Buy Anything
Replacing the wrong part wastes time and money. Run through this checklist first.
| Diagnostic Step | What to Do | What It Means If Actuator Is Bad |
|---|---|---|
| Acoustic check | Listen near dash at startup | Repetitive clicking or grinding |
| Thermal cycle test | Move temp knob full cold to full hot | No air temperature change |
| HVAC warning lights | Watch panel on ignition | Defrost light blinks on startup |
| Heater hose check | Feel both hoses when engine is warm | Both should be hot |
| Scan tool test | Monitor door position PIDs | Door position won’t change on command |
Don’t Skip the Heater Core Check
The Wrangler JK had cooling system problems that often get misdiagnosed as blend door issues. Before you tear apart your dashboard, pop the hood and feel both heater core hoses when the engine is warm. Both should be hot to the touch.
If one hose is hot and the other is noticeably cooler, your heater core is clogged. Replacing the actuator won’t fix that — and you’ll have done all that work for nothing.
Jeep Wrangler JK Blend Door Actuator Replacement
The driver-side actuator replacement on the 2007–2018 JK is notoriously tight. It’s not complicated — it’s just cramped. Budget 2–3 hours the first time.
Tools You’ll Actually Need
| Tool | Why You Need It |
|---|---|
| 1/4″ ratchet with 10″ extension | Reaches the deep brace bolts |
| Stubby Phillips screwdriver | Only thing that fits behind the duct |
| 45-degree bent long-nose pliers | Holds screws so you don’t drop them |
| Trim tool set | Separates air ducts without snapping tabs |
| 8mm and 10mm sockets | Standard Jeep dash fasteners |
Step-by-Step: JK Driver Side
Step 1: Disconnect the battery. Pull the negative terminal first. You’re working next to steering column wiring — don’t skip this step.
Step 2: Remove the knee bolster. This plastic panel sits under the steering column. It clips at the top and hinges at the bottom. Pull it off and set it aside.
Step 3: Unbolt the metal support plate. Behind the knee bolster, there’s a 10mm metal brace. Remove it. This is the main obstacle between you and the actuator.
Step 4: Split the floor duct. This is the hardest part. The lower air duct — the one that blows on your feet — blocks both actuator screws. It’s made of two plastic halves snapped together. Use a trim tool to carefully unsnap the tabs. Take your time here. The plastic is brittle, especially on older JKs.
Step 5: Twist and pull the inner duct half. Once the outer half is off, the inner half pulls down with a twisting motion. It’s held by friction and a couple small tabs.
Step 6: Remove the actuator. Two Phillips screws hold it in place. Use your stubby screwdriver here — nothing else fits. Hold the actuator with one hand while removing screws with the other. Dropping a screw into the dashboard is a bad day.
Step 7: Plug in the new actuator before mounting it. Use the temperature knob to rotate the motor arm until it matches the door track position. This is the alignment step most people skip — and then wonder why the gears strip immediately.
Step 8: Reverse the process. Reinstall everything, reconnect the battery, and move to calibration.
Jeep Wrangler JL Blend Door Actuator Replacement
The JL is a different animal. It uses T20 Torx screws instead of Phillips, and the passenger-side actuator is actually easy to reach — just drop the glove box and remove a section of floor duct.
One important JL trick: when you remove the actuator, the blend door tends to fall to the “full heat” position on its own. Use this to your advantage. Set your temperature controls to maximum heat before installing the new actuator. The door and the motor gear will already be aligned when you go to seat it.
Dual-Zone Temperature Problems on the JL
If your JL blows hot on one side and cold on the other, don’t immediately blame the actuator. That symptom also shows up with a low refrigerant charge in the AC system. Verify the AC is fully charged before replacing anything.
Here are the common JL actuator part numbers for reference:
| Part Number | Component | Typical Failure |
|---|---|---|
| 68301847AA | Temp valve actuator | Stripped gears, clicking |
| 68301848AA | AC/heater actuator | Calibration drift |
| 68364652AA | Temperature door actuator | Internal potentiometer failure |
| 68490114AA | Solenoid/actuator mix | High-mileage electrical short |
OEM vs. Aftermarket: Don’t Cheap Out Here
This is the part where a $35 decision can cost you a weekend. Modern Jeep HVAC modules check the electrical feedback from your actuator. Aftermarket units from Dorman or TRQ often have wider tolerances in their circuits — and the system fails the self-test, leaving you with the same blinking lights you started with.
| Brand | Type | Expected Lifespan | Price Range |
|---|---|---|---|
| Mopar | OEM | 7–10 years | $120–$150 |
| Dorman | Aftermarket | 2–5 years | $35–$50 |
| TRQ | Aftermarket | 2–5 years | $25–$40 |
| Four Seasons | Aftermarket | 3–6 years | $45–$60 |
Given that the JK driver-side job takes 2–3 hours of miserable contortion, the OEM Mopar part is the only sensible choice. You’re paying for the peace of mind that you won’t redo this job in 18 months.
If the blend door’s shaft or arm is what actually broke — not the motor — look into Dorman’s OE FIX repair kit. It lets you fix a broken door shaft without pulling the entire HVAC box apart.
Calibrate the System After Replacement
Here’s the step that makes or breaks the whole repair. Without calibration, the HVAC module doesn’t know the physical limits of the new door. It’ll overextend the motor and strip the gears on a brand-new part.
Manual Reset (No Scan Tool Needed)
This works on most JK models. Follow these steps carefully:
- Turn the ignition off and center the temperature knob
- Turn the ignition to the “Run” position
- Within 10 seconds, rotate the knob to full cold, pause, then full hot
- Repeat this sweep 2–3 times
- The module enters a learning mode and drives the doors to their physical stops
Electronic Calibration (The Right Way)
In a shop, use a bidirectional scan tool — JScan, Kingbolen Ediag Elite, or dealer-level WiTech software. The tool commands each door to move through its full range, records the voltage limits, and zeros the system.
For the JL, this step isn’t optional. The HVAC system connects through the CAN-bus network, and the Body Control Module needs to register the new component. If you skip calibration on a JL, the temperature split between driver and passenger sides will stay inconsistent.
Prevent the Next Failure
The blend door actuator fails faster when the doors are sticky or obstructed. A few habits keep them moving smoothly.
Replace your cabin air filter. It’s behind the glove box. A clogged filter lets debris build up on the blend door edges, creating physical resistance the actuator has to fight through every time you adjust the temperature.
Cycle your controls monthly. If a blend door sits in one position through an entire winter, its foam seal can stick to the door. The first time you turn the knob in spring, the actuator hits maximum torque trying to break it loose. Run your HVAC through its full range at least once a month — even in mild weather.
Be extra careful after off-road trips. High dust environments push grit into the heater box faster than normal driving. If you wheel your Jeep regularly, check the cabin filter more often than the standard interval.