Hitting the 4WD button in your Silverado only to find no lights and no response is more than just annoying—it’s potentially dangerous if you’re facing slick roads or tough terrain. The problem can range from a simple blown fuse to more complex issues with your transfer case. This comprehensive guide walks you through diagnosing and fixing this common Chevy Silverado problem without breaking the bank or losing your mind in the process.
How the Silverado 4WD System Should Work
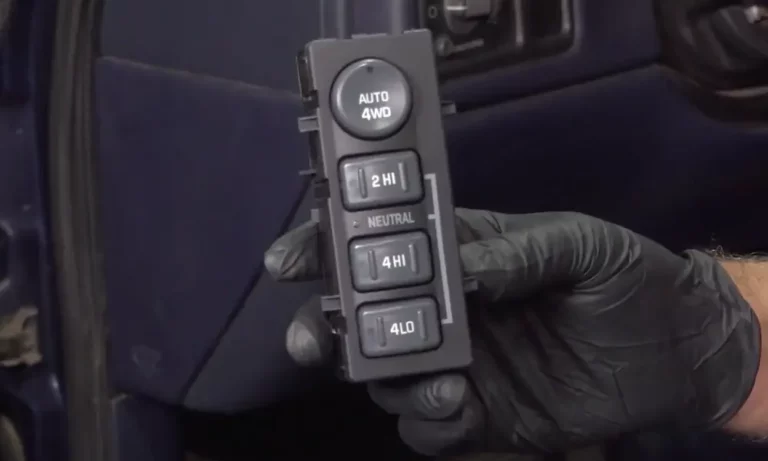
Your truck’s 4-wheel drive system relies on several key components working together. At the heart of it is the transfer case, which distributes power between front and rear axles. When you press that selector switch on your dash, it sends a signal to the Transfer Case Control Module (TCCM), which then activates various components to engage 4WD.
When everything’s running properly, the selector switch lights up to show which mode you’re in—2WD, 4-High, 4-Low, or Auto 4WD. No lights typically means there’s an electrical issue somewhere in this chain of command.
Common Symptoms Besides No Lights
When your 4WD switch lights aren’t working, you’ll likely notice other issues:
- Complete absence of any lights on the selector switch
- Momentary flashing when you turn the key, then nothing
- “Service 4WD” message on your dashboard
- “4WD OFF” error appearing while driving
- Inability to engage any 4WD modes
- System dropping back to 2WD after you try to engage 4WD
- Strange noises when attempting to engage 4WD
As one truck owner described on Reddit: “While I was trying to turn around in a driveway after missing a road, the truck spun its tires in reverse. Suddenly, the ‘4wd off’ message appeared on the Driver Information Center, and I lost access to all 4WD modes.”
The Most Common Causes (Start Here)
1. Blown Fuses (Check These First!)
Fuses are the simplest and most common culprit. Before diving into complex repairs, check these fuses:
- The ATC (Automatic Transfer Case) fuse under the hood (usually 20 amp)
- Fuse #67 in the engine compartment fuse box (2006-2013 models)
- The 4WD fuse inside the cab
- The TREC fuse (on some models)
One Silverado owner shared this experience: “On a 99 Silverado 5.3, the switch lights would not come on and it was stuck in 2WD. I replaced the actuator, checked the 4WD fuse in the cab, replaced the switch and the TCCM. Still no lights. Finally checked for power at TCCM. No power. There is a fuse under the hood labeled ATC, automatic transfer case. It’s a 20 amp fuse and it was blown.”
2. Bad Ground Connections
Poor ground connections are electrical system killers in Silverados. The two main grounds to check:
- Ground G105 at the lower front passenger side of the engine block
- Ground G200 in the dashboard
These connections can become corroded or loose over time, preventing proper electrical flow to your 4WD components. A thorough cleaning with a wire brush and securing the connections can often resolve the issue.
3. Transfer Case Control Module (TCCM) Failure
The TCCM is essentially the brain of your 4WD system. When it fails, nothing works right. Common TCCM issues include:
- Internal electrical failures
- Water damage from leaks (often around the A-pillar)
- Corrosion on connector pins
- Communication errors with other vehicle systems
The TCCM is typically located under the dash on the driver’s side, though exact location varies by model year.
4. Encoder Motor Problems
The encoder motor on your transfer case is a frequent failure point, especially in trucks with higher mileage. It contains a magnet that can develop “bad spots,” preventing proper position sensing.
As one Reddit user explained: “Your problem is very likely the encoder motor on the transfer case. They have a tendency to get bad spots on the encoder magnet to where the Transfer Case Control Module can’t tell if the motor is shifting to the selected position, in which case it defaults back to the last known position.”
5. Faulty Selector Switch
While less common than other causes, the selector switch itself can fail:
- Internal electrical connections can break
- Water or coffee spills can damage the switch
- Physical wear over time from repeated use
Diagnosing the Problem Step-by-Step
Step 1: Basic Electrical Checks
Start with the simplest checks:
- Inspect all fuses – Use a test light rather than just looking at them
- Check battery voltage – Low voltage can cause electrical gremlins
- Test for power at the switch – With ignition on, check if power is reaching the switch
Step 2: Ground Connection Inspection
Poor grounds are notorious for causing electrical issues in Chevy trucks:
- Locate ground G105 at the lower front passenger side of the engine block
- Check ground G200 in the dashboard area
- Clean all connections with a wire brush and tighten securely
- Check for green corrosion, loose bolts, or damaged wires
Step 3: Diagnostic Scan
Scan for error codes that could pinpoint the issue:
- Connect an OBD-II scanner
- Look for 4WD-related codes
- Common codes include those related to the transfer case motor or module
- U0102 code often indicates TCCM communication problems
Step 4: Check Transfer Case Fluid
Sometimes mechanical issues masquerade as electrical problems:
- Locate the transfer case fill plug
- Check the fluid level and condition
- Proper fluid should be clean—not black or contaminated
- Low fluid levels can cause erratic operation
One Silverado owner noted: “I did drain the transfer case fluid today. It wasn’t blue like it should be, or red. It was just black and dirty.”
Step 5: Test Component Function
If the basics check out, it’s time to test specific components:
- Encoder motor test – With a scanner that can run output tests
- Measure resistance at the motor and actuator
- Check for voltage at the TCCM connectors
DIY Repair Options
Fuse Replacement
- Consult your owner’s manual for fuse locations
- Remove the suspicious fuse using fuse pullers
- Replace with a new fuse of identical amperage rating
- If it blows again immediately, you have a short circuit that needs attention
Cleaning Ground Connections
- Disconnect the battery (negative terminal first)
- Locate the ground connections (G105 and G200)
- Remove the terminal and clean with a wire brush or sandpaper
- Apply dielectric grease to prevent future corrosion
- Reconnect and tighten properly
TCCM Reset
Sometimes a simple reset can clear electronic gremlins:
- Disconnect the negative battery terminal
- Wait 15-20 minutes (allows capacitors to fully discharge)
- Reconnect the battery
- Turn on ignition without starting the engine
- Wait for all systems to initialize
Encoder Motor Replacement
This is a more involved but common repair:
- Drain the transfer case fluid
- Disconnect the driveshaft (mark position first)
- Remove the encoder motor mounting bolts
- Replace with new unit
- Refill with correct fluid
- Reset the system by disconnecting the battery
“This happened to me and I had to replace the encoder motor,” wrote one truck owner. “It’s not hard if you can lift your truck and feel confident taking the front drive shaft off among other things.”
Selector Switch Replacement
For failed switches:
- Remove the trim panel around the switch
- Disconnect the electrical connector
- Remove the mounting screws
- Install new switch in reverse order
- Test operation before fully reassembling
Comparing Repair Costs
| Repair | DIY Cost | Shop Cost | Difficulty |
|---|---|---|---|
| Fuse Replacement | $2-5 | $50-100 | Very Easy |
| Clean Grounds | $0 | $75-150 | Easy |
| TCCM Reset | $0 | $50-100 | Easy |
| Encoder Motor | $80-150 | $350-600 | Moderate |
| Selector Switch | $50-120 | $200-350 | Easy |
| TCCM Replacement | $100-300 | $600-900 | Moderate |
| Transfer Case Rebuild | $300-600 | $1200-2000 | Difficult |
Preventive Maintenance Tips
Avoid future 4WD light issues with these maintenance practices:
Fluid Maintenance
- Change transfer case fluid every 50,000 miles or according to your manual
- Use the correct fluid type (often Auto-Trak II for transfer cases)
- Check for leaks regularly, especially around seals and gaskets
Electrical Care
- Keep battery terminals clean and tight
- Apply dielectric grease to electrical connections
- Protect your truck from water intrusion
Proper 4WD Operation
- Always return to 2WD when no longer needed
- Avoid excessive wheel spin while in 4WD
- Don’t force engagement if the system is making unusual noises
- Allow the system to cool if you get “4WD OFF” messages due to overheating
Advanced Diagnostic Tips
For those comfortable with more technical troubleshooting:
Testing the Encoder Motor Circuit
- Locate the encoder motor connector (usually on the transfer case)
- With ignition on, measure voltage at the connector
- Proper reading should be around 5 volts on the reference circuit
- Check for continuity in the ground circuit
Checking TCCM Communication
- Use a scanner that can monitor module communication
- Look for communication errors between the TCCM and other modules
- Verify CAN bus integrity if multiple module communication issues exist
Actuator Function Test
- Disconnect the encoder motor connector
- With ignition on, select different 4WD modes
- Listen for motor operation sound
- No sound indicates an electrical issue; grinding noise suggests mechanical problems
Real-World Case Studies
Case 1: The Mysterious Fuse Problem
A 2010 Silverado owner complained about no 4WD switch lights and inability to engage 4WD. After replacing the switch and encoder motor with no success, they finally found the ATC fuse under the hood was blown. Total repair cost: $3 for a fuse.
Case 2: The Ground Connection Nightmare
A 2008 Silverado had intermittent 4WD operation and no dash lights. Multiple shops diagnosed expensive parts failures. The actual issue? A corroded ground connection at G105 that someone had previously painted over during engine bay detailing. Cost of repair: $0 (just cleaning the connection).
Case 3: The Complete Failure
One 2014 Silverado owner experienced complete 4WD failure after spinning tires in snow. Diagnosis revealed a catastrophic front differential bearing failure that also damaged the transfer case motor. This worst-case scenario required replacing both components at a cost of over $2,000.