
So your 4L60E is slipping, shuddering, or just flat-out refusing to shift? This guide walks you through everything — from identifying your exact unit to torquing the last bolt. Stick with it to the end, and you’ll know exactly what breaks, why it breaks, and how to fix it so it doesn’t break again.
First, Know Exactly Which 4L60E You Have
Not all 4L60E transmissions are the same. GM made significant changes across its production run from 1993 to 2013, and mixing up parts from different eras is one of the fastest ways to ruin a rebuild before it starts.
The easiest way to identify your unit is by the case style and connector pin count. Check the identification tag on the right-rear pan rail — it’s either a sticker or a stamped code. This GM transmission identification guide from Speedway Motors breaks down the codes clearly.
Here’s a quick reference:
| Production Era | Case Style | Input Shaft | Connector | Key Detail |
|---|---|---|---|---|
| 1993 | 1-Piece | 298mm | 12-Pin | No TCC solenoid |
| 1994–1996 | 1-Piece | 298mm | 12/13-Pin | PWM TCC introduced in 1995 |
| 1997 | Transition | 298/300mm | 13-Pin | Varied by vehicle model |
| 1998–2005 | 2-Piece | 300mm | 13-Pin | Standard LS-series fitment |
| 2006–2013 | 2-Piece | 300mm | 17-Pin | Added ISS sensor and IMS |
The 1998+ two-piece case is easy to spot — it has a removable bellhousing and an extra bolt hole at the 12 o’clock position. The 2006+ units added an Input Speed Sensor and Internal Mode Switch, which is why they run a 17-pin connector instead of 13.
Read the Failure Before You Touch a Bolt
A smart 4L60E transmission rebuild starts with diagnosis, not disassembly. The 4L60E has predictable failure patterns. Each one points to a specific internal problem.
The 3-4 Clutch Pack: The #1 Killer
The 3-4 clutch pack fails more often than any other component in this transmission. It handles both third and fourth gear, and the factory design squeezes too many thin friction plates into a tight space. Heat warps them. Pressure bypasses the piston seals as they shrink with age.
The symptoms? RPM flares during the 2-3 shift, or the transmission feels like it drops into neutral when third gear is commanded.
The Sunshell: When Three Gears Disappear at Once
If your truck suddenly loses second gear, fourth gear, and reverse all at the same time — that’s the sunshell. The factory stamped-steel reaction shell is a known weak point. Its splines shear off, or the hub fractures under hard acceleration. This specific failure triad is an almost certain sign the sunshell is gone.
P1870 and the TCC Shudder Problem
The 1995–1996 introduction of Pulse Width Modulation for torque converter clutch control brought a headache with it. The TCC regulator valve constantly oscillates inside the aluminum valve body. Over time, it wears the bore out. Fluid cross-leaks as the transmission warms up, the PCM detects a speed mismatch, and it throws a P1870 “Component Slippage” code. The PCM then commands maximum line pressure as a protective measure — which is why your 1-2 shift suddenly feels like a kick in the back.
Symptom Mapping Table
| Symptom | Primary Failure | What’s Happening |
|---|---|---|
| RPM flare on 2-3 shift | 3-4 Clutch Pack | Worn friction or leaking seals |
| No 2nd, 4th, or Reverse | Sunshell | Hub fractured or splines sheared |
| Harsh 1-2 shift when hot | TCC Regulator Valve Bore | P1870 code, max line pressure triggered |
| No 3rd or 4th at all | 3-4 Clutch Pack | Complete friction burn-up |
| Sudden loss of all gears | Pump failure | Rotor damage or total fluid loss |
| Intermittent harsh shifts | Throttle Position Sensor | Erratic signal causing pressure spikes |
Tools You Actually Need for This Job
Don’t skip this section. Using the wrong tools — like prying on aluminum sealing surfaces or skipping Teflon ring resizing — causes immediate post-rebuild failure.
Here’s what you need before you start:
- Transmission holding fixture (J 8763-02 equivalent) — lets you rotate the unit 360° safely
- Clutch spring compressors (J 350 or T-0158-HD) — you need these to compress return springs in the input drum and reverse input drum to access snap rings
- Front pump puller (T-0033) — never pry the pump out; you’ll ruin the aluminum case sealing surface
- Teflon seal resizers (T-1503-Z or T-1574-Z) — the turbine shaft and stator rings must be expanded, installed, then resized to spec. Skip this step and they’ll shear when you install the drums
- Vacuum test equipment — Sonnax’s vacuum test guide shows exactly which valve body bores to test. Anything below 15–18″ Hg means the bore is worn and needs repair
- Servo pin length gauge (J 33037) — selects the correct 2-4 band apply pin for proper band clearance
Get the full rebuild tool kit designed for the 700R4/4L60E family if you’re going to do more than one of these builds.
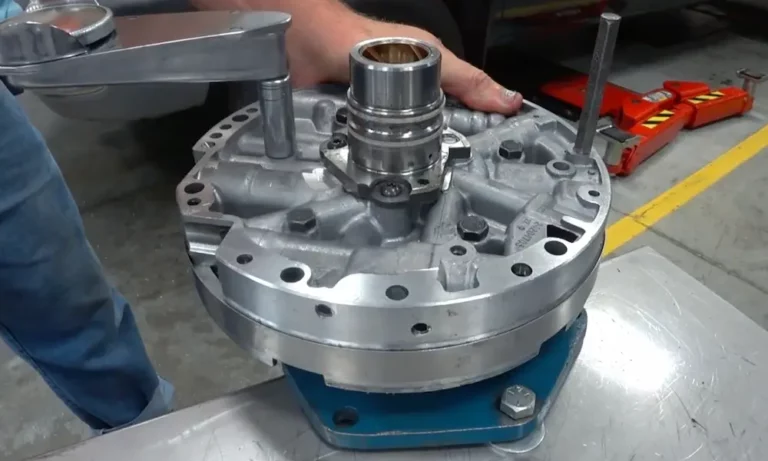
Disassembly: What to Watch For
Pull the pan first and read the debris. It tells you what failed before you take anything apart.
- Bronze slivers = bushing wear
- Steel particles = gear train or bearing failure
- Grey or black material = burned clutch frictions
When you remove the valve body, it’s held in by bolts of different lengths. Use a bolt mapping tray — every bolt goes back to its exact hole. Valve body bolts torque to just 8 lb-ft, and uneven torque causes valves to bind in their bores.
Capture all seven checkballs when you lift the valve body off. Check the separator plate for peening or punch-through where checkballs seal.
With the valve body out, extract the pump using the pump puller. On 1998+ units, the pump bolts use special O-rings — don’t lose them. Lift out the input drum, reverse input drum, and 2-4 band together, then work your way back through the input sun gear, input carrier, reaction sun shell, and finally the low/reverse clutch and rear planetary.
Rebuilding the Front Pump: Get This Right
The pump supplies every drop of hydraulic pressure in the transmission. If it’s worn, nothing else matters.
Split the pump cover from the body and inspect the vanes and rotor faces. Any scoring on the pump faces bleeds internal pressure. Early 4L60E units used a 10-vane pump; later ones switched to 13 vanes to reduce pressure pulsations.
Pressure Regulator Upgrades That Actually Matter
The Pressure Regulator (PR) valve lives in the pump cover and runs constantly. Its bore wears over time and lets pressure leak out — which means low line rise and burned clutches. Installing a Sonnax boost valve and sleeve kit is a non-negotiable upgrade. The O-ring design seals worn bores better than the factory valve ever did. Pair it with a slightly stiffer PR spring to bump baseline line pressure, and your clutches will hold harder without making the shifts feel brutal.
The 3-4 Clutch Pack: Stack It Right or Burn It Again
This is the heart of the 4L60E rebuild. Get the clutch configuration wrong and you’re pulling it apart again in 20,000 miles.
Clutch Count vs. Steel Thickness Trade-Off
More frictions give you more surface area. But thinner steels can’t shed heat. That’s the trade-off, and it matters.
| Configuration | Frictions | Steel Thickness | Clearance Target |
|---|---|---|---|
| Stock OEM | 6 | 0.106″ | 0.050″–0.080″ |
| Standard Rebuild | 7 | 0.078″ | 0.050″–0.065″ |
| Raybestos Z-Pak | 14 (single-sided) | Integrated | 0.050″–0.070″ |
| Performance 9-Pack | 9 | 0.060″ | 0.025″–0.040″ |
For most street and towing applications, seven high-energy frictions with thicker steels hit the sweet spot. Use a feeler gauge to measure clearance between the top friction and the backing plate. Too tight and the plates drag and burn. Too loose and they slip on every shift.
Check the input drum itself for coning or distortion. The Sonnax Smart Drum bolt-on reinforcement plate prevents the drum from flexing under pressure — worth every penny.
Mechanical Upgrades That Make This Rebuild Last
Replace the Sunshell — No Exceptions
Don’t reinstall the factory sunshell. Replace it with a heavy-duty unit like “The Beast” or the Sonnax Smart Shell. The Smart Shell swaps the plastic thrust washer for a thrust bearing, which cuts internal friction significantly and extends the life of surrounding components.
5-Pinion Planet Upgrade
If you’re running a heavier truck or towing regularly, swap the factory 4-pinion planets for 5-pinion units from the 4L65E. Five pinions spread torque across more teeth and more surface area, which reduces stress on each individual pinion pin.
Forward Sprag Upgrade
The forward sprag holds torque in first, second, and third gear. When it fails, the vehicle won’t move forward at all. Upgrade to the Borg Warner 29-element sprag for significantly more holding capacity than the factory 26-element version. When you install it, verify rotation — the inner race should freewheel clockwise and lock immediately going counterclockwise.
Valve Body: Fix the Hydraulic Brain
AFL Valve and Shift Valve Bores
The Actuator Feed Limit valve controls pressure to the solenoids. When its bore wears, solenoids get inconsistent pressure and shifts become erratic. Vacuum test every bore. Anything below 15–18″ Hg means you need to ream it and install an oversized valve.
Checkball Upgrades
Switch from steel checkballs to Torlon plastic balls. Steel balls pound the separator plate until they punch through. Torlon balls are softer on the plate and seal better in worn seats. Replace the separator plate while you’re in there — they’re cheap insurance.
The 4L60E uses 10 checkballs total: 7 in the valve body, 1 near the 3-4 accumulator in the case (this one falls out when you remove the valve body — don’t lose it), and 2 encapsulated in the case for low/reverse apply.
Corvette Servo Upgrade
The “Corvette” servo is one of the best bang-for-buck upgrades in a 4L60E rebuild. Its larger piston delivers roughly 35% more clamping force on the 2-4 band compared to the standard truck servo. That means firmer 1-2 shifts and a band that actually lasts. After installation, verify band clearance — more than 1/8″ of travel and the band will slip.
Air Check Every Circuit Before Final Assembly
Before you button everything up, apply 30–40 psi of regulated shop air to each case port. You’re listening for a crisp, audible clunk that confirms each clutch or band is applying correctly.
| Case Port | Expected Result | What It Confirms |
|---|---|---|
| 3-4 Port | Firm clunk | 3-4 Clutch apply |
| Forward Port | Solid clunk | Forward Clutch apply |
| 2nd Port | Band tightens | Servo apply |
| Low/Reverse | Firm clunk | Low/Reverse Clutch apply |
| TCC Port | Audible air hiss | TCC apply circuit |
Set Input Shaft End Play
Measure total input shaft end play with a dial indicator while pulling the shaft in and out. The spec is 0.005″ to 0.036″. Outside that range? Install a different thickness selective washer behind the pump thrust bearing. Excessive end play causes gear train noise and chews through thrust washers fast.
Torque Specs: Don’t Guess
| Location | Bolt Size | Torque |
|---|---|---|
| Valve Body to Case | M6 | 8 lb-ft (97 lb-in) |
| Oil Pan Bolts | M8 | 9 lb-ft (106 lb-in) |
| Pump to Case | M8 | 18 lb-ft |
| Extension Housing | M10 | 26 lb-ft |
| Manual Shaft Nut | M10 Nut | 23 lb-ft |
| Cooler Line Fittings | 1/4-18 | 28 lb-ft |
| Bellhousing Bolts | M10 | 52 lb-ft |
| Torque Converter | M10 | 45 lb-ft |
Use a calibrated torque wrench — especially on valve body bolts. Uneven torque binds the valves in their bores, and you won’t figure that out until the transmission is back in the truck.
Installation Details That Protect the Build
Flush the Cooler
The transmission cooler inside your radiator is full of debris from the old failure — metal shavings, friction material, contaminated fluid. Flush it thoroughly with a dedicated cooler flush product before you connect the new transmission. Skipping this step pushes all that contamination straight into your fresh build.
Torque Converter Seating
Install a new or remanufactured torque converter — never reuse the old one. Seat it fully into the pump by pushing and rotating until you feel three distinct engagement clicks as the converter splines engage the stator and pump. Then measure the distance from the bellhousing face to the converter pads — it should be approximately 1 inch. Less than that means it’s not seated, and it’ll destroy the pump within seconds of startup.
Initial Fill and Fluid Level
Start with approximately 5 quarts of fresh ATF to allow a safe startup. Cycle through all gear ranges to fill the converter and hydraulic circuits. Check the final fluid level with the engine idling and fluid at operating temperature (180–200°F). Total capacity runs 11–14 quarts depending on pan depth.
The 500-Mile Break-In Protocol
The first 500 miles determine whether this rebuild lasts 50,000 miles or 5,000. The new clutch material and band need time to seat properly.
- Use light to medium throttle — no wide-open throttle shifts
- Vary your speed — cycle through as many upshifts and downshifts as possible to seat the friction material evenly
- Don’t tow anything until after 500 miles
- Check the fluid at 500 miles — if it’s already dark or smells burned, something is slipping and needs attention immediately
If your vehicle uses an aftermarket controller like the US Shift Quick 4, calibrate the TPS before driving. For stock PCM units that received a new valve body, run a Quick Learn procedure to let the transmission relearn its adaptive shift tables.
Done right, a 4L60E transmission rebuild transforms a failure-prone factory unit into a transmission that’ll outlast the one that came before it — and probably the one after that.


