Is your lawn mower sputtering, surging, or flat-out refusing to start? A dirty carburetor is almost always the culprit. This guide walks you through Briggs and Stratton carburetor cleaning from diagnosis to reassembly — no fluff, no mystery. Stick around to the end, because the prevention tips alone will save you hours of frustration next season.
Why Your Briggs and Stratton Carburetor Gets Dirty
Here’s the short answer: modern gasoline is working against you.
Most pump gas in the United States contains ethanol. Ethanol attracts moisture from the air like a magnet. When your mower sits in a garage or shed during winter, that moisture mixes with the ethanol in the fuel bowl. Eventually, the water-and-ethanol blend separates from the gasoline and sinks to the bottom of the carburetor — a process called phase separation.
That water sits directly against the soft aluminum and brass components, triggering rapid corrosion.
Meanwhile, the gasoline itself breaks down. Lighter compounds evaporate, leaving behind heavier hydrocarbons that oxidize and harden into a sticky, amber-colored residue. Briggs & Stratton calls this varnish, and it clogs the tiny fuel passages that control your engine’s air-to-fuel mixture.
Even a slight restriction in a jet causes the engine to run lean — too much air, not enough fuel. That leads to overheating, surging, and hard starting.
Read the Symptoms Before You Start Cleaning
Don’t pull the carburetor apart until you’ve confirmed it’s actually the problem. Check compression and spark first. A weak spark or low compression will mimic carburetor issues every time.
Once you’ve ruled those out, match your symptoms to the table below:
| Symptom | Most Likely Carburetor Cause |
|---|---|
| Engine won’t start at all | Completely blocked main jet or phase-separated fuel in bowl |
| Engine surges rhythmically | Partially clogged idle or pilot jet circuit |
| Black smoke from exhaust | Ruptured float, stuck choke plate, or clogged air filter |
| Raw fuel leaking from intake | Failed needle valve not sealing against its seat |
| Starts fine but dies under load | Restricted main jet — enough fuel to idle, not enough to work |
| Idles too fast | Blocked high-speed air bleed or misadjusted idle screw |
One extra diagnostic trick: smell the fuel. If it smells sharp and acidic — like old turpentine — the fuel has degraded and varnish has likely spread through the entire fuel system.
Safety First — Every Single Time
Carburetor work involves flammable liquids and volatile vapors. Follow these steps before you touch anything:
- Work outside or in a well-ventilated space. No open flames, no sparks, no grinders nearby.
- Disconnect the spark plug wire first. This prevents accidental engine start while your hands are near moving parts.
- Wear nitrile gloves and safety glasses. Aerosol carburetor cleaner sprays back hard when it hits a blocked passage.
- Let the engine cool completely before you start. A hot exhaust manifold and spilled gasoline is a bad combination.
- Close the fuel shut-off valve or clamp the fuel line before removing the carburetor. This stops fuel from draining out of the tank onto your workspace.
CRC Industries recommends draining any residual fuel from the bowl into a proper catch container for correct environmental disposal — don’t just dump it on the ground.
The Right Tools and Solvents for the Job
Using the wrong cleaner causes more damage than the varnish itself. Here’s what actually works:
Aerosol Carburetor Cleaner
This is your everyday go-to. Berryman Products and CRC both make solid formulas that combine pressurized propellant with chemical solvency to blast debris out of narrow passages. Spray in short bursts and let it dwell for five to ten minutes on heavy buildup.
If you’re in California or another regulated state, look for a 50-state compliant formula that reduces volatile organic compound emissions without sacrificing cleaning power.
Dip Tank Solvents
For severe varnish, liquid immersion cleaners work better. Soak metal parts for 30 minutes to a couple of hours — but never soak rubber seals, plastic floats, or polymer components. Aggressive dip solutions will destroy them fast.
Also note: some dip formulas pit aluminum and zinc alloys if you leave parts submerged past the recommended window of two to four hours.
Biodegradable Degreasers
Simple Green and similar aluminum-safe degreasers diluted with warm water (roughly one part degreaser to three parts water) break down fuel deposits without harsh chemical risks. These are increasingly popular in repair shops that want to avoid toxic waste disposal headaches.
What to Absolutely Avoid
Never use vinegar or bleach on a carburetor. The acetic acid in vinegar and the sodium hypochlorite in bleach will rapidly corrode aluminum, brass, and zinc — and destroy any rubber seals that survived the original problem.
Mechanical Clearing Tools
Chemical cleaners sometimes aren’t enough for a packed jet. You’ll need something to physically dislodge the blockage. Your safest options:
- A strand of nylon fishing line
- A single fine wire pulled from stranded copper electrical wire
- The stripped wire from a bread tie
- A bristle from a steel wire brush for stubborn main jets
Do not use a standard drill bit or aggressive torch tip file aggressively. Even removing a microscopic layer of brass from a jet permanently enlarges the orifice. Because fuel flow increases with the square of the hole’s radius, a slightly larger jet means a dramatically richer mixture — and a carburetor that can’t be tuned back into spec.
Ultrasonic Cleaners
If you want the most thorough clean possible, ultrasonic cleaning technology is the gold standard. The machine generates high-frequency sound waves through a mild water-based solution, creating microscopic cavitation bubbles that strip varnish from blind holes and internal galleries that no brush or wire can reach. It’s non-destructive and leaves the carburetor looking factory-fresh.
How to Clean Each Carburetor Type
Briggs and Stratton uses several distinct carburetor designs. The cleaning approach changes depending on which one you have.
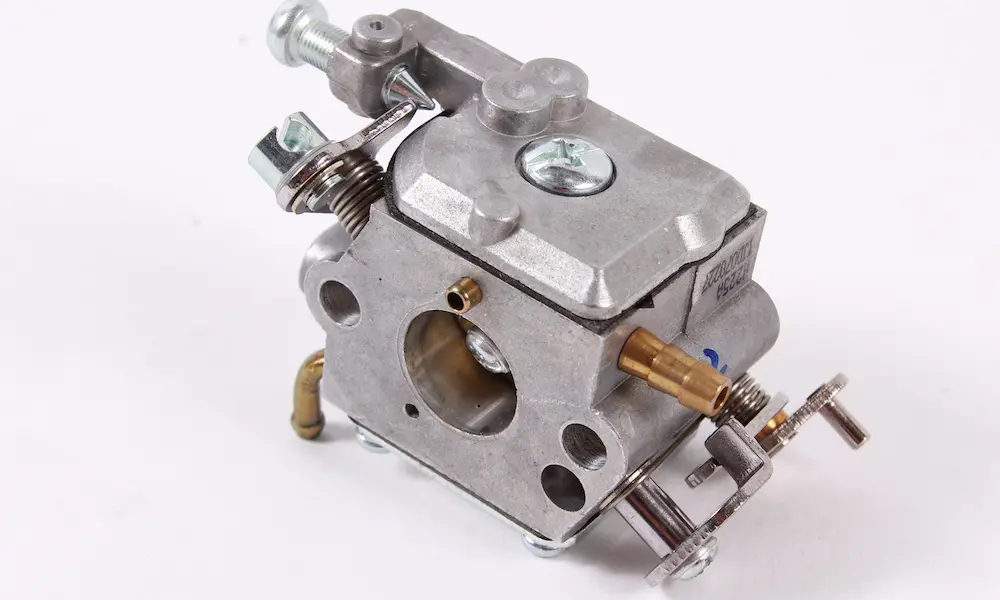
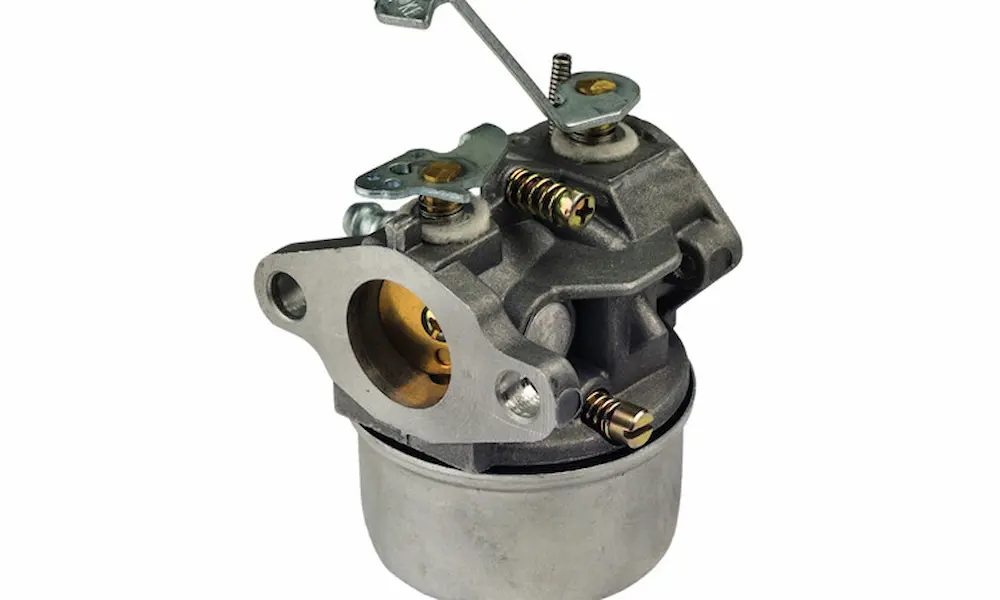
Metal Float-Bowl Carburetors
This is the most common design on mid-sized engines. It’s cast aluminum or zinc with a bowl-shaped fuel reservoir at the bottom.
Disassembly steps:
- Remove the air cleaner housing to access the carburetor mounting bolts.
- Photograph all governor linkages, choke rods, and spring positions before disconnecting anything.
- Disconnect the anti-afterfire solenoid wire if your engine has one (common on riding mower engines).
- Unbolt the carburetor and remove it from the intake manifold.
- Remove the bowl bolt at the base — on many Briggs engines, this bolt is hollow and doubles as the main fuel jet. The lateral holes near the bolt head must be completely clear.
- Gently pry the bowl away. If it’s stuck with varnish, tap the side lightly with a screwdriver handle.
- Push out the float hinge pin to release the float and needle valve.
Inspect the needle valve carefully. Many modern Briggs needles use a Viton rubber tip. If that tip shows any ridging, hardening, or compression marks, replace it. A damaged needle tip causes the bowl to overflow, which pushes raw fuel into the crankcase and dilutes your oil.
The emulsion tube is the tricky part. It’s a threaded brass cylinder deep in the central pedestal of the body. It has a center bore crossed by multiple tiny holes that aerate fuel before it enters the venturi. Varnish loves these holes.
Use a perfectly fitting, parallel-ground carburetor screwdriver when removing it. A tapered standard flathead will shear the brass slot tabs on a tight tube. If it’s seized, apply penetrating lubricant and wait. Still stuck? Tap the screwdriver handle firmly with a rubber mallet — the shock breaks the threads loose without stripping. Once out, soak the tube and probe every cross-drilled hole with a soft wire until the passages run completely clear.
If blockages persist after standard cleaning, the carburetor may have welch plugs — small factory-pressed metal discs that cap internal passages. Removing them requires a punch, and reinstalling them requires careful re-seating and sealing with a chemical-resistant compound.
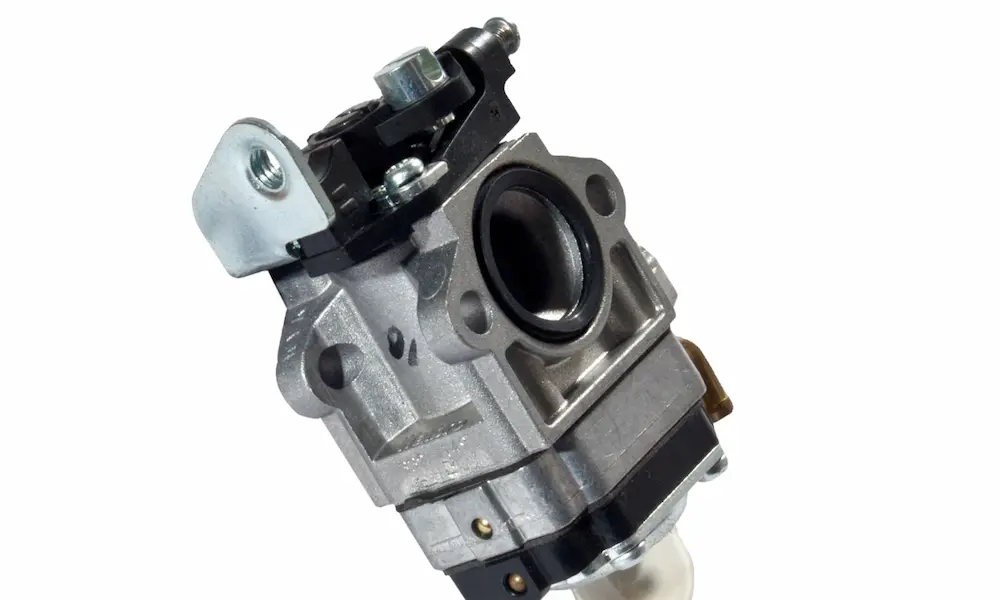
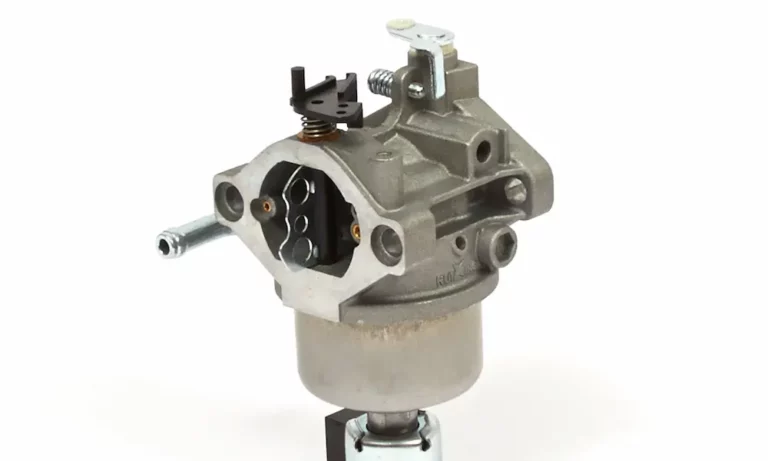
Plastic Carburetors (550EX and 625EX Series)
These show up on most modern walk-behind mowers. They’re black polymer with no external adjustment screws and non-removable internal jets.
Key differences in cleaning:
- Use aerosol carburetor cleaner only — no aggressive dip tank solvents. Harsh immersion chemicals warp and dissolve the plastic housing.
- The bowl fasteners thread directly into plastic. Use minimal torque during reassembly to avoid stripping the threads.
- Inspect all internal O-rings for swelling, tearing, or flattening.
Here’s an honest industry insight: plastic carburetors are inexpensive to replace outright. If yours is heavily fouled, suspected to be heat-warped, or has stripped threads, buying a new OEM unit is often faster and cheaper than deep cleaning a plastic carburetor that may fail again in a season anyway.
Pulsa-Jet and Diaphragm Carburetors
Found on older 3–5 HP horizontal and vertical shaft engines, the Pulsa-Jet mounts directly on top of the fuel tank. It doesn’t use a float bowl. Instead, it uses engine vacuum to pulse a rubber diaphragm, which pumps fuel up from the tank through a screened pickup tube.
The most common failure here isn’t a clogged jet — it’s a stiffened, brittle diaphragm that can no longer flex in response to engine pulses. No flex means no fuel delivery.
Servicing a Pulsa-Jet means:
- Removing the carburetor from the tank
- Scraping the mating surfaces perfectly clean and flat
- Clearing the fine brass screens on the pickup tubes
- Installing a fresh diaphragm and gasket
Watch for warped mounting flanges. The base of the carburetor body must sit perfectly flat against the tank to maintain the vacuum seal. Repeated heat cycles cause the zinc alloy to bow slightly. A warped base creates a massive vacuum leak — the engine draws unmetered air instead of pulsing the fuel pump, causing violent surging. If you spot warping, the carburetor needs replacement or careful lapping on an abrasive surface over flat plate glass.
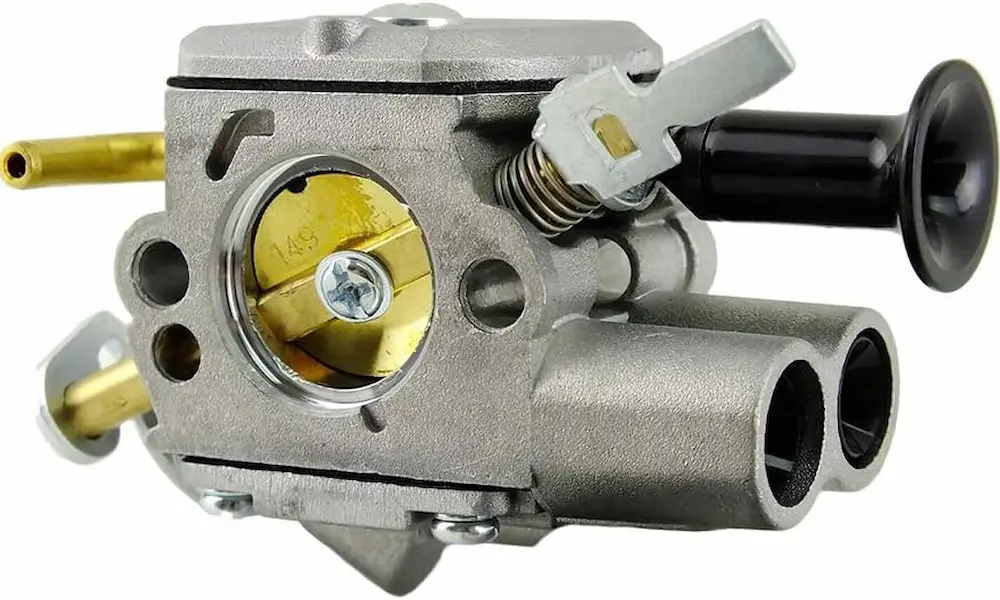
Nikki Carburetors on Intek and V-Twin Engines
Nikki carburetors appear on larger Intek and V-twin engines that power riding mowers and generators. They’re notoriously sensitive to tiny particles and varnish deposits — debris that passes harmlessly through a standard carb will cause severe surging in a Nikki.
Internal fuel paths use O-rings rather than threaded brass components. When those O-rings flatten or crack, fuel bypasses its metered circuits and floods the venturi — causing rich running, black smoke, and fouled plugs.
The rule with Nikki carburetors: replace every internal O-ring and gasket every time you open one. Reassembling with old, compressed O-rings guarantees the problem comes back. Use the thinnest soft wire available to probe the exceptionally fine pilot and idle transition ports, then flush thoroughly with high-pressure aerosol cleaner.
Reassembly and Final Adjustments
Reassemble in reverse order. A few critical checkpoints before you button everything up:
- Scrape all old gasket material completely off mating surfaces. Any fiber remnant creates a vacuum air leak that disrupts the mixture.
- Check float height. Hold the carb inverted with the needle seated. The float should sit level and parallel to the base casting. Too high or too low shifts the fuel level in the bowl and throws off the mixture at all speeds.
- Use fresh intake gaskets. A compromised intake gasket lets unmetered air past the venturi — same result as a dirty carb.
- Reconnect governor linkages exactly as photographed. One misrouted spring causes uncontrollable over-revving or a failure to pick up load.
On older engines with external mixture screws, the standard starting point is gently seating the screws and backing them out 1¼ turns for idle and 1½ turns for high-speed. Fine-tune from there once the engine is warm. Never overtighten — you’ll crush the tapered brass tips.
Modern fixed-jet carburetors have no external adjustments. Federal EPA emissions regulations prohibit tampering with sealed jets on current production engines. If a clean, properly assembled fixed-jet carburetor still runs poorly, replace the entire unit with a new OEM part.
Keep Your Carburetor Clean All Season
The best Briggs and Stratton carburetor cleaning is the one you never have to do because you prevented the buildup in the first place.
Use fuel stabilizer immediately when you fill your gas can. Ethanol-blended fuel starts degrading within 30 days. Stabilizer interrupts oxidation and delays phase separation significantly.
Even better — use ethanol-free fuel wherever you can find it. No ethanol means no hygroscopic moisture absorption, no phase separation, and dramatically slower varnish formation.
At the end of every season, run the carburetor dry. Add stabilized fuel to the tank, close the fuel valve, and let the engine run until it stalls from fuel starvation. That leaves the jets, emulsion tube, and float completely dry through winter storage — which is exactly what Briggs & Stratton recommends.
Round out your annual tune-up with a fresh air filter, a new properly gapped spark plug, and a full oil change. A healthy engine puts less stress on the carburetor’s calibration — and you’ll be pulling the cord once and rolling in the first week of spring.