Struggling with a bog, hanging idle, or mystery flat spot? A proper Mikuni carburetor adjustment fixes most of these problems without buying new parts. This guide walks you through every circuit, from idle to wide-open throttle, with real specs and proven methods. Stick around — the float level section alone saves most riders a return trip to the garage.
How a Mikuni Carburetor Actually Works
Before you touch anything, understand what you’re adjusting.
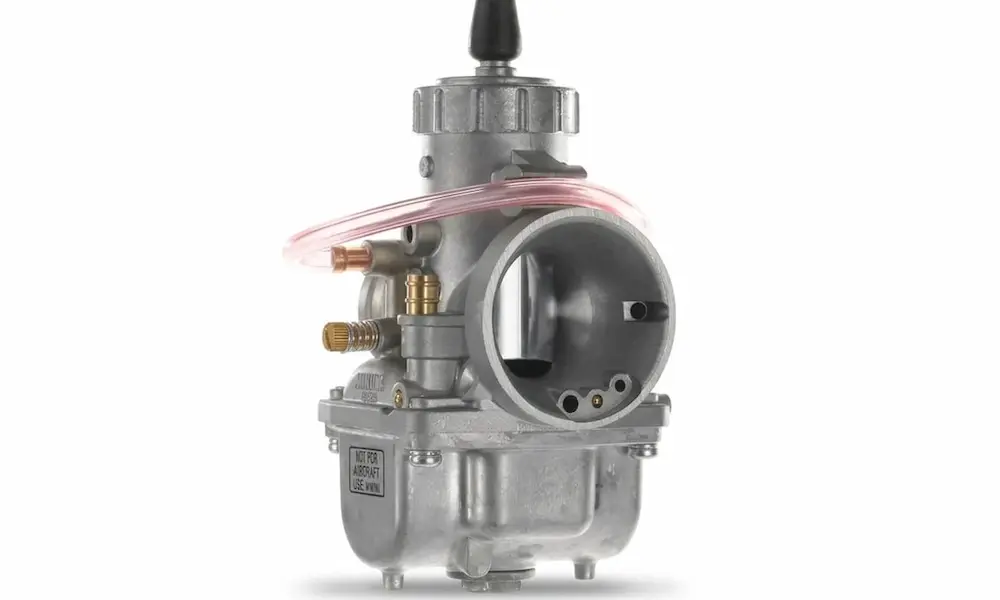
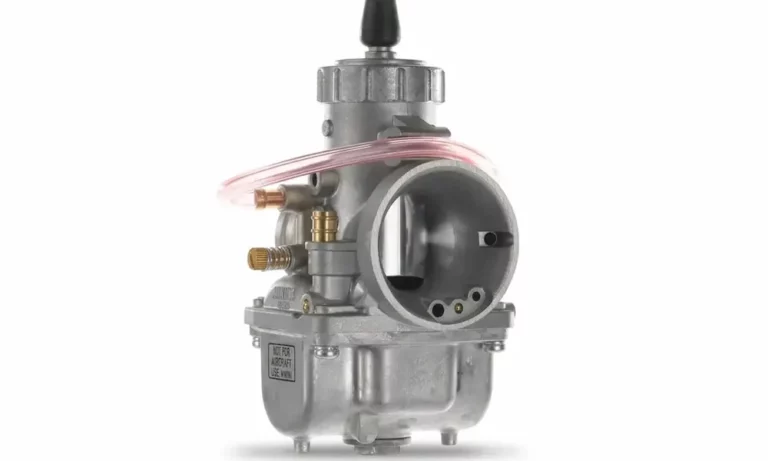
A Mikuni is a variable venturi slide carburetor. When the throttle slide rises, air rushes faster through the narrowed throat. That speed creates a pressure drop — a localized vacuum. Atmospheric pressure sitting on the fuel in the float bowl pushes fuel upward into the airstream. That’s it. No fuel pump, no magic.
The target air-to-fuel ratios look like this:
- Stoichiometric (ideal combustion): 15:1
- Wide-open throttle power: 12–13:1
- Air-cooled engines under load: 10–12:1 (richer, to prevent overheating)
Every adjustment you make pushes the mixture toward one of these targets. Keep that in mind and the whole process makes sense.
The concentric twin float design in Mikuni carbs keeps fuel level stable during hard acceleration and cornering. One important detail: don’t mount the carb at more than 20 degrees from horizontal. Beyond that angle, the float arm binds and fuel metering goes haywire.
VM vs. HSR: Which Mikuni Do You Have?
The tuning process differs slightly depending on your series.
| Carburetor Model | Bore Size | Airflow Capacity | Throttle Slide | Primary Use |
|---|---|---|---|---|
| VM28-418 | 28mm | 135 CFM | Round Slide | Small-bore two-strokes, vintage bikes |
| VM34-168 | 34mm | 165 CFM | Round Slide | Mid-size dual-sport, off-road |
| HSR42 | 42mm | 213 CFM | Flat Slide + Roller Bearings | Stock to mild Harley-Davidson V-twins |
| HSR45 | 45mm | 237 CFM | Flat Slide + Roller Bearings | Highly modified V-twins |
| HSR48 | 48mm | 270 CFM | Flat Slide + Roller Bearings | Drag racing, max-airflow builds |
The HSR series adds a roller-bearing flat slide and an accelerator pump. That pump eliminates the lean bog you get with round-slide carbs during snap throttle openings. If you’re tuning a Harley and you see bog, the accelerator pump stroke is usually the first place to look.
For U.S. street riders, Easy Kits bolt onto the stock Harley manifold and use your existing cables. Total Kits replace the whole intake system. Choose based on how far your build goes.
Pre-Tuning Checks You Can’t Skip
A carburetor can’t fix a sick engine. Check these first.
- Compression: Low compression makes the carb look guilty when the engine is the real problem.
- Valve clearances: Tight valves cause lean-running symptoms that mimic pilot circuit issues.
- Ignition timing: Off timing creates flat spots that no jetting change will cure.
U.S. pump fuel note: Most American gas is E10 — 10% ethanol. Ethanol carries its own oxygen, which leans out combustion. Engines running on E10 often need a main jet in the 150–155 range to stay safe.
Check for intake leaks. Spray a paint-safe, non-conductive lubricant around the manifold flanges and carb base while the engine idles. If the idle speed changes — surges, drops, or hunts — you’ve got a leak. Fix it before tuning anything. Scrape old gaskets with a flat razor blade parallel to the aluminum surface to avoid gouging the sealing face.
Map your throttle. Wrap masking tape around the grip and mark it in quarter-throttle increments. When you feel a problem during a test ride, glance at the mark to know exactly which circuit is active.
Idle and Low-Speed Circuit Adjustment (0–1/4 Throttle)
The pilot jet and mixture screw control everything below quarter throttle.
First, know which screw you have:
| Screw Type | Location | Clockwise Effect | Counter-Clockwise Effect |
|---|---|---|---|
| Air Screw | Upstream (airbox side) | Richens mixture | Leans mixture |
| Fuel Screw | Downstream (engine side) | Leans mixture | Richens mixture |
The physical tip tells you which is which. Air screws have a blunt tip. Fuel screws have a fine, stepped tip with a small O-ring, washer, and spring behind them.
Adjustment procedure:
- Warm the engine fully.
- Set a slow idle with the slide stop screw.
- Turn the mixture screw slowly in one direction until the engine stumbles.
- Wait 10 seconds between each quarter-turn — combustion chambers need time to stabilize.
- Turn it back the other way, counting half-turns until it stumbles again.
- Set the screw at the exact midpoint.
Pilot jet sizing signals:
- Fuel screw needs more than 2.5 turns out for best idle → pilot jet is too lean, go up a size
- Fuel screw under 1 turn out → pilot jet is too rich, go down a size
- Cold winter air requires the air screw turned inward by a half to full turn to compensate for denser air
Mid-Range Needle and Slide Cutaway Tuning (1/8–3/4 Throttle)
Three components share this range: the slide cutaway, the jet needle, and the needle jet.
Slide cutaway affects the transition from idle to 1/4 throttle. A taller cutaway leans the mixture. A smaller cutaway richens it.
Jet needle clip position governs 1/4 to 3/4 throttle:
- Moving the clip up (toward the needle top) lowers the needle → leans the mixture
- Moving the clip down raises the needle → richens the mixture
The straight diameter of the needle controls off-idle to 1/4 throttle. The taper controls 1/4 to 3/4. These aren’t adjustable without swapping needles.
On bleed-type vs. primary needle jets: Bleed-type needle jets mix air into the fuel before it exits the nozzle. Four-stroke engines need this pre-emulsification. Primary-type jets flow raw fuel — fine for two-strokes, but they leave unburned fuel in four-stroke exhaust.
The Joe Minton Mileage Setup for HSR42 riders is worth knowing:
| Component | Factory Spec | Minton Setup | Result |
|---|---|---|---|
| Pilot Jet | Size 20–25 | Size 17.5 | Cleaner low-speed cruise |
| Jet Needle | 8DDY1-97 | 8DDY1-98, clip middle notch | Crisper 10–25% throttle |
| Pump Nozzle | Size 70–80 | Size 50 | No combustion chamber flooding |
| Pump Stroke | Starts at 1/8 throttle | Starts immediately | Zero hesitation off idle |
This setup from experienced HSR tuner Joe Minton improves highway mileage and sharpens throttle response simultaneously.
Wide-Open Throttle and Main Jet Diagnosis
At full throttle, the jet needle clears the needle jet completely. The main jet is the only fuel metering device at this point. Test it under real load, not in the driveway.
Roll-Off method: Accelerate hard in 3rd or 4th gear, then snap back to 7/8 throttle. A sudden surge of power means the main jet is too small — the slight throttle reduction temporarily matched the limited fuel supply. Go up two jet sizes and repeat.
Sputter and Step-Down method:
- Increase the main jet until the engine stutters at full throttle
- Drop back down two jet sizes at a time until the stutter disappears
- Go back up one size — that’s your safe limit
Spark plug chop: After a full-throttle run, cut the ignition and pull the clutch simultaneously. Don’t let it idle — pull the plug and inspect it under magnification.
- Light caramel ring, 2mm wide: Perfect mixture
- Sooty black, velvety ring: Too rich
- Blistered, stark white porcelain: Dangerously lean — fix this immediately or melt a piston
Float Level Calibration
Float height controls the fuel level in the bowl. Get this wrong and every other adjustment is fighting an uphill battle.
The right measurement technique: Remove the float bowl and tilt the carb sideways — never fully invert it. Full inversion lets the float’s weight compress the spring-loaded needle valve pin, giving you a falsely high reading and a rich running engine.
Rotate the carb until the float arm tongue just barely touches the needle plunger pin without compressing it. Measure from there.
| Carburetor Model | Float Type | Measurement Reference | Target Height | Tolerance |
|---|---|---|---|---|
| VM12–VM24 | Integrated Twin Floats | Bottom of float to gasket | 22mm | ±1.0mm |
| VM30–VM34 | Integrated Twin Floats | Bottom of float to gasket | 24mm | ±1.0mm |
| VM36–VM44 | Integrated Twin Floats | Bottom of float to gasket | 18mm | ±1.0mm |
| VM28 | Independent Twin Floats | Top of float arm to gasket | 15–17mm | ±0.5mm |
| HSR42/45/48 | Dual Floats, Single Arm | Top of float to carb base | 18mm | ±2.0mm |
For independent floats on the VM28, ignore the float bodies entirely. Measure the float arm itself when it sits parallel to the gasket surface under its own weight.
Adjust the height by carefully bending the small metal tongue that contacts the needle valve. A 1mm change produces a noticeable mixture shift — work in small increments.
Multi-Carburetor Synchronization
Running dual or triple carbs? Mechanical synchronization is non-negotiable before any mixture work.
Tactile Method: Back off all idle screws, then turn them in until they just contact the slides. Place a finger on adjacent slides through the intake mouths. Slowly open the throttle. Feel one slide lift first? Adjust its cap cable adjuster until both slides rise simultaneously.
Pin Method (more precise):
- Back out all idle screws
- Slide a 10mm drill bit shank under one slide’s cutaway
- Lock the throttle so the slide pinches the pin with light drag
- Adjust the remaining carbs via their cable adjusters until each pin encounters identical resistance
- Release the throttle lock and balance idle screws so any clockwise turn immediately raises engine speed
Diagnosing Common Mikuni Problems Fast
| Symptom | Most Likely Cause | Fix |
|---|---|---|
| Hanging idle after throttle release | Intake air leak or lean pilot circuit | Leak test first; if clean, richen mixture screw or upsize pilot jet |
| Popping through exhaust on deceleration | Lean low-speed circuit | Adjust mixture screw inward (air screw) or outward (fuel screw) in 1/4-turn increments |
| Flat, sluggish transition | Mismatched slide cutaway or wrong needle taper | Adjust E-clip position or alter accelerator pump stroke on HSR |
| Fuel dripping from overflow tubes | Dirty or worn float needle tip | Clean or replace needle before attempting any tuning |
A hanging idle with a negative leak test almost always means the pilot circuit runs too lean. Richen it with a larger pilot jet before chasing ghosts elsewhere.
Exhaust popping on overrun is one of the most common Mikuni complaints. High engine vacuum during deceleration pulls more air than the lean pilot circuit can supply. Fix the pilot circuit first — exhaust note changes tell you immediately when you’ve nailed it.