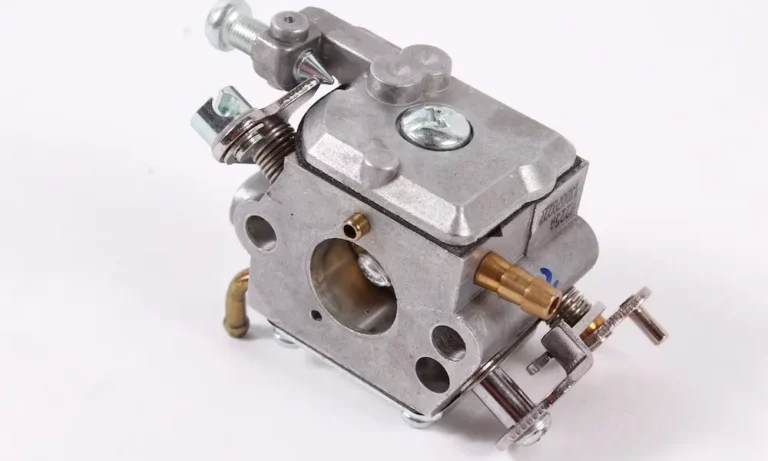
Is your Husqvarna chainsaw bogging down, running rough, or refusing to idle? A bad carburetor tune is usually the culprit. This guide walks you through everything — from safety checks to final fine-tuning — so you can dial in your machine like a pro. Stick around to the end, because the sequence matters more than most people realize.
Why Your Husqvarna Carburetor Needs Proper Adjustment
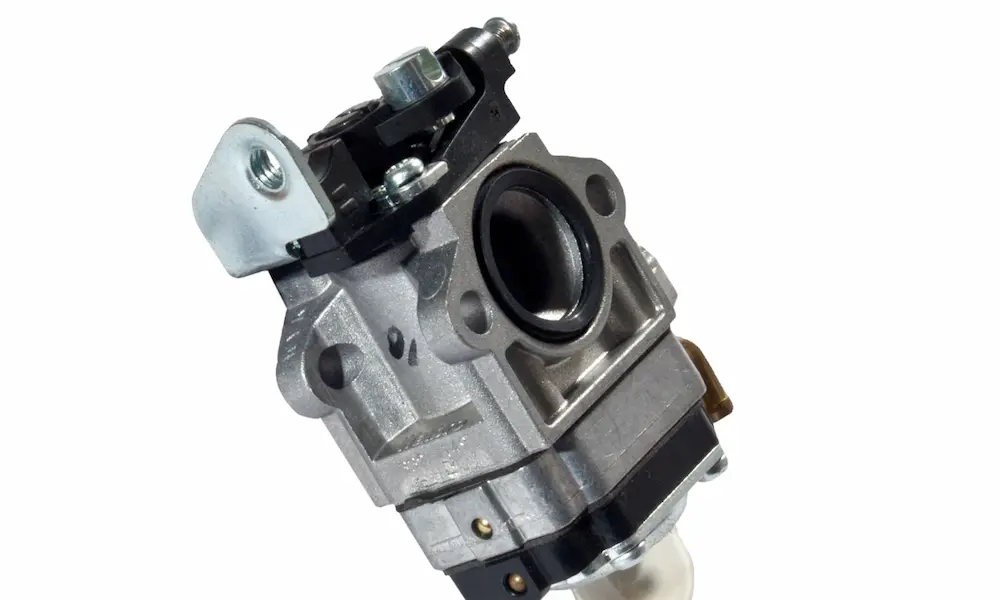
The carburetor controls how much fuel mixes with air before it enters the engine. Get that ratio wrong, and bad things happen fast.
Too much fuel (rich mixture):
- Black or blue exhaust smoke
- Heavy carbon buildup on the spark plug
- Sluggish, low-power performance
Too little fuel (lean mixture):
- Engine runs dangerously hot
- Loss of internal lubrication
- Piston scoring, ring seizure, or full engine failure
Two-stroke engines like those in Husqvarna chainsaws and trimmers use oil mixed into the fuel for internal lubrication. A lean condition doesn’t just hurt performance — it destroys the engine from the inside out.
Here’s something worth knowing: a correctly tuned two-stroke engine should four-stroke at full throttle under no load. That’s the rough, sputtering sound you hear when the engine gets a slightly rich charge. It’s not a problem — it’s a cooling mechanism. The moment you apply a cutting load, the engine transitions into that clean, high-pitched scream. That’s the sweet spot.
Understanding EPA Limiter Caps
Before you grab a screwdriver, know this: Husqvarna installs plastic limiter caps over the low-speed and high-speed mixture needles to comply with EPA emissions regulations. These caps restrict needle rotation to a maximum of half a turn.
They serve two purposes:
- Keep emissions within certified limits
- Prevent you from accidentally running the engine dangerously lean
On older or professional-grade carburetors, these caps can sometimes be repositioned during an overhaul. On newer designs, they’re molded or glued shut. Don’t force them. Work within the range they allow unless you’re doing a full rebuild.
The 10-Point Pre-Tuning Inspection You Can’t Skip
Never touch the adjustment screws on an engine that hasn’t passed a basic mechanical check. Tuning a carburetor to compensate for an air leak or clogged filter will cause engine damage — not fix the problem.
Run through every item on this list before you start:
| Inspection Item | What to Check |
|---|---|
| Engine compression | Pull the starter rope — resistance should feel firm and consistent |
| Fuel quality | Drain stale fuel, refill with fresh gas/oil at the manufacturer’s ratio |
| Fuel filter | Inspect for clogs or degradation inside the tank |
| Fuel lines & primer bulb | Look for cracks, stiffness, or air leaks |
| Air filter | Clean or replace — always reinstall before tuning |
| Spark plug | Check for wear, carbon buildup, and correct gap |
| Ignition spark | Use a spark tester to verify a strong, consistent spark |
| Muffler & spark arrestor | Clean any carbon from the arrestor screen |
| Intake gaskets | Check for fuel residue that signals an air leak |
| Bar & chain installation | Mount correctly and tension the chain — don’t engage the chain brake during tuning |
One critical note on the air filter: always tune with the air filter and cover installed. Adjust without them, and the engine will run lean once you put them back. That’s a mistake that wrecks engines.
Safety Checks for Chainsaw Users
If you’re adjusting the carburetor on a chainsaw, safety system verification isn’t optional.
Check the chain brake thoroughly:
- Clean dirt, oil, and sawdust from the brake mechanism
- Measure the steel brake band — it must be at least 0.024 inches (0.6 mm) thick
- Check the front hand guard for cracks and confirm it moves freely
Then run two brake tests:
Static test (engine off): Hold the rear handle, release the front, and let the bar tip drop onto a wooden block. The impact should trigger the automatic brake.
Dynamic test (engine running): On firm ground at full throttle, tilt your left wrist forward into the hand guard. The chain must stop immediately.
Also test the throttle lockout lever — the throttle trigger should stay locked until the lockout is fully depressed, and every spring should snap back instantly when released.
The Right Tools for Husqvarna Carburetor Adjustment
Don’t use a regular flathead screwdriver. It will slip, strip the adjustment screw head, and crack the carburetor casing. Husqvarna carburetors use recessed, profile-specific screws that require dedicated tuning tools made from corrosion-resistant steel.
Here’s what each tool fits:
| Tool Profile | What It Fits |
|---|---|
| Pacman | Walbro, Zama, Ruixing, Huayi carbs on Husqvarna, Poulan, Homelite, Ryobi |
| Micro Pacman (2.0mm) | Ruixing carburetors with deep, narrow access |
| 21-Teeth Splined (Part: 530035560) | Modern EPA-compliant Husqvarna, Poulan, and Craftsman 2-cycle engines |
| 7-Teeth Splined | Restricted needles with heavy plastic limiter caps |
| Single D | Select Zama, Walbro, and Echo carburetors |
| Double D | Dual-flat adjustment screws on specialized carburetors |
| Inner Hexagon (4.0mm) (Part: 5910 890 2307) | Newer Stihl and select Husqvarna blowers, edgers, pole saws |
Pick up a carburetor jet cleaning kit too — one with stainless-steel cleaning needles and graduated nylon brushes (3.0mm to 7.0mm). These clear carbon and varnish from the internal jets without scratching the metal.
How to Set Baseline Needle Positions
If the engine won’t start or is completely out of adjustment, reset both needles to a known starting point.
First, identify your carburetor type. Turn the low-speed (L) needle clockwise until it gently seats. Then turn it counter-clockwise as far as it goes. If it rotates more than one full turn, you have a Type A carburetor. Less than one full turn means Type B.
| Carburetor Type | L Needle Baseline | H Needle Baseline |
|---|---|---|
| Type A | Seat, then back out 1 full turn CCW | Back out CCW to limiter stop |
| Type B | Seat, then back out 1/4 turn CCW | Back out CCW to limiter stop |
| Standard reset | Seat, then back out 1 to 1-1/2 turns CCW | Seat, then back out 1 to 1-1/2 turns CCW |
| Husqvarna 435 / 435e | Seat, then back out 2-1/2 turns CCW | Seat, then back out 2 turns CCW |
| Husqvarna 440e | Seat, then back out 2-1/2 turns CCW | Seat, then back out 2 turns CCW |
Never force a needle down hard. The needle tip seats against a delicate brass surface inside an aluminum casting. Overtighten it, and you’ve just destroyed the carburetor.
Adjusting the Low-Speed Needle (L Screw)
The L screw controls fuel delivery during idle and acceleration. This is the first adjustment you make.
- Start the engine and let it warm up — 2 to 3 minutes for chainsaws, up to 10 minutes for string trimmers
- Find the hole marked L near the air filter housing
- Insert the correct tool profile
- Turn the L screw clockwise slowly — the engine speed will rise
- Keep turning until the engine starts to stumble and slow (that’s the lean stumble point)
- Now turn it counter-clockwise past the peak speed point until the engine runs smoothly
- Test throttle response by squeezing the trigger quickly
If the engine bogs or hesitates before revving up, it’s too lean. Turn the L screw counter-clockwise in 1/8-turn increments until it accelerates cleanly with no hesitation.
Adjusting the Idle Speed (T Screw)
Once the L screw is set, dial in the idle speed with the T screw.
- Turn clockwise to raise idle speed
- Turn counter-clockwise to lower it
The chain or trimmer head must not spin at idle — if it does, the idle is too high. Back the T screw off counter-clockwise until the cutting attachment stops completely.
A correct idle keeps the engine running smoothly in any position — horizontal, vertical, or tilted — while staying well below the clutch engagement speed. If you can’t get the chain to stop spinning at idle no matter what you do, shut the engine off and take it to an authorized service center.
Adjusting the High-Speed Needle (H Screw)
The H screw sets the fuel mixture at full throttle. This one demands respect — a lean condition at wide-open throttle causes engine failure in seconds.
- Turn the H screw counter-clockwise as far as it goes (richest, safest setting)
- Start the engine and hold the throttle wide open with no load
- Listen for the four-stroking sound — rough, sputtering, bubbling
- Slowly turn the H screw clockwise in 1/8-turn increments
- The four-stroking will clear into a smooth high-pitched scream
- Once the four-stroking disappears, back the H screw counter-clockwise by 1/8 turn
That last 1/8 turn adds just enough fuel so the engine four-strokes lightly at no-load speed, then transitions to a clean two-stroke scream under cutting load.
If you’re using a digital tachometer, the Husqvarna 435 and 440e should top out between 12,500 and 13,000 RPM. Don’t hold the engine at max RPM under no load for more than 10 seconds during this process — thermal stress builds fast.
The Correct Tuning Sequence at a Glance
The order you adjust these screws matters. Do them out of sequence and you’ll be chasing your tail.
Always follow this sequence:
- L screw first — clean acceleration from idle
- T screw second — correct idle speed, cutting attachment stops spinning
- H screw last — full-throttle power without running lean
Skipping ahead to the H screw before the L screw is dialed in means your baseline is wrong before you even start the high-speed tune.
Get the sequence right, use the correct tools, and your Husqvarna carburetor adjustment will hold. Miss a step, and you’ll be back at square one — or worse, shopping for a new engine.