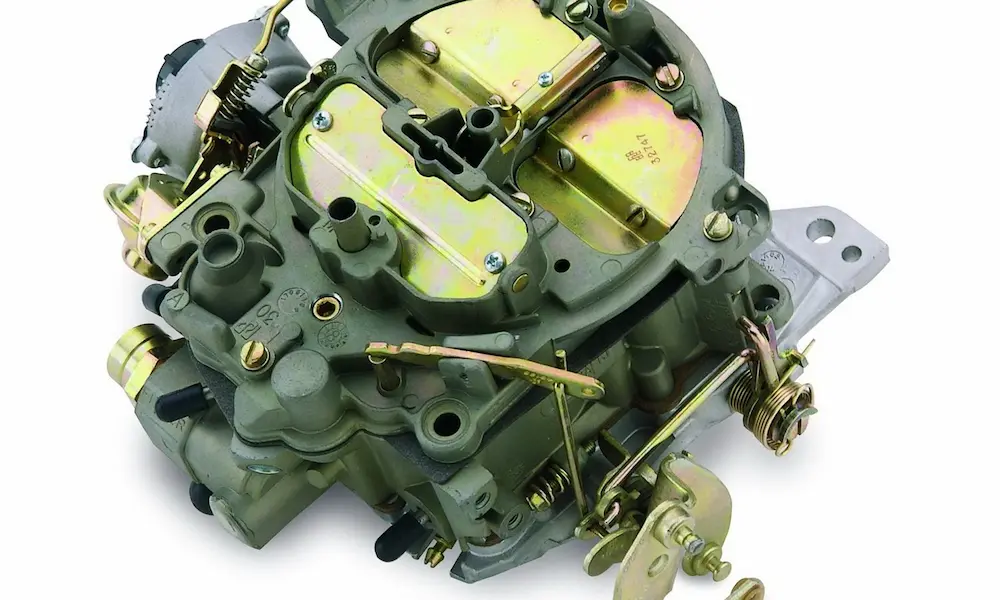
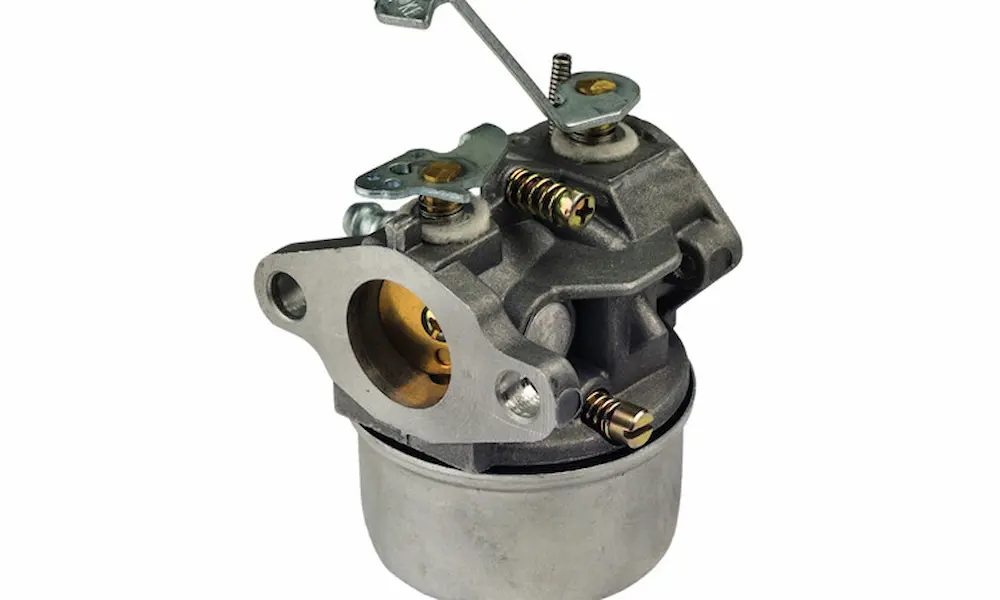
The Rochester Quadrajet has a bad reputation — but it’s mostly undeserved. Most “Quadrabog” problems come down to poor tuning, not bad design. This guide walks you through exactly how to adjust a Quadrajet carburetor, from float level to secondary air doors. Stick around — the fix is probably simpler than you think.
Before You Touch the Carburetor
Here’s the thing most people skip: the carburetor isn’t always the problem.
The Quadrajet runs on pressure differences created by engine vacuum. If your ignition timing is off, or you’ve got a vacuum leak, no amount of carburetor tuning will fix your driveability issues.
Check these first:
- Set initial ignition timing to 10–14 degrees BTDC
- Confirm total mechanical advance tops out at 34–36 degrees
- Make sure vacuum advance works and connects to a manifold vacuum source
- Inspect every vacuum line, intake gasket, and carb base gasket for leaks
A vacuum leak forces you to over-enrich the idle circuit just to keep the engine running. Then your plugs foul, the idle hunts, and you blame the carburetor. Don’t do that.
Tools You Actually Need
Standard screwdrivers won’t cut it here. Get these before you start:
| Tool | Why You Need It |
|---|---|
| Manifold vacuum gauge | Sets idle mixture accurately |
| Angle gauge or drill bits | Measures choke and vacuum break openings |
| Float drop gauge | Measures fuel level in the bowl |
| Flexible Double-D idle screw tool | Adjusts recessed mixture screws without stripping |
| APT wrench | Tunes part-throttle mixture without disassembly |
| Torx bit set | Removes security screws on late-model air horns |
Setting the Float Level First
Every other adjustment depends on this one. Get it wrong and nothing else works.
The Quadrajet uses a single large pontoon float in a central bowl. That central design keeps fuel flowing even during hard cornering or steep hills. But if the float absorbs fuel — which old plastic floats absolutely do — it sinks too low, the needle stays open, and the bowl floods.
Replace plastic floats with brass. Brass doesn’t absorb fuel. It’s that simple.
How to Measure Float Level
- Remove the air horn and bowl gasket
- Remove the plastic filler block above the float valve
- Hold the hinge pin down firmly in its cradle
- Apply very light pressure to the hinge lever arm — never the pontoon itself
- Seat the viton needle tip gently. Don’t force it or you’ll crush the tip
- Measure from the top of the main body casting down to the highest point of the float pontoon, about 3/16 inch back from the toe
Don’t force the needle. Heavy pressure deforms the viton tip permanently and guarantees future flooding.
Here are the target specs depending on your carburetor:
| Carburetor Era / Float Type | Target Float Level | Notes |
|---|---|---|
| Early models (1968–1972) | 1/4 inch to 3/8 inch | Earlier castings tolerate slightly higher levels |
| Late models (1975+) | 3/8 inch to 1/4 inch | Emissions requirements demand lower fuel levels |
| Duracon (plastic) side-hung | 7/32 inch | Lighter float rides higher — different measurement needed |
| Racing applications | 1/4 inch | Maximizes fuel volume under hard WOT |
To adjust, remove the float and bend the small brass lever arm. Bending up lowers the level. Bending down raises it. Re-measure after every bend.
A float set too low causes hesitation and surging. Too high causes flooding, poor hot starts, and terrible fuel economy.
How to Adjust a Quadrajet Carburetor Idle Mixture
The idle circuit feeds a tiny amount of fuel-air emulsion through ports just below the nearly closed throttle plates. The mixture screws control how much gets through.
Turning screws clockwise = lean (restricts flow)
Turning screws counter-clockwise = rich (opens flow)
Setting the Baseline
Turn both mixture screws clockwise until they just barely seat. Don’t crank them tight — you’ll destroy the tapered tips. Then back both screws out equally, starting at 2–4 turns out depending on engine size.
Dynamic Tuning With a Vacuum Gauge
This is where most people get it right:
- Warm the engine fully — choke must be completely open
- Connect a vacuum gauge to a manifold vacuum source
- Set idle speed to 600–800 RPM
- Adjust both mixture screws in equal 1/4-turn increments
- Chase the highest steady vacuum reading you can get
- Target: around 18 inches of mercury on a stock engine
If turning a screw inward drops RPM or makes the gauge needle flutter, you’ve gone lean. Back it out slightly and stabilize.
Keep both screws symmetrical. Uneven settings cause uneven combustion across the engine.
The Idle Bypass Air Fix for Big Cams
Got a performance camshaft? Your mixture screws might feel completely useless. Here’s why.
High-overlap cams produce low manifold vacuum. To compensate, people crank the idle speed screw in to prop the throttle plates open. But open them too far and the transition slots get exposed. The engine starts pulling fuel from there instead of the idle circuit — and the mixture screws stop doing anything.
The fix, popularized by Quadrajet expert Cliff Ruggles, is to drill small bypass air holes directly into the casting or throttle plates. Start at 0.050 to 0.080 inches for a mild performance build. This lets the engine get the extra air it needs without prying the throttle blades open, which reseals the transition slots and puts the mixture screws back in control.
Tuning the Primary Metering and APT System
Once past idle, primary metering takes over. Tapered metering rods sit inside fixed brass jets and move up and down based on manifold vacuum.
High vacuum at cruise = rods drop deep into jets = lean and economical
Low vacuum under load = spring pushes rods up = richer for power
The spring tension under the power piston determines when that transition happens. Match it to your engine’s vacuum curve.
Unlocking the APT Adjustment
Later Quadrajets have an Adjustable Part Throttle (APT) system that lets you fine-tune cruise mixture without swapping jets. The factory buried the access screw under a cup plug to prevent tampering.
Here’s how to unlock it:
- Remove the air horn and punch out the aluminum plug from below
- Thread the hole with a 3/8 x 16 tap
- Install a small threaded pipe plug to keep dirt out
- Reassemble the carburetor
With the engine running, remove the plug and insert an APT wrench through the air horn.
- Clockwise = rods seat deeper = leaner cruise
- Counter-clockwise = rods rise slightly = richer cruise
Adjust in half-turn increments during actual road testing. Keep going until surging or lean stumbles disappear.
Fixing the Accelerator Pump
Flat spot when you tip into the throttle? That’s the accelerator pump’s job — and it’s not doing it.
When the throttle opens fast, air rushes in faster than fuel can follow. The pump squirts raw fuel directly into the primary venturis to bridge that gap. If it fails, you get a bog, stumble, or intake backfire.
What Goes Wrong
- Pump cup degradation: Modern ethanol-blend fuels harden rubber cups. Once the cup loses its flare, it can’t seal against the bore wall. No seal, no pressure, no squirt
- Clogged passages: Dried varnish blocks the tiny channels leading to the discharge nozzle
- Stuck or missing check ball: Stops fuel delivery completely
To check the pump, look down the primary bores with the engine off and cycle the throttle linkage by hand. You should see a strong, immediate stream of fuel from both nozzles. Delay or no stream means the circuit needs attention.
Important: Never sand or polish inside the pump bore. That coating prevents corrosion. Remove it and the bore deteriorates fast.
Setting Pump Linkage Correctly
The pump rod connects the throttle linkage to the pump lever on the air horn.
- Inner hole = longer stroke = more fuel (good for big engines and automatics)
- Outer hole = shorter stroke = less fuel (better for small engines and manuals)
At curb idle, there must be zero slack in the linkage. Any delay causes a flat spot right when you need fuel most.
At wide-open throttle, the plunger should stop about 0.015 inches before bottoming out. If it hits the bottom hard, the return spring can bind and prevent the throttle from closing. Fix this by carefully bending the pump rod to adjust its effective length.
Choke and Vacuum Break Adjustments
Cold starts need a rich mixture. The thermostatic choke provides it by closing the primary bores and forcing high vacuum to pull fuel from every circuit at once.
Choke Timing Adjustment
Rotate the choke housing to change how long the choke stays engaged:
- Clockwise = more spring tension = choke stays closed longer = richer cold running
- Counter-clockwise = less tension = choke opens faster
Remember: rotating the housing changes duration only. It doesn’t change how rich the mixture gets while the choke is actually closed.
Fast idle speed during warm-up typically targets 1,500–2,400 RPM. The dedicated fast idle screw hides under the choke housing. Adjust it while running on the second step of the fast idle cam, targeting 750–800 RPM in that position.
Setting the Primary Vacuum Break
The primary choke pull-off cracks the choke blade open the instant the engine fires. Without it, the engine floods and stalls immediately.
Here’s the adjustment procedure:
- Apply at least 18 inches of vacuum to the pull-off diaphragm using a hand pump — this fully seats the plunger
- Apply light upward pressure to the bottom of the choke blade
- Measure the gap between the choke blade and air horn wall — target is typically 1/4 inch or a specified angle in degrees
- No angle gauge? Use a drill bit as a pin gauge. A 1/4-inch bit works for many applications
- Adjust by bending the U-shaped loop in the linkage rod, or turning the adjustment screw on the pull-off lever
Too small a gap = rich, smoky, stumbling cold start. Too large = lean stall the moment it fires.
Secondary Air Valve Tuning
This is where the infamous “Quadrabog” lives. And it’s almost always a simple spring tension problem.
The secondary bores are massive — factory castings flow at least 750 CFM. Spring-loaded air doors above the secondary throttle plates control when all that airflow comes in. If those doors fly open too fast, air velocity collapses and the engine gets a huge gulp of unmetered air with zero fuel. That’s the bog.
Adjusting the Air Valve Spring
- Find the secondary adjustment assembly on the upper passenger side of the air horn
- Loosen the Allen-head lock screw underneath the casting lip about 1/4 turn — don’t remove it
- Use a small flat-blade screwdriver to slowly unwind the spring until the doors hang free with zero tension
- Wind the screw back clockwise until the spring just barely contacts the pin lever
- From that zero-tension point, add 1/2 to 7/8 of a turn of additional tension
- Hold the screwdriver position firmly and tighten the Allen lock screw
Test under real driving conditions. If it bogs on hard acceleration, add tension in 1/16-turn increments. If the top end feels sluggish and restricted, back off slightly.
Fixing Leaking Bottom Well Plugs
Leaking bottom well plugs are the sneaky cause behind two frustrating problems:
- Hot restart issues — fuel drains past the plugs into the intake after shutdown. The engine floods and won’t start until the cylinders clear
- Long cranking in the morning — the bowl empties overnight. The pump has to refill it completely before the engine fires
Standard epoxy fails from heat and fuel exposure. You need marine-grade or fuel-resistant epoxy like J-B Weld TankWeld. Scrape the area completely clean, scuff the casting, press the compound on thick, and let it fully cure.
For a permanent fix, drill out the old plugs, tap the holes, and install threaded brass plugs with fuel-resistant thread sealant. They won’t move again.
Quick Troubleshooting Reference
| Symptom | Likely Cause | Fix |
|---|---|---|
| Hard bog on full acceleration | Air valve spring too loose | Tighten secondary air door wrap-up spring in small increments |
| Stumble right off idle | Accelerator pump failure | Inspect pump cup, clear discharge passages, set linkage gap to zero |
| Hard hot restarts | Leaking bottom well plugs | Seal with marine epoxy or threaded brass plugs |
| Surging at highway cruise | APT too lean or float too low | Turn APT screw counter-clockwise; verify float level |
| Idle screws have zero effect | Vacuum leak or transition slots exposed | Check throttle shaft wear; drill idle bypass air holes if needed |
| Fires but stalls cold | Primary vacuum break set wrong | Check diaphragm holds vacuum; adjust linkage to correct choke opening angle |
Knowing how to adjust a Quadrajet carburetor means treating it as a system, not a collection of isolated screws. Fix the foundation first — timing, vacuum leaks, float level — and the rest of the adjustments fall into place quickly.