Ever turned the key after filling up your gas tank, only to have your car struggle to start? Or maybe you’ve noticed that annoying check engine light glowing on your dashboard. These could be signs of a failing canister purge valve – a small but crucial component in your vehicle’s emissions system.
Replacing this valve might seem intimidating, but with the right guidance, you can tackle this repair yourself and save hundreds of dollars. Let’s dive into everything you need to know about canister purge valve replacement.
What Is a Canister Purge Valve and Why It Matters
Your car’s canister purge valve is like a gatekeeper for fuel vapors. It’s part of the Evaporative Emission Control (EVAP) system that’s been mandatory on all vehicles since the early 1970s. Instead of letting harmful fuel vapors escape into the atmosphere, the system captures them in a charcoal canister and then releases them back to the engine to be burned during combustion.
The purge valve only opens when your car’s computer determines conditions are right – typically when your engine reaches around 165°F and other factors like engine load and speed are optimal. When this valve fails, your entire emissions system gets thrown out of whack.
Where to Find Your Purge Valve
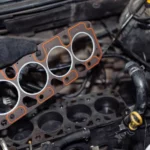
Before you can replace it, you need to find it! The location varies significantly depending on your vehicle, but it’s typically in one of these spots:
- Near the intake manifold or throttle body (most common)
- Behind the alternator (like in a 2011 Chevy Suburban)
- Along the firewall between engine and passenger compartment
- Close to the fuel tank in vehicles with rear-mounted tanks
- Under the intake manifold (requiring some disassembly)
Look for a component connected to two vacuum hoses plus an electrical connector. If you’re having trouble, your vehicle’s repair manual can be invaluable here.
5 Warning Signs of a Failed Purge Valve
How do you know if your purge valve needs replacing? Watch for these telltale symptoms:
1. Check Engine Light Illumination
This is often your first clue. When your car’s computer detects abnormal vapor flow, it triggers the check engine light. Common diagnostic trouble codes include P0441, P0443, P0444, and P0445 for stuck-open conditions, or P0496 and P0497 for stuck-closed conditions.
2. Hard Starting After Refueling
If your car struggles to start right after you’ve filled the tank, pay attention. A stuck-open valve can flood your engine with excess fuel vapors, creating an overly rich mixture that makes starting difficult.
3. Rough Idling and Performance Issues
Notice your car running roughly at idle or hesitating during acceleration? When the valve sticks open, it continuously allows fuel vapors into the engine, disrupting the air-fuel ratio and causing performance problems.
4. Decreased Fuel Economy
Suddenly getting fewer miles per gallon? A faulty purge valve affects combustion efficiency, leading to increased fuel consumption as your engine struggles to maintain proper operation.
5. Unusual Fuel Odors
A stuck-closed valve might cause fuel vapors to seep into your vehicle’s cabin, creating noticeable gas smells inside. This isn’t just unpleasant—it’s a safety concern.
Professional vs. DIY Replacement Costs
The financial advantage of DIY replacement is substantial:
| Cost Factor | Professional Repair | DIY Repair |
|---|---|---|
| Parts | $30-245 (average $80-150) | $30-150 |
| Labor | $45-170+ (0.5-2 hours) | $0 |
| Total Cost | $75-415+ | $30-150 |
| Additional Benefits | Professional diagnosis, Warranty | Skill development, Immediate repair |
Professional costs vary widely based on your vehicle make/model and local labor rates. Complex installations requiring removal of other components naturally cost more. The labor costs typically range from $45 to $170+ depending on accessibility and shop rates.
For parts, expect to pay anywhere from $30 for aftermarket valves to $245+ for OEM dealer parts, with most quality replacement valves falling in the $80-150 range.
Tools You’ll Need for DIY Replacement
Before starting, gather these tools:
- Socket set (typically 10mm, 13mm, or 8mm depending on vehicle)
- Pliers for hose clamp removal
- Flathead and Phillips screwdrivers
- Safety glasses and gloves
- Replacement valve (OEM or quality aftermarket)
- Vehicle repair manual or online guide specific to your model
- Optional: Torque wrench for precise installation
Step-by-Step Replacement Guide
Safety First
- Park on a level surface and let the engine cool completely
- Disconnect the negative battery terminal to prevent electrical shorts
- Work in a well-ventilated area away from ignition sources (fuel vapors may be present)
Finding and Accessing the Valve
- Locate your purge valve using your repair manual or by tracing the vacuum lines from the intake manifold
- Remove any engine covers, air intake components, or other parts blocking access
- Take a picture of the connections before disassembly to reference during reinstallation
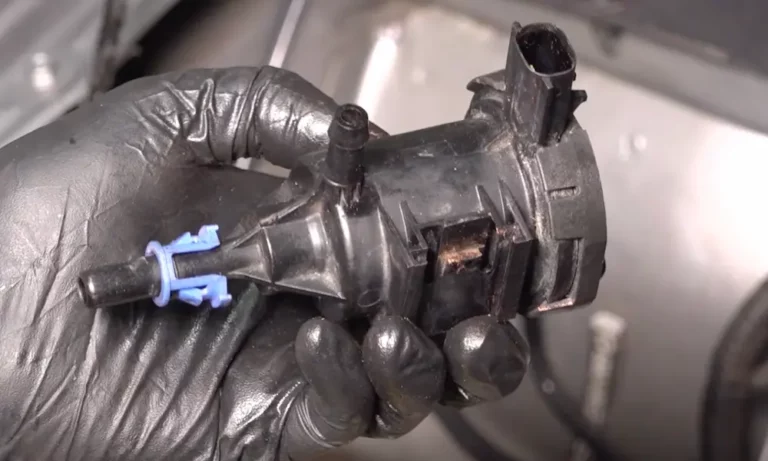
Removing the Old Valve
- Disconnect the electrical connector by pressing the release tab and pulling straight back
- Remove vacuum hoses by pressing release tabs or using pliers for stubborn connections
- Remove mounting hardware (typically one 10mm bolt or twist-lock mechanism)
- Extract the old valve, noting the direction of any flow arrows
Installing the New Valve
- Compare the new valve to the old one to ensure they match
- Position the new valve, making sure to align any flow direction arrows correctly
- Secure the mounting hardware (don’t overtighten!)
- Reconnect the vacuum hoses, ensuring they’re fully seated
- Reattach the electrical connector until it clicks into place
- Double-check all connections are secure
Testing Your Work
- Reconnect the battery
- Start the engine and check for any unusual noises or vacuum leaks
- Clear any stored diagnostic codes using an OBD-II scanner
- Test drive the vehicle to ensure proper operation
- Check that the engine light doesn’t return
Vehicle-Specific Considerations
Easy Access Vehicles
Many vehicles position the purge valve for relatively straightforward access. Models like the Ford Fusion (2013-2020), Chevy Silverado (2007-2013), and Toyota Camry typically allow for replacement with basic tools in 15-30 minutes.
Complex Installations
Some vehicles require significant additional work:
- Ford Fiesta: May require cutting and replacing hard plastic lines with rubber hoses and heat-shrink clamps
- GMC Terrain/Chevy Equinox: Valve location behind intake manifold requires partial disassembly
- Ford Escape AWD models: Some years may require dropping the rear differential unit for access
A repair manual specific to your make and model is invaluable for these more complex jobs.
How to Test Before Replacing
Want to confirm it’s actually the purge valve before replacing it? Try these simple diagnostic tests:
Manual Vacuum Test
- With the engine off, disconnect the valve’s electrical connector
- Try blowing through the valve – a properly functioning valve should not allow air passage when not energized
- If air passes through easily, the valve is likely stuck open and needs replacement
Engine Running Test
- With the engine running at operating temperature, disconnect the valve electrically
- Check for vacuum at the canister-side fitting using a vacuum gauge
- Vacuum presence indicates a stuck-open condition requiring replacement
For more complex issues, professional diagnosis using smoke testing equipment and advanced scan tools may be necessary to identify leaks in the EVAP system.
Preventing Future Failures
Want your new purge valve to last longer? Follow these practices:
- Don’t overfill your gas tank: Stop at the first click – overfilling can force liquid fuel into the valve
- Use quality fuel: Contaminated fuel can clog the valve mechanism
- Address check engine lights promptly: Early intervention prevents cascading failures
- Inspect your EVAP system regularly: Check hoses and connections for cracks or damage
Remember that the purge valve is part of a complete system. If it fails repeatedly, investigate the entire EVAP system for root causes like clogged canisters or damaged vapor lines.
Why DIY Makes Sense
Canister purge valve replacement is one of those rare repairs where DIY effort really pays off. The procedure is generally straightforward, the parts are reasonably priced, and you’ll save a significant amount on labor costs.
Even if you’re not particularly mechanically inclined, with proper research and preparation, this is a repair most car owners can handle. Just take your time, follow the steps carefully, and you’ll have the satisfaction of fixing your car yourself while keeping hundreds of dollars in your pocket.
Have you tackled a purge valve replacement or other emissions system repair? What challenges did you face? Share your experiences in the comments below!