Your chainsaw won’t start, idles rough, or dies mid-cut. Nine times out of ten, the carburetor is the culprit. This guide walks you through chainsaw carburetor cleaning the right way — from diagnosis to tuning — so you don’t waste money on parts you don’t need. Stick around, because the tuning section at the end is where most people get it wrong.
Why Your Chainsaw Carburetor Gets Dirty (It’s Probably the Gas)
Before you grab a screwdriver, understand why it’s dirty.
Most gas in the US contains up to 10% ethanol. That sounds harmless, but ethanol is hygroscopic — it actively pulls moisture from the air. Once enough water builds up, the ethanol-water mix sinks to the bottom of your fuel tank. This is called phase separation.
Here’s why that’s bad:
- Two-stroke oil bonds to gasoline, not water
- The separated bottom layer carries zero lubrication
- Your engine draws that layer in and runs hot with no oil protection
- Result: piston seizure, cylinder scoring, and a very expensive repair
Even if phase separation doesn’t happen, stale ethanol fuel leaves behind sticky varnish that clogs the carburetor’s microscopic jets. That varnish causes lean running conditions that overheat the engine fast.
The short version: ethanol-blended gas sitting in your saw for 30+ days is probably what’s causing your problem.
Check the Engine Before You Touch the Carburetor
A bad carburetor and a worn engine look identical from the outside. Don’t skip this step.
The Drop Test
Hold the chainsaw by the starter handle and let it hang. A healthy engine drops slowly — each compression stroke catches it. A dead engine drops straight to the floor. Low compression means the carburetor isn’t your problem.
The Crankcase Leak Test
Air leaks in the crankcase completely bypass the carburetor’s fuel metering system. Symptoms include:
- Erratic idle
- Engine racing without throttle input
- Stalling under load
To test, block the exhaust port and intake with rubber plugs cut from an inner tube. Connect a hand pump to the spark plug hole. Pressurize the crankcase to about 7 PSI. If pressure drops, spray soapy water around the block — bubbles reveal the leak. The engine should also hold 10 inches of mercury on vacuum.
If the engine fails these tests, fix the seals first. Cleaning the carburetor won’t help an engine that can’t hold pressure.
How to Remove the Carburetor Safely
Safety first — disconnect the spark plug wire before touching anything.
Then:
- Drain the fuel tank completely into an approved container
- Blow off the exterior with compressed air or a nylon brush
- Remove the top cover, air filter, and filter housing
- Squeeze the throttle trigger to create slack, then pop the linkage rod free from the carburetor lever
- Remove the mounting nuts (usually 8mm or 5/16″)
- Gently pull the fuel line, return line, and impulse line off the nipples
- Slide the carburetor straight back off the studs
Take photos before disconnecting anything. Fuel line routing looks simple until it’s not. Reversing the purge bulb lines completely disables fuel delivery — a common mistake during reassembly.
Disassembling the Carburetor: What’s Inside
Work on a clean, light-colored surface. A magnetic mat helps — you will drop tiny parts.
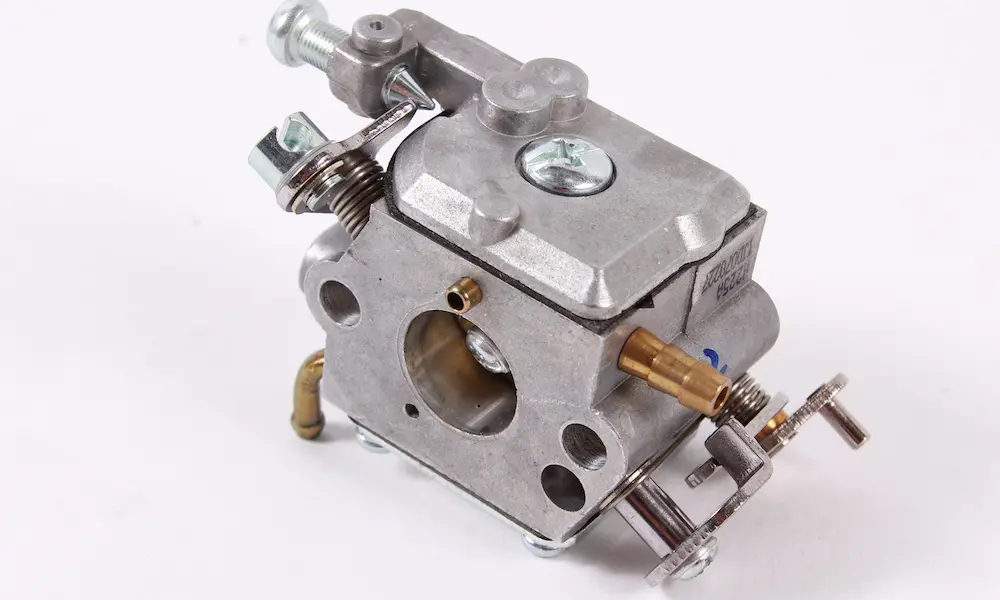
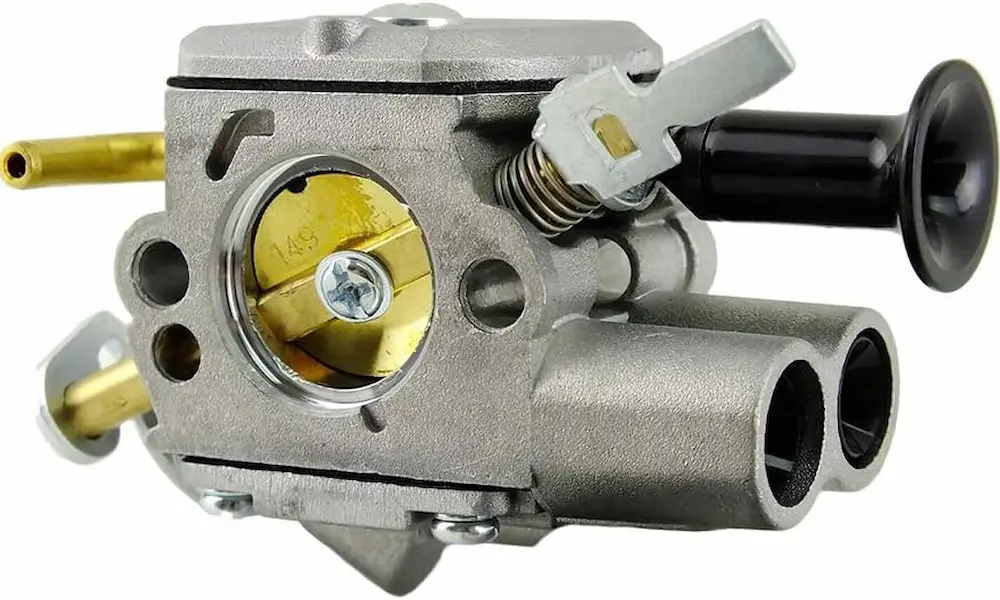
Chainsaw carburetors split into two sides: the fuel pump side and the metering side. The two dominant brands are Walbro (WT, WA, HDA, WYK series) and Zama (C1Q, C1U, C1M, C3 series). Different layouts, same principles.
Fuel Pump Side
Remove the pump cover screw(s) and lift off the cover, pump gasket, and pump diaphragm. Note their exact order — it matters during reassembly.
Below the diaphragm sits a microscopic mesh inlet screen pressed into the carburetor body. This screen is the last filter before fuel enters the metering chamber. A clogged screen starves the engine at high speed. Extract it with a pick, clean it with solvent, and replace it if it’s rusted or torn.
Metering Side
Remove the four perimeter screws on the metering cover. You’ll find:
- Metering diaphragm — central metal disk, faces the metering lever
- Metering gasket — sits between the diaphragm and carburetor body
- Metering lever, spring, fulcrum pin, and inlet needle — held by one retaining screw
Zama carburetors use a T8 Torx for that retaining screw. Walbro typically uses a Phillips or flathead.
Press down on the lever to control the spring before removing it. Inspect the rubber (Viton) tip of the inlet needle under magnification. Any flat spots, grooves, or hardening means it won’t seal — replace it.
Mixture Screws
Before removing the L (low-speed) and H (high-speed) screws, turn them gently clockwise until they lightly seat. Count every rotation and write it down. That’s your baseline for reassembly.
Check the tapered brass tips. A grooved or bent tip makes the carburetor impossible to tune correctly — replace it. Note: the L needle is longer with a different taper than the H needle. They’re not interchangeable.
Many US-market saws have plastic limiter caps over these screws to meet EPA emissions regulations. You’ll need a reverse-thread puller tool to remove them for a full cleaning.
Cleaning Methods: What Works and What Wrecks the Carburetor
| Cleaning Method | Best For | Watch Out For |
|---|---|---|
| Aerosol carburetor cleaner | Fresh varnish, quick targeted cleaning | Can’t reach deep blind passages |
| Heated ultrasonic bath | Deep internal passages, inaccessible jets | Destroys Mylar check valves if carb isn’t fully stripped |
| Soft bristle/copper wire | Physically blocked jets | Hard steel wire enlarges brass jets permanently |
Aerosol Solvents — The Standard Approach
Use a solvent like Berryman B-12 Chemtool or CRC Clean-R-Carb. Spray into every exposed orifice and jet. When you spray into the main high-speed circuit, you should see fluid exit the main nozzle inside the venturi. Spraying into the L screw cavity should push fluid out the small progression holes near the throttle plate.
Follow up with low-pressure compressed air. Keep pressure low — high-pressure shop air can permanently deform the internal check valves.
Ultrasonic Cleaning — Powerful but Dangerous if Done Wrong
Ultrasonic machines use 37kHz sound waves to create microscopic implosions (cavitation) that blast varnish from blind holes. Effective — but risky.
Both Walbro and Zama explicitly warn against putting assembled carburetors in ultrasonic baths. The cavitation effect destroys the thin Mylar or rubber check valve flaps inside the venturi. Shattered check valves mean a totaled carburetor.
If you use an ultrasonic cleaner:
- Strip every diaphragm, gasket, adjustment screw, and check valve first
- Use aluminum-safe solution only (Simple Green Pro HD, Elma tec clean A4) diluted 1–5% in distilled water
- Standard alkaline degreasers cause hydrogen embrittlement in cast aluminum
Clearing Blocked Jets — Use Soft Materials Only
Hard steel wire scratches brass jets and enlarges the calibrated orifice. Even a tiny enlargement ruins the air-fuel ratio permanently. Use nylon bristles, soft copper wire stripped from electrical cord, or aluminum-safe cleaning probes instead.
Got a stuck check valve that isn’t physically damaged? Drop a few drops of two-stroke oil directly onto the valve tip. The oil can soften the hardened flap and break the varnish seal without destructive extraction.
Reassembly: Getting the Stacking Order Right
Installing diaphragms in the wrong order is one of the most common mistakes in chainsaw carburetor cleaning. It’s also one of the easiest to make.
| Side | Correct Order (Body Outward) | Why |
|---|---|---|
| Fuel Pump Side | Body → Pump Diaphragm → Pump Gasket → Cover | Diaphragm flaps must contact the machined body surface to pump correctly |
| Metering Side | Body → Metering Gasket → Metering Diaphragm → Cover | Gasket spaces the diaphragm for proper lever travel; metal disk faces down toward the lever |
Every alignment pin must engage its matching hole. The unique cutouts in the gaskets and diaphragms make it difficult — but not impossible — to install them backward. Double-check before tightening.
Setting the Metering Lever Height
This single adjustment determines whether your carburetor floods or starves the engine. Too high, and raw fuel leaks from the carburetor throat. Too low, and the engine hesitates, stalls, and overheats.
Use a Zama Z-gauge or Walbro W-gauge (model 500-13) — always measured without the metering gasket installed. The lever should sit flush with the cavity floor or within 0–0.012″ below it, depending on the model.
To adjust: hold the lever base down with a flathead screwdriver, then gently bend the free end up or down with your thumb. Don’t apply pressure to the needle tip.
Pressure Testing Before You Reinstall
Don’t bolt the carburetor back on until it passes this test. Use a hand-pump pressure and vacuum tester with a gauge.
Wet the needle seat with a few drops of fuel or light oil first — a dry carburetor always leaks on the test.
| Test | Target | Failure Sign |
|---|---|---|
| Inlet Pop-Off Pressure | ~10 PSI | Needle pops too early or won’t pop |
| Inlet Reseat Pressure | Holds ~7 PSI for 1 minute | Pressure bleeds to zero |
| Metering Vacuum Test | Holds 10 in. Hg for 10 seconds | Rapid vacuum loss |
A carburetor that fails the reseat test will flood the engine. Don’t skip this step.
Tuning the Carburetor After Cleaning
Warm the engine completely before tuning. A cold adjustment always runs rich once the block heats up.
Your carburetor has three screws:
- T/LA (Idle Speed): Controls how far the throttle plate closes — not fuel volume
- L (Low-Speed): Governs idle stability and throttle response
- H (High-Speed): Controls wide-open-throttle fuel volume and max RPM
Tuning Step-by-Step
1. Baseline: Back L and H screws out to your pre-recorded baseline (typically 1–1.5 turns out).
2. Set idle: Adjust T/LA until the engine idles without stalling. The chain must not move at idle — back the screw out immediately if it does.
3. Tune the L screw:
- Turn clockwise (lean) until the RPM peaks, then begins to die
- Turn counter-clockwise (rich) until it sounds sluggish and begins to die
- Set it roughly in the middle
- Snap the throttle — it should rev instantly with zero hesitation. If it bogs, richen the L screw by one blade-width and retest
4. Tune the H screw — listen for the “blubber”:
This is where most people go wrong. A correctly tuned chainsaw four-strokes at wide-open throttle with no load. That rough, fluttering “blubber” sound isn’t a problem — it’s intentional.
Turn the H screw clockwise (lean) until the engine sounds completely smooth and screams. Then immediately back it out counter-clockwise until the RPM drops about 500 RPM and that rough blubber returns. That’s your target.
A smooth-screaming unloaded chainsaw is destroying itself. With no load and a lean mixture, there’s not enough fuel to cool the piston or lubricate the crankshaft bearings. Seizure follows fast.
Use a digital tachometer to stay within safe RPM limits:
| Model | Max No-Load RPM |
|---|---|
| Stihl 044 / MS440 / 046 / MS460 | 13,500 RPM |
| Stihl 066 / MS660 | 13,000 RPM |
| Stihl 084 / 088 / MS880 | 11,500 RPM |
| Husqvarna 272 / 372 | 13,500 RPM |
| Husqvarna 288 / 385–395 | 13,000 RPM |
| Husqvarna 3120 | 11,500 RPM |
5. Final check: Revisit idle speed after setting both needles. Confirm the chain stays still and acceleration is crisp.
How to Prevent This Job Next Time
The best chainsaw carburetor cleaning is the one you don’t need to do.
- For storage under 30–60 days: Fill the tank completely and add a marine-grade ethanol stabilizer like Biobor EB. A full tank minimizes air space and reduces moisture condensation.
- For seasonal storage: Drain the tank completely. Run the engine until it starves and dies. Restart several times using the choke to purge the last fuel from the carburetor. Store it bone-dry.
- Best option of all: Switch to ethanol-free pre-mixed canned fuel like STIHL MotoMix. No ethanol means no phase separation, no corrosion, and no varnish — ever.
A properly cleaned, rebuilt, and tuned carburetor on a healthy engine runs hard and stays reliable for years. The key is the details: the right cleaning method for each component, the exact diaphragm stacking order, the metering lever height, pressure testing, and that four-stroking blubber at wide-open throttle. Get those right, and your saw will cut like it’s brand new.