
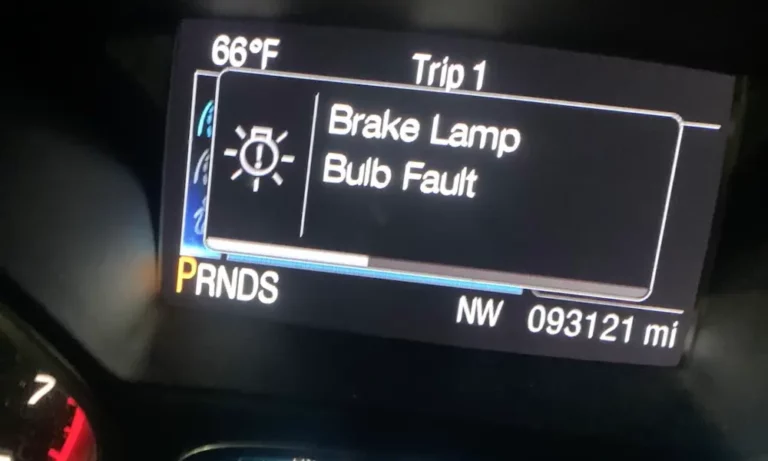
Got that dreaded “Brake Lamp Bulb Fault” message on your Ford Escape dashboard? You’re looking at one of the most common electrical issues these vehicles face. This problem affects safety, inspection status, and even resale value—but don’t worry, most cases can be fixed without breaking the bank. Let’s dive into what causes this fault and how you can fix it yourself in many cases.
What’s Behind Your Ford Escape Brake Light System
How Your Brake Lights Are Set Up
Your Ford Escape uses special dual-filament bulbs (typically 3157 type) that do double duty—they work as both brake lights and tail lights. These clever bulbs have two separate filaments inside: one that glows dimly for your regular tail lights, and another that shines brightly when you hit the brakes.
The system works through a chain reaction: when you press the brake pedal, a brake light switch near your pedal sends an electrical signal through your vehicle’s wiring to those bulbs, telling them to light up. This switch doesn’t just control your lights—it also lets your transmission shift out of park, making it pretty important for daily driving.
Different Generations, Similar Problems
While the basic brake light setup hasn’t changed much across different Ford Escape generations, there are some differences worth noting:
- 2005-2007 models use 3156/3157 bulbs with separate headlight configurations
- 2008-2012 models stick with the same bulb type but changed to H13 headlight bulbs
- 2013-2019 models improved wiring harnesses to fix earlier heat problems
- 2020-2025 models often include LED brake lights in higher trims (which create their own unique repair challenges)
Why Your Brake Lamp Bulb Fault Light Comes On
Burned-Out Bulb Filaments
The simplest cause is just a burned-out filament in one of your brake light bulbs. Since these bulbs have two separate filaments, it’s possible for one function to fail while the other works fine. When you look at the bulb, you might notice a darkened glass or visibly broken wire inside—clear signs you need a replacement.
Melted Sockets and Wiring Issues
A more serious problem—especially in 2008-2012 models—is socket overheating and melting. This happens when connections get loose or corroded, creating resistance that generates heat. The plastic socket housing can melt, damaging wiring and even creating fire hazards.
The wiring harness that connects everything can also degrade over time. Road salt, moisture, and normal aging can all create breaks or poor connections in the circuit, triggering that annoying fault message.
Faulty Brake Light Switch
Your brake light switch is the starting point for the entire system. When it fails, your brake lights might stay on constantly, never come on at all, or work inconsistently. A bad switch can also prevent your transmission from shifting out of park—leaving you stranded in your driveway.
Electrical System Problems
Sometimes the issue is broader than just the bulbs:
- Blown fuses can disable your entire brake light circuit. In most Ford Escapes, check fuse #21 (usually 5-amp) in the engine compartment fuse box.
- Body Control Module glitches occasionally trigger false warning messages even when everything is actually working fine.
How to Diagnose Your Brake Light Problem
Start With a Visual Check
Begin with a basic visual inspection:
- Have someone press the brake pedal while you check all three brake lights (left, right, and high-mounted center)
- Note which specific lights aren’t working—this helps pinpoint the problem
- Remove the affected tail light assembly to inspect the bulb and socket
- Look for obvious damage: burnt filaments, melted plastic, corroded connections, or damaged wiring
- Verify you have the correct 3157 bulb installed—wrong bulbs can cause overheating
Test the Electrical System
If visual inspection doesn’t reveal the problem, it’s time for some electrical testing:
- Use a digital multimeter to check for 12-volt power at the socket when the brake pedal is pressed
- No voltage means an upstream electrical problem; proper voltage with non-working bulbs points to bulb or socket issues
- Test for continuity through the wiring harness from the brake switch to the tail light sockets
- Check ground connections, as poor grounds can cause various lighting problems
Reset the System
Modern Ford Escapes sometimes need a system reset after bulb replacement to clear persistent fault messages:
- Disconnect the battery for several minutes
- Or use diagnostic scan tools to reset the Body Control Module
- Some vehicles automatically reset after driving briefly with properly functioning brake lights
How to Fix Your Ford Escape Brake Lamp Issue
Replacing a Brake Light Bulb
Here’s a step-by-step guide to replacing your brake light bulb:
What you’ll need:
- 8mm socket and ratchet
- Flat-head screwdriver or trim removal tools
- Replacement 3157 bulbs
- Disposable gloves
Safety first:
- Park on level ground
- Engage the parking brake
- Turn off the ignition
- Open the rear liftgate
Removing the assembly:
- Locate and remove the two small plastic covers hiding the tail light mounting bolts
- Use a small flat-head screwdriver to carefully pry these out
- Remove the two 8mm bolts securing the tail light assembly
- Pull the entire assembly straight back from the vehicle body
Changing the bulb:
- Find the brake light socket (typically the upper socket in the assembly)
- Twist the socket counterclockwise about a quarter-turn to remove it
- Pull the old bulb straight out
- Insert the new 3157 bulb, avoiding touching it with bare skin (oils can cause premature failure)
Putting it back together:
- Have someone test the new bulb by pressing the brake pedal
- If it works, reinstall the socket with a clockwise quarter-turn
- Push the tail light assembly back into position
- Replace the mounting bolts and plastic covers
Replacing a Damaged Socket
If your socket shows signs of melting or burning:
- Cut the damaged socket from the wiring harness, leaving enough wire for splicing
- Note the wire colors and positions for proper reconnection
- Splice the new socket to the existing wires using appropriate electrical connectors
- Apply dielectric grease to connections to prevent corrosion
- Add heat shrink tubing for additional protection against moisture
Replacing the Brake Light Switch
To replace a faulty brake light switch:
- Locate the switch near the brake pedal assembly under the dashboard
- Remove the lower dashboard panel on the driver’s side for access
- Disconnect the electrical connector by pressing the release tab and pulling
- The switch typically twists counterclockwise to remove from its mounting bracket
- Install the new switch by reversing the removal process
- Test to make sure brake lights activate and the transmission shifts properly
Preventing Future Brake Light Problems
Regular Inspection Schedule
Make brake light checks part of your routine maintenance:
- Inspect all lights every 5,000-10,000 miles (coinciding with oil changes)
- Clean sockets and apply dielectric grease to prevent corrosion
- Pay special attention if you drive in areas with road salt or high humidity
Choose Quality Parts
Don’t skimp on replacement components:
- Use OEM-specification 3157 bulbs for proper fit and longevity
- Avoid higher-wattage bulbs that can cause socket overheating
- If upgrading to LEDs, ensure they’re compatible with your vehicle’s electrical system
- Invest in quality sockets—OEM or premium aftermarket options resist heat better than generic parts
Protect Against the Elements
Environmental factors play a big role in electrical system health:
- Ensure proper sealing of tail light housings to prevent moisture intrusion
- Address any signs of water accumulation in tail light assemblies
- Make sure there’s adequate ventilation around light assemblies to prevent heat buildup
Making Sense of Ford Escape Taillight Problems
| Generation | Common Issues | Recommended Bulb | Difficulty to Fix |
|---|---|---|---|
| 2005-2007 | Bulb failures, minor socket issues | 3157 | Easy |
| 2008-2012 | Severe socket melting, wiring problems | 3157 | Moderate |
| 2013-2019 | Improved sockets, occasional moisture | 3157 | Easy-Moderate |
| 2020-2025 | LED module failures, electrical glitches | Varies by trim | Moderate-Difficult |
Essential Tools for DIY Brake Light Repair
| Tool | Purpose | Estimated Cost |
|---|---|---|
| 8mm Socket Set | Remove tail light assembly | $10-15 |
| Digital Multimeter | Test voltage and continuity | $20-50 |
| Dielectric Grease | Prevent connection corrosion | $5-10 |
| Wire Crimping Tool | Repair wiring harness | $15-25 |
| Heat Shrink Tubing | Insulate electrical repairs | $8-12 |
Ford Escape brake lamp bulb faults are common but usually straightforward to fix. With systematic diagnosis, you can identify whether you’re dealing with a simple bulb failure, socket damage, or a more complex electrical issue. Regular maintenance, quality parts, and prompt attention to warning signs will keep your brake lights working reliably and your vehicle safe on the road.
By handling these repairs yourself when appropriate, you’ll save money while gaining a better understanding of your vehicle’s electrical systems—knowledge that comes in handy for future maintenance and troubleshooting.


