Your Uconnect screen is glitching, your maps are outdated, or your Bluetooth keeps dropping. Sound familiar? A software update probably fixes it. This guide walks you through every method to update Uconnect — USB, Wi-Fi, or over-the-air — so you can pick the right one for your vehicle and get it done today.
First, Figure Out Which Uconnect You Have
Before you update anything, you need to know what you’re working with. Uconnect 3, 4, and 5 all update differently.
Here’s how to find your current software version:
- Uconnect 4: Tap “Apps” or “Controls” → Settings → System Information
- Uconnect 5: Tap “Vehicle” → Settings → Version Information
- Uconnect 3 (legacy): You may need Dealer Mode — hold specific climate or radio buttons to access it
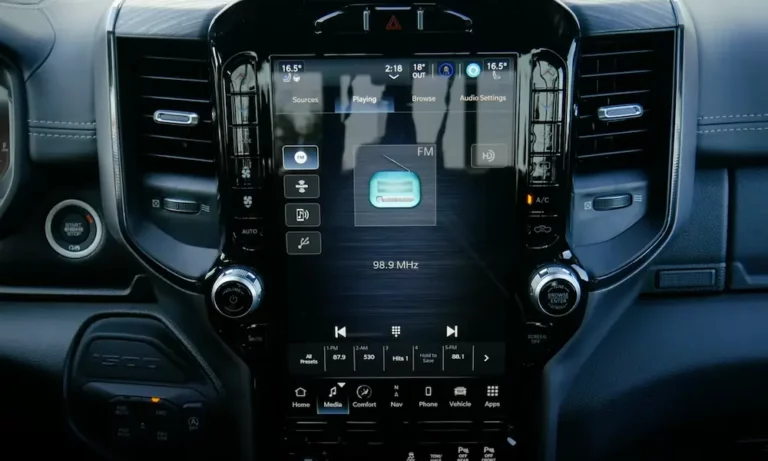
Still not sure which generation you have? Check the screen size. Five-inch screens are Uconnect 3. Seven or 8.4-inch screens are typically Uconnect 4. An 8.4, 10.1, or 12.3-inch screen with a slick Android-based interface? That’s Uconnect 5.
The Quick Generation Comparison
| Feature | Uconnect 3 | Uconnect 4 | Uconnect 5 |
|---|---|---|---|
| Operating System | Proprietary/QNX | QNX-based | Android-based |
| RAM | Under 1GB | 2–4GB | 6GB |
| Storage | Under 8GB | 16–32GB | 64GB |
| How It Updates | USB or dealer | USB or early OTA | OTA, Wi-Fi, or dealer |
How to Check If an Update Is Available
Your VIN is the key here. Every software update is matched to your specific vehicle.
- Find your 17-digit VIN on your dashboard (driver’s side), doorjamb, or registration
- Head to the Uconnect Software Update Center
- Enter your VIN
- The site shows you whether an update is available and lets you download it
Quick tip on your VIN: The 10th character tells you the model year. “K” means 2019, “L” means 2020, “M” means 2021, and so on. Getting this right matters — installing the wrong firmware version can cause real problems.
How to Update Uconnect via USB (Manual Method)
This method works for all Uconnect generations. It’s the best option if your vehicle is older, doesn’t have cellular connectivity, or needs a full firmware re-image.
Step 1: Get the Right USB Drive
Most failed updates come down to a bad USB drive. Use a name-brand drive — Kingston or SanDisk work well. Skip anything with built-in encryption or multiple partitions. The Uconnect bootloader can’t work around those security layers.
Capacity and formatting requirements:
| System | Minimum Size | Required Format |
|---|---|---|
| Uconnect 4 / 8.4 | 4GB | FAT32 |
| Uconnect 5 | 8GB | NTFS |
On Windows, right-click the drive in File Explorer and select “Format.” On a Mac, use Disk Utility. Choose “MS-DOS (FAT)” for older systems, NTFS for Uconnect 5.
Step 2: Download and Extract the Update
Go back to the Uconnect Software Update Center, download the update file for your VIN, and unzip it.
Here’s where people go wrong: don’t put the .zip file on the drive, and don’t put the extracted files inside a folder. The files need to sit in the root directory — meaning you open the drive and see the files immediately, not a folder containing them.
Step 3: Run the Update in Your Vehicle
This part needs some care. A failed update mid-flash can brick your head unit.
- Start your engine. Running the engine keeps voltage stable throughout. A battery dip can corrupt the firmware write.
- Disconnect everything else — other USB drives, SD cards, and your Bluetooth-paired phone. If the system tries to index media files, it may ignore the update.
- Insert the USB drive. A pop-up appears comparing your “Old” version and the available “New” version. If the new version isn’t higher, stop — don’t install it.
- Tap “Yes” to begin. The screen may go black several times. The progress bar might hang at 33% or 99% for a while. That’s normal. Don’t remove the drive.
- Wait for the reboot. The version comparison screen appears again. If the “Old” version now matches the “New” version, it worked. Tap “No” and remove the drive.
The whole process typically takes 20–45 minutes depending on your system.
How to Update Uconnect Over the Air (OTA)
OTA updates are available on most vehicles made after 2017. They deliver patches and improvements through your vehicle’s built-in cellular modem — no USB required.
To check if your vehicle qualifies: Look for an “Assist” button on your rearview mirror. That button indicates an active telematics module, which is what makes OTA updates possible. Note that some early 2017 models like the Chrysler 300 and Dodge Charger were excluded from the first OTA rollouts due to hardware limits.
How OTA Updates Actually Work
The Uconnect FAQ breaks it into two phases:
Phase 1 — Pre-Installation (about 20 minutes):
- Vehicle must be in Park with the ignition in RUN position
- A prompt appears: “Update Now” or “Schedule Later”
- You can defer as long as you want if the timing’s bad
Phase 2 — Background Installation (up to 70 minutes):
- Runs automatically after you approve it
- Keeps running even after you turn the ignition off and lock the car
- The system manages its own power so it doesn’t drain your battery
- Shuts down automatically when done
During the update, your navigation, radio, and backup camera go offline. The system won’t start an update while you’re driving — that’s a hard lock.
How to Update Uconnect 5 via Wi-Fi
Uconnect 5 adds Wi-Fi as a third update path. This is handy for large updates like full map refreshes, or if your cellular signal is weak.
Connect your vehicle to a password-protected home Wi-Fi network through the system settings, then check for updates the same way you would with OTA. The process and prompts are identical — the only difference is the connection type.
How to Update Uconnect Maps
Map updates are separate from system firmware. You can have the latest software and still be driving with outdated roads.
For Uconnect 4 and older systems, map data comes from HERE Technologies and is typically sold as a physical USB package. Head to the Uconnect Navigation Map Update page to buy and download it. The activation process works like this:
- Insert the map USB — your vehicle generates a unique Request Code
- Enter the Request Code and your VIN on the web portal
- You receive an Activation Code
- Enter the Activation Code into your touchscreen to unlock the maps
For Uconnect 5, maps update automatically over the air with an active navigation subscription. The base navigation still works without a subscription, but real-time traffic and the latest road data require a paid data plan.
Troubleshooting Common Update Problems
Even when you do everything right, updates sometimes hit a wall. Here’s what to do.
Your Screen Is Frozen or Glitching
Try a soft reset first. Hold the Volume and Tune knobs simultaneously for 10–20 seconds. This clears most minor glitches — frozen maps, Bluetooth failures, unresponsive touch — without wiping your settings.
You’re Getting an Error Code
The NHTSA Technical Service Bulletin 08-081-21 documents known firmware issues and common error scenarios. Here’s a quick reference:
| Error Code | What It Means | What to Do |
|---|---|---|
| 187 | USB read failure | Check the port for debris; try a new USB drive |
| 255 | File integrity error | Re-download the update; check for antivirus interference |
| 260 | Protocol mismatch | Reformat the drive — FAT32 for Uconnect 4, NTFS for Uconnect 5 |
| “No Files Found” | System still indexing | Wait 15 minutes; don’t remove the drive |
| Black screen | Flash cycle in progress | Wait 30 minutes minimum; don’t cycle the ignition |
The “No Files Found” Message
This one panics a lot of people. The system might just be indexing media files before it checks for software. Leave the drive in for at least 15 minutes before pulling it out.
Factory Reset as a Last Resort
If an update has corrupted your user profile database, a factory reset through the Settings menu gets you back to a clean slate. It wipes radio presets, navigation favorites, and paired devices — but sometimes that’s the cleanest fix.
What to Do After a Successful Update
Updates often reset certain settings back to factory defaults. After any Uconnect update, check these:
- Auto Play: Often defaults to OFF. Turn it back on if you use USB media.
- Clock: GPS-based clocks can take up to 20 minutes of open-sky driving to re-sync.
- Bluetooth: Go to “Forget this Device” on both your phone and the car, then re-pair fresh. This loads the latest Bluetooth profiles and clears old handshake issues.
- Connected services: If you use the Uconnect app, log into the Mopar Owner Site to confirm your vehicle’s new software version is reflected in the system.
The Dealership Route: When Pros Handle It
Some updates can’t happen over USB or OTA. If your screen is black and unresponsive, or if a recall is tied to a software fix, a certified technician is the right call.
Technicians use the wiTECH diagnostic tool through the OBD-II port. It lets them force-flash the firmware through the data bus even when the screen won’t respond — something no consumer tool can do. They also run post-flash calibrations to re-sync premium audio systems, air suspension controls, and other vehicle-specific configurations.
The cost varies. Updates covered under warranty or a safety recall are free. Out-of-warranty software work typically runs between $190 and $300 in labor, depending on complexity. Some multi-step updates — where the technician has to flash an intermediate version before jumping to the latest firmware — take longer and cost more.
If your system gets fully bricked during a failed update — stuck in a reboot loop with no recovery — the head unit itself may need replacement. That repair runs between $700 and $2,500 depending on screen size and vehicle model.
Keeping Uconnect Updated Is Worth the Effort
A current Uconnect build means faster response, better Bluetooth reliability, accurate maps, and access to features Stellantis has rolled out since you bought the car. The USB method takes about an hour and costs nothing. OTA updates run themselves overnight. Either way, staying current is easier than dealing with a system that’s slowly falling behind.