Your Kia Optima won’t crank. You turn the key and hear a click, a grind, or nothing at all. Before you call a tow truck, this guide walks you through exactly what’s wrong and how to fix it yourself — from diagnosing the problem to bolting in a new starter and resetting your electronics. Read to the end; the post-installation steps most people skip can save you a frustrating callback.
What Does a Starter Actually Do?
The starter motor spins your engine fast enough — around 200 to 300 RPM — for the fuel and ignition system to take over. It’s a high-torque DC electric motor that works with a solenoid, a pinion gear, and an overrunning clutch.
Here’s the quick version of how it works:
- You turn the key → a small signal wire energizes the solenoid
- The solenoid pushes the pinion gear into the flywheel teeth
- Copper contacts close → hundreds of amps flow from the battery into the motor
- The engine cranks, fires, and the overrunning clutch disengages the gear before the engine can destroy the starter
On 2011–2020 Optimas with the Theta II GDI engine, the starter is a gear-reduction type. A smaller, faster motor uses planetary gears to multiply torque. It fits in a tighter space and handles high-compression GDI engines without breaking a sweat.
Know Your Generation Before You Start
Kia Optima starter replacement isn’t one-size-fits-all. The access point, tools needed, and labor time change depending on which generation you own.
| Generation | Model Years | Common Engines | Starter Access Point |
|---|---|---|---|
| First (MS) | 2001–2005 | 2.4L I4, 2.5L/2.7L V6 | Rear bellhousing, top access |
| Second (MG) | 2006–2010 | 2.4L I4, 2.7L V6 | Top access, remove air ducting |
| Third (TF) | 2011–2015 | 2.4L GDI, 2.0L Turbo | Under intake manifold, front |
| Fourth (JF) | 2016–2020 | 2.4L GDI, 2.0T, 1.6T | Under tray, bottom access |
The 2016–2020 JF platform is longer, wider, and more aerodynamic — but the engine bay is packed tight. Expect to remove a splash shield before you even see the starter.
Diagnosing the Problem: What Does Your Optima Sound Like?
Don’t buy a starter until you confirm it’s actually the problem. The most common cause of a no-start is a weak battery, and the symptoms can look identical to a dead starter.
| Sound or Symptom | What It Means |
|---|---|
| One sharp click, lights stay bright | Starter motor failure or worn brushes |
| Rapid clicking, lights dim or flicker | Dead battery or corroded terminals |
| High-pitched whirring, engine won’t turn | Failed overrunning clutch |
| Harsh grinding during start | Worn pinion gear or damaged flywheel teeth |
| Starts fine sometimes, fails other times | Carbon brush wear or loose ground |
| Engine cranks slowly | High resistance in cables or weak battery |
A grinding noise is a red flag — ignore it and you risk chewing up the flywheel teeth. That repair means pulling the transmission, and the bill can get ugly fast.
The Voltage Drop Test
Grab a multimeter before you order parts. Check battery voltage at rest — it should read 12.6V. Then have someone crank the engine while you measure voltage at the starter’s B-terminal (the large power post).
- Drops below 9V during cranking? The battery or cables are the problem — not the starter.
- Stays above 10V but the starter doesn’t respond? Check the S-terminal (signal wire). If it reads 12V with the key turned, the solenoid is dead.
TSB 19-EE-007H: Check This Before Replacing Anything
For 2011–2020 models, Kia issued Technical Service Bulletin 19-EE-007H covering intermittent no-crank conditions. The cause is often just a loose nut on the starter’s M-terminal — the internal connection between the solenoid and the motor. Vibration loosens it over time. Tighten it first. You might save yourself an unnecessary part purchase.
Safety Rules You Can’t Skip
The starter’s B-terminal carries a direct, always-hot, high-amperage connection straight from the battery. There’s no fuse protecting it.
Step one, always: disconnect the negative battery terminal.
Touch that main cable to any metal surface with the battery connected and you’ll get a serious electrical arc. Batteries can explode. Tools can melt. It’s not worth it.
Two more rules for third and fourth-gen Optimas:
- Let the engine cool completely — the starter sits near cooling hoses and fuel lines on GDI models
- Use jack stands rated for your vehicle’s weight — never trust a hydraulic jack alone while you’re working underneath
Tools You’ll Need
| Tool | Why You Need It |
|---|---|
| 10mm, 12mm, 13mm, 14mm sockets | All starter fasteners are metric |
| 1/4″ and 3/8″ drive ratchets | Tight spaces need the smaller drive |
| 10″ extension + swivel joint | Essential for GDI engines |
| Torque wrench | Don’t guess on terminal nuts |
| Needle-nose pliers | Removes wiring harness clips |
| Flat-head screwdriver | Pops plastic push-pin clips |
| 10mm wrench | Battery terminal disconnect |
Have spare M6 screws and plastic push-pin clips ready if you own a 2016–2020 model. The under-tray fasteners rust badly in salt belt states, and they snap without warning.
Replacing the Starter: 2001–2010 (Generations 1 & 2)
This is the friendliest repair of the bunch. The starter lives near the rear of the engine, where it meets the transmission bellhousing, and you can reach it from the top.
Steps:
- Disconnect the negative battery terminal
- Remove the air intake ducting — loosen the worm-gear clamps at the throttle body and air filter housing, then lift it clear
- Locate the starter at the engine/transmission junction
- Remove the rubber boot from the solenoid and unscrew the 12mm or 13mm main power nut — hold the cable steady while you turn
- Press the release tab on the signal wire connector and pull it straight off
- Remove the two 14mm mounting bolts — on V6 models, the bolts are different lengths, so note their positions before you pull them
- Rotate the starter 90° if needed to clear the hoses and wiring, then extract it
On installation, clean the mounting surface first. Any corrosion between the starter and the transmission housing will mess with the ground connection and cause problems even with a brand-new part.
Replacing the Starter: 2011–2015 (Generation 3)
This generation moved the starter underneath the intake manifold. Early repair manuals say to remove the entire intake manifold — that means disconnecting high-pressure fuel lines, vacuum hoses, and a pile of sensors. Skip that approach.
The Smarter Method: Manifold Displacement
You don’t need to fully remove the manifold. You just need to move it a few inches.
- Disconnect the battery
- Remove the upper radiator hose — some coolant will drain, so top it off afterward
- Unbolt the cooling fan (two 10mm bolts at the top of the radiator) and unplug its connector — lift the entire fan shroud out of the engine bay. This opens a huge workspace
- Remove the five 12mm nuts holding the intake manifold to the cylinder head
- Find the two 12mm support bolts underneath the manifold — reach them from below or with a long extension from above. These are the bolts most guides miss
- Pull the manifold away from the head by a few inches — you don’t need to remove it completely
- The two 14mm starter mounting bolts are now accessible — remove them
- Disconnect the electrical connections while the starter is loose and has room to maneuver
- Slide the starter out through the gap
Pro tip: When installing the new unit, attach the wiring before you bolt it to the engine. You’ll have far more room to thread the cables when the starter isn’t locked in place.
This method cuts the job from roughly three hours down to about one.
Replacing the Starter: 2016–2020 (Generation 4)
The JF platform starter is best accessed from underneath the car. The layout improved slightly from the third gen, but you’ll deal with a serious under-engine splash shield first.
- Lift and support the car on rated jack stands
- Remove the splash shield — a mix of 10mm bolts and plastic push-pins. Budget for replacements
- Remove the heavy metal support bracket protecting the starter (14mm bolts)
- The upper mounting bolt is easier to reach from the top of the engine bay with a long extension; the lower bolt comes out from below
- Pop off the plastic clip cover on the electrical connections, remove the 12mm power nut, and disconnect the spade connector
- On the 2.0L turbo: the intercooler pipe runs right next to the starter. Loosen the rubber couplers and rotate the pipe out of the way before trying to extract the starter
| Model Variant | Main Obstacle | Estimated Labor Time |
|---|---|---|
| 2.4L GDI (2016–2020) | Splash shield and bracket | 1.5–2.0 hours |
| 2.0L Turbo (2016–2020) | Intercooler piping | 2.0–2.5 hours |
| 1.6L Turbo (2016–2020) | DCT housing clearance | ~2.0 hours |
Torque Specs Matter — Don’t Wing It
Undertighten the mounting bolts and the starter vibrates out of alignment. Overtighten the terminal nuts and you’ll strip or snap the soft copper stud.
| Fastener | Socket Size | Torque (ft-lbs) |
|---|---|---|
| Bellhousing mounting bolts | 14mm | 35.0 |
| Main power (B-terminal) nut | 12mm–13mm | 3.0–4.4 |
| Intake manifold support bracket | 12mm | 13.7–17.4 |
| Splash shield screws | 10mm | 3.5–5.0 |
The B-terminal nut is the one that trips people up. It feels loose at 4 ft-lbs. Use a small torque wrench anyway — the NHTSA engine replacement guidelines are clear about terminal torque compliance, and it’s easy to exceed 4 ft-lbs without realizing it.
Reset Your Electronics After Reconnecting the Battery
This is the step most DIYers skip, and then wonder why the car feels off for a week.
Power windows: Hold the window switch down until fully open, keep holding for 5 seconds. Pull up until fully closed, keep holding for 5 seconds. The motor controller re-learns its stall points.
Engine idle relearn: Start the car and let it idle for three minutes without touching the gas pedal. The ECM re-calibrates the throttle body’s resting position.
Transmission relearn: Avoid flooring it for the first 20–50 miles. The TCM needs time to re-learn optimal shift pressures — especially important on DCT-equipped 1.6T models.
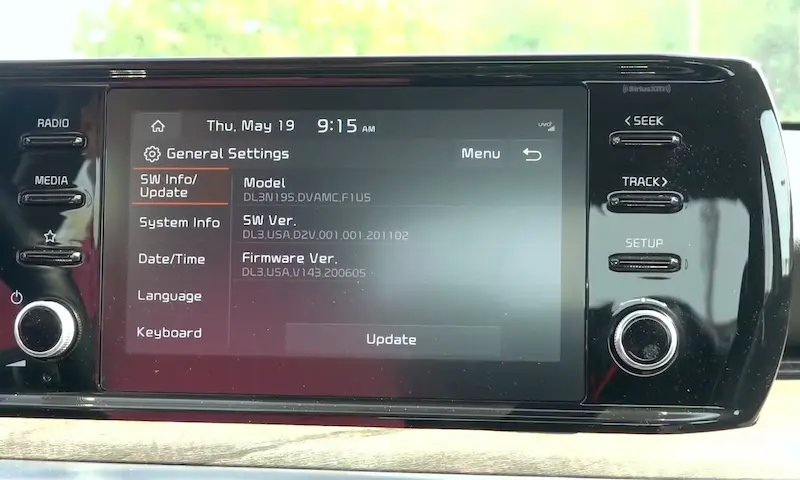
Other resets: Clock, radio presets, and on some older models, a radio security code. Check your owner’s manual or call your Kia dealer with your VIN if the infotainment system locks up.
What’s This Going to Cost You?
| Cost Category | DIY | Professional |
|---|---|---|
| OEM starter (dealer) | $250–$350 | Included in total |
| Aftermarket (Denso/Bosch) | $180–$275 | Included in total |
| Budget aftermarket | Under $100 | Not recommended for GDI |
| Labor (1.5–2.5 hrs @ $150–200/hr) | $0 | $225–$500 |
| Total | $180–$350 | $450–$850 |
A quality aftermarket starter from a known brand handles the job fine on naturally aspirated models. On high-compression GDI engines, spending a little more for a Denso or Bosch unit is worth it — budget starters often lack the torque spec needed for a reliable start under load.
Starters typically last 100,000–150,000 miles, but city driving and cold climates accelerate wear. If you’re in the rust belt and your battery cables look rough, replace them at the same time. A corroded ground is the quiet killer of brand-new starter motors.
A Note on Hybrid Optima Models
The Optima Hybrid and Plug-in Hybrid don’t use a traditional 12V starter for most operations. They use a Hybrid Starter-Generator (HSG) integrated into the belt drive system — and it runs on high voltage, typically over 270V. That’s not a DIY job, period.
What is your responsibility as a hybrid owner: keep the 12V auxiliary battery healthy. If that battery dies, the hybrid system can’t boot up, and the car won’t start at all. The 12V battery is more critical on hybrids than most owners realize.