Got a Quadrajet sitting on your engine that stumbles, floods, or just acts up? A proper quadrajet carburetor rebuild fixes all of that. This guide walks you through everything — from decoding your carb’s ID number to eliminating the dreaded Quadra-bog. Stick around. There’s a lot here worth knowing.
What Makes the Quadrajet Different
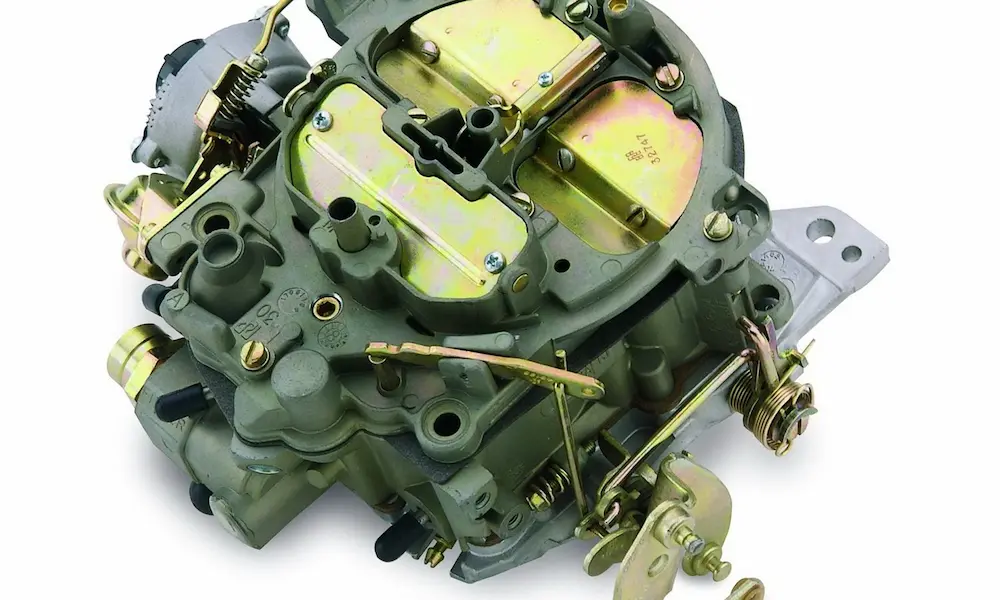
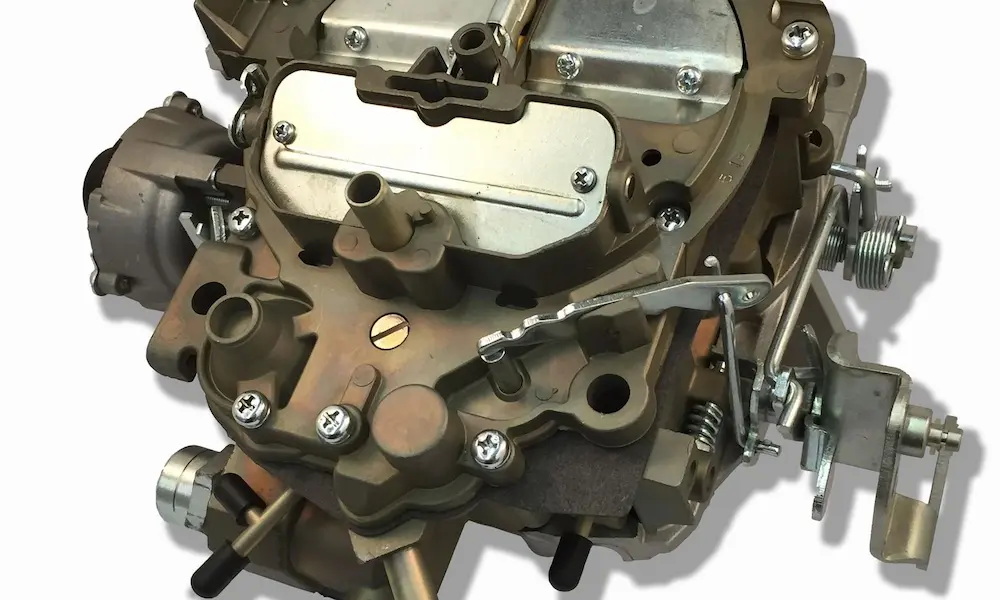
The Rochester Quadrajet isn’t your average four-barrel carb. It uses a spread-bore design — small 1.375-inch primary bores for crisp throttle response and massive 2.25-inch secondary bores for wide-open-throttle power. That combination is why GM bolted these onto everything from economy cars to muscle cars between 1965 and the late 1980s.
The small primaries spin air fast, creating a strong pressure drop that pulls fuel through plain tube nozzles with real precision. The big secondaries stay closed until the engine actually needs them, controlled by a spring-loaded air valve — not just mechanical linkage. That’s smarter engineering than most people give it credit for.
The whole unit is built from three zinc-aluminum castings: the throttle body, the main fuel bowl, and the air horn. Decades of heat cycles and vibration take a toll on those castings in very specific ways. Knowing where they fail — before you start wrenching — saves a lot of frustration.
How to Decode Your Quadrajet ID Number
Before you buy a rebuild kit or order parts, identify exactly what you have. The ID number is stamped into the main fuel bowl casting. On 1965–1967 units, it’s on a pressed metal tag. From 1968 onward, it moves to a vertical stamp on the driver-side rear corner of the bowl.
Here’s how the number breaks down:
| Digit Position | Value | Meaning |
|---|---|---|
| Prefix | 702/703 | 1960s production |
| Prefix | 704 | 1970–1975 |
| Prefix | 1705 | 1976–1979 |
| Prefix | 1708 | 1980s |
| Emissions digit | 2 | Federal standards |
| Emissions digit | 5 | California spec |
| Division digit | 0, 1, 2 | Chevrolet |
| Division digit | 4 | Buick |
| Division digit | 5 | Oldsmobile |
| Division digit | 6, 7 | Pontiac |
| Transmission digit | Even | Automatic |
| Transmission digit | Odd | Manual |
The model suffix tells you the choke type. 4MC means the choke housing mounts directly on the bowl. 4MV uses a divorced manifold-mounted choke coil. M4MC and M4ME are later emissions-era units, often with electronic mixture control solenoids.
Carter also built Quadrajets under license using standard Rochester part numbers. They’re mechanically identical — just watch for a Carter tag and a different date code format.
The Six Operating Circuits — And Why Each One Matters
Understanding the circuits makes diagnosing problems much faster. The Quadrajet runs on six overlapping systems.
Float System
Fuel enters through a sintered bronze or paper filter, past an inlet needle valve, and fills the central bowl. The float pivots up as fuel rises, pressing the needle shut. A small pull-clip on the needle ensures it doesn’t stick. Mike’s Carburetor Parts explains that early carbs used Nitrophyl foam floats, while later units used brass — and each type fails differently.
Idle System
At closed throttle, high manifold vacuum pulls a fuel-and-air emulsion through idle tubes and out small ports below the throttle blades. The idle mixture needles in the base plate control volume. Later M4MC units added a fixed idle air bypass that keeps the throttle blades nearly shut, preventing premature main nozzle discharge at idle.
Main Metering and Power System
Open the throttle past the idle transfer slots and the primary venturis take over. Fast-moving air creates a pressure drop that draws fuel up through the main wells. Tapered metering rods inside the main jets control exactly how much fuel flows. High manifold vacuum pulls the power piston down, pushing thick rod sections into the jets — lean and efficient for cruising. Drop the vacuum under load and the spring pushes the piston up, lifting the rods to richer tapers for power.
Accelerator Pump System
Snap the throttle open and air rushes in faster than liquid fuel can follow. The accelerator pump mechanically squirts a shot of raw fuel straight into the primaries to cover that lean gap. A rubber cup on a plunger, driven by the throttle linkage, forces fuel past a 1/8-inch aluminum check ball and through two discharge nozzles in the air horn. If that check ball is missing, you’ll get a stumble every time you tip in the throttle.
Secondary System
The secondary throttle plates open mechanically at wide-open throttle, but the upper air valve doors stay shut until air velocity forces them open. As they open, an eccentric cam lifts the secondary metering rods out of the secondary jets. The carburetor-parts.com secondary circuit page covers this pneumatic demand system in detail. It’s elegant when it’s calibrated correctly — and terrible when it isn’t.
Choke System
The choke enriches the mixture for cold starts. Depending on the model, the thermostatic coil sits directly on the bowl (4MC) or mounts on the intake manifold (4MV). The vacuum break diaphragm cracks the choke open slightly on startup to prevent flooding.
Pre-Rebuild Inspection: Four Failures to Find First
Don’t pull a single screw until you check for these structural problems. Catching them early means you can order the right parts before teardown.
Bottom Fuel Well Plug Leakage
This is the most notorious Quadrajet flaw. The factory sealed the main well drillings with lead, brass, or cup plugs. Decades of heat cycling and ethanol-blended fuels cause those plugs to leak. Fuel drains from the bowl into the intake after shutdown. The symptoms are hard cold starts after the car sits and a flooded, rich condition on the first startup.
Standard epoxy dissolves in fuel. The correct fix uses Marine-Tex epoxy putty, which handles 13,000 psi compressive strength and resists gasoline, oil, and alcohol. Degrease with acetone, roughen the surface, mix at 5:1 resin-to-hardener, apply over the plugs, then file flat so it doesn’t interfere with the base plate gasket.
Throttle Shaft Wear
The steel throttle shaft wears an oval groove into the softer zinc throttle body over time. Unmetered air sneaks past that oval bore straight into the intake — a vacuum leak you can’t tune out. Signs include a wandering idle and an idle speed that won’t drop even with the idle screw backed off entirely.
Fixing it means installing throttle shaft bushings. You can drill and press in oil-impregnated bronze bushings, or use the no-drill method with PTFE sheet material cut into strips and rolled into the stepped factory bore.
Before pulling the throttle blades, grind the staked screw ends with a rotary tool. Don’t try to back them out — you’ll strip the shaft threads.
Air Horn Warpage
Over-tightening the air cleaner wing nut pulls the center of the air horn upward over time. A warped air horn breaks the gasket seal between the upper and middle castings, allowing raw fuel to bypass the idle circuit and enter the engine directly. You’ll get a rich idle you can’t lean out and sometimes a whistling sound from the gap.
Repairing a warped air horn involves heating the casting carefully with a propane torch, tapping the high spots flat with a wooden drift and rubber mallet, then final-truing on 80-grit abrasive paper adhered to a flat glass plate. Severe warpage needs machine work.
Fuel Inlet Thread Failure
The zinc threads around the fuel inlet fitting strip easily if the fitting is overtightened or cross-threaded. Stripped threads mean a fuel spray onto a hot intake manifold — a genuine fire hazard. PTFE tape won’t hold under fuel pump pressure. The only lasting fix is boring the passage and installing a steel Heli-Coil thread insert to restore stronger-than-factory threads.
Disassembly: The Organized Teardown
Work methodically. The Quadrajet has dozens of tiny springs, balls, and linkages that vanish if you rush.
- Drive the accelerator pump lever roll pin inward using a 3/32-inch punch
- Unclip the secondary air valve rod, choke linkages, and fast-idle rods
- Remove all air horn screws — including two hidden ones inside the choke housing many people miss
- Later models use Torx T-25 security screws instead of flathead
- Lift the air horn perfectly straight up — angling it bends the primary metering rods and snaps secondary emulsion tubes
Inside the bowl, press out the float hinge pin and remove the float, needle, and pull-clip as a unit. Depress and release the power piston to free it from its bore. Unhook the secondary metering rods from their hanger.
On emissions-era carbs from the late 1970s and 1980s, idle mixture screws are hidden behind hardened plugs. Break steel plugs with a punch. For aluminum plugs, drill a pilot hole, thread in a coarse drywall screw, and extract with locking pliers using a rocking motion. Choke covers held by aluminum rivets need a No. 21 drill bit to remove the heads cleanly.
Cleaning and Inspection
Soak the zinc castings in carburetor cleaning solvent or a heated ultrasonic bath. Keep acetone and lacquer thinner away from any plastic parts, rubber diaphragms, or the throttle position sensor on Computer Command Control units — those chemicals will eat them fast.
After soaking, blast every passage with compressed air. A blocked idle down tube causes rough idle issues that look like jetting problems.
Float inspection matters more than most people realize:
- Brass floats: submerge in near-boiling water and watch for bubbles from pinholes
- Nitrophyl floats: weigh on a gram scale — operational weight is 6.5 to 7.5 grams; anything heavier means fuel saturation
A saturated float sits low in the bowl, holds the needle open, and causes constant flooding. Replace it. Don’t reuse it.
Reassembly: Torque Sequence and Tolerances
Join the throttle body to the main bowl first, using a new thick insulator gasket to block heat transfer from the intake manifold. Even torque in a cross pattern.
Install the accelerator pump return spring, then the pump cup. A thin film of white lithium grease on the pump cup prevents the rubber from tearing during initial dry cycling.
When securing the air horn, tighten screws from the center outward in a spiral pattern — never from the outside in. Start with fasteners near the choke valve and work toward the perimeter. Final torque runs 32 to 60 inch-pounds. Going tighter warps the casting. This is how most air horn damage happens in the first place.
Calibration and Tuning After the Rebuild
A clean carb on a misadjusted float still runs poorly. Get the calibration right.
Float Height
Remove the air horn and gasket. Hold the hinge pin down and let the float rest its weight on the closed needle. Measure from the top rim of the main body casting to the toe of the float. Specs range from 0.250 inches on early high-performance units to 0.420 inches on later emissions carbs — always verify against your specific application.
Adjust by bending the float arm with needle-nose pliers. Never press directly on the needle tip. That synthetic tip damages easily, and a damaged tip causes immediate flooding.
Idle Mixture
Thread the mixture screws in until they just touch — don’t overtighten, or you’ll groove the brass tips. Back them out 2 to 4.5 turns as a baseline. At operating temperature, hook up a vacuum gauge to a manifold vacuum port and adjust both screws in equal 1/4-turn increments until you reach the highest steady vacuum reading.
Adjustable Part Throttle (APT)
Post-1975 carbs have an APT screw that sets the baseline primary metering rod height during steady cruising. Drill out the factory aluminum plug in the air horn, tap it 3/8-16, and install a removable plug. Use a Double-D adjustment tool to tune without pulling the air horn. Richer or leaner cruising mixture — adjusted in minutes.
Fixing the Quadra-Bog
The bog happens when the secondary air valve doors open too fast and a wall of air enters before the fuel can catch up. Adjusting the air valve spring tension fixes it.
- Loosen the Allen set screw on the passenger side of the air horn
- Back off all tension until the doors fall open freely
- Wind the spring clockwise until the doors just barely close — that’s zero tension
- Add 1/2 to 3/4 turn of preload and lock the set screw
- Test under wide-open throttle; add 1/8-turn increments if the bog persists
If the engine still bogs after spring adjustment, the vacuum break hose restrictor may be too tight. Drilling it to 0.016 inches allows faster vacuum bleed-off and quicker door opening on high-performance builds.
Secondary Metering Rods and Hangers
The secondary jets are fixed at 0.1360 inches. All secondary fuel tuning happens through rod and hanger selection — one Torx screw and no full disassembly required.
| Rod Code | Power Tip Diameter | Application |
|---|---|---|
| AX | 0.0397 in. | High performance / aggressive cams |
| BE | 0.0410 in. | Performance street |
| AU | 0.0527 in. | Moderate street / cruising |
| AK | 0.0567 in. | Standard emissions |
| AN | 0.0697 in. | Economy / lean calibration |
Hangers are lettered A through V. Earlier letters in the alphabet lift the rods higher, exposing thinner tapers sooner — richer. Later letters lower the rods — leaner. Most street performance builds work well with G through M hangers paired with rods in the AX to AU range. Going too lean with a late-alphabet hanger risks detonation at high rpm.
Tools Worth Having Before You Start
Don’t wing it without the right tools. A quadrajet carburetor rebuild goes much smoother with:
- T-scale or float drop gauge
- 3/32-inch roll pin punch
- Torx T-25 bit
- Double-D APT adjustment tool
- Small Allen key set for the air valve spring
- Precision gram scale for Nitrophyl float testing
- Marine-Tex epoxy for well plug sealing
- Manifold vacuum gauge for idle mixture tuning
Cliff Ruggles’ How to Rebuild and Modify Rochester Quadrajet Carburetors is the definitive technical reference.
The Quadrajet’s reputation for being temperamental comes almost entirely from poor rebuilds and lazy tuning. Do it right — fix the structural issues, calibrate the float, tune the secondaries — and you’ll have one of the most responsive, fuel-efficient carburetors ever bolted to a GM engine.