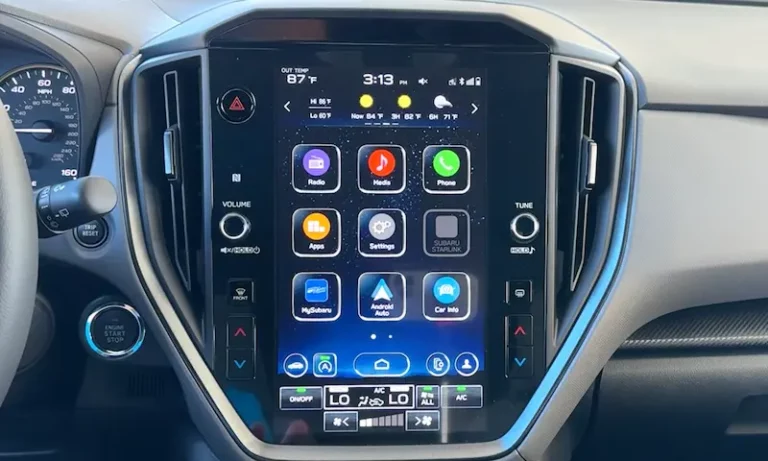
Is your Subaru touchscreen going haywire with phantom touches? Or maybe you’re just fed up with an outdated system that can’t keep up with your smartphone? You’re looking at replacing your Subaru infotainment system, and we’ve got you covered with all the options, costs, and installation details you’ll need to make the right choice.
Why Subaru Infotainment Systems Fail
The Dreaded “Ghost Touch” Problem
If your Subaru’s screen seems possessed—randomly changing stations, opening apps, or becoming completely unresponsive—you’re experiencing what owners call “ghost touch syndrome.” This widespread issue affects thousands of Subarus, particularly 2018-2019 models.
The problem stems from screen delamination, where the protective touchscreen layer separates from the display. You’ll notice this as bubbles or oil-like spots beneath the glass. Over time, the condition worsens until the system becomes completely unusable, affecting critical functions like your backup camera.
Other Common System Failures
Beyond ghost touch, Subaru infotainment systems frequently experience:
- System freezing and random reboots
- Audio skipping during Bluetooth connections
- Black screens and complete system failures
- Backup camera malfunctions
These issues are so prevalent that Subaru has issued multiple warranty extensions. As of March 2025, Subaru extended coverage for 2019-2023 model year vehicles from the standard 3 years/36,000 miles to a generous 8 years/150,000 miles for qualifying infotainment failures.
The problem has even triggered class-action lawsuits alleging that Subaru knowingly sold vehicles with defective systems.
Replacement Options and Costs Breakdown
Option 1: OEM Dealer Replacement
Getting a factory-identical replacement from your Subaru dealer ensures perfect compatibility with all vehicle systems, but comes at a premium.
Cost breakdown:
- Parts: $1,500-$1,800
- Labor: $200-$400
- Total range: $1,500-$2,400
Pros:
- Perfect integration with all vehicle systems
- Maintains factory appearance
- Potentially covered under warranty extension
Cons:
- Expensive when out of warranty
- May develop identical issues to the original unit
- Severe supply shortages (8-12 month waits reported)
Many owners report that Subaru of America offers goodwill assistance even for out-of-warranty repairs, often covering 50-100% of replacement costs. Always ask!
Option 2: Touchscreen-Only Repair
If your system works but the touchscreen is failing, companies like Kinetic Vehicles offer replacement touchscreens without replacing the entire unit.
Cost breakdown:
- Replacement screen: $350-$600
- Professional installation: $100-$200
- Total range: $450-$800
Pros:
- Much cheaper than full unit replacement
- Maintains all original features and functions
- No compatibility concerns
Cons:
- Requires complete disassembly of the head unit
- DIY installation voids warranty on the screen
- Doesn’t address potential underlying system issues
Option 3: Premium Aftermarket Units
Japanese brands like Kenwood, Pioneer, Sony, and Alpine offer high-quality replacements with superior features to the original Subaru system.
Cost breakdown:
- Head unit: $400-$850
- Installation hardware: $50-$150
- Professional installation: $150-$400
- Total range: $600-$1,400
Brand-specific strengths:
| Brand | Price Range | Audio Quality | Reliability | Key Strength |
|---|---|---|---|---|
| Kenwood | $500-$850 | Excellent | Very Good | Audio processing & DSP |
| Sony | $350-$500 | Good | Excellent | User interface & reliability |
| Pioneer | $400-$700 | Very Good | Good | Feature set & tech adoption |
| Alpine | $500-$900 | Excellent | Very Good | Sound quality & audio tuning |
The Kenwood Excelon DMX908S and Sony XAV-AX4000 are frequently recommended for their reliability and excellent smartphone integration.
Option 4: Budget Android Head Units
Chinese manufacturers like iDoing, Seicane, and ATOTO offer Android-based units at lower price points.
Cost breakdown:
- Head unit: $200-$500
- Installation hardware: $50-$100
- Professional installation: $150-$300
- Total range: $400-$900
Pros:
- Large 9-10 inch screens (bigger than OEM)
- Full Android OS with app installation
- Plug-and-play designs for specific Subaru models
- Wireless Apple CarPlay/Android Auto
Cons:
- Variable build quality and longevity
- Potential software bugs and update issues
- Less reliable customer support
Long-term users report generally positive experiences with Seicane units, noting 3+ years of reliable service, while iDoing units receive praise for their comprehensive feature sets.
What You’ll Need for Installation
Essential Adapters and Harnesses
Successful installation requires several vehicle-specific components:
- Main wiring harness adapter ($47-$80): Connects the new head unit to your Subaru’s factory wiring without cutting any original wires. The 28-pin harness is essential for maintaining backup camera functionality.
- Starlink bypass plug ($40-$80): Critical for 2019+ models with Subaru’s telematics system. Without this, your front speakers won’t work after head unit replacement since factory front speaker signals route through the Starlink module.
- Steering wheel control adapter ($40-$100): Maintains functionality of your steering wheel audio controls with the new head unit.
- Dash kit ($15-$30): Provides proper fitment and a factory-like appearance for your new head unit.
Professional vs. DIY Installation
Professional installation typically costs $150-$400 depending on complexity. Many shops like Best Buy offer free installation with head unit purchases. Professional installation ensures proper integration of backup cameras, steering wheel controls, and factory amplifiers.
DIY installation is feasible with the right tools and patience. You’ll need:
- Plastic trim removal tools
- Phillips head screwdrivers
- 10mm socket wrench
- Wiring diagrams (model-specific)
Comprehensive video guides like this one walk through the entire process for most Subaru models.
Model-Specific Considerations
2015-2018 Subaru Models
Older Subaru models typically have simpler integration requirements with standard double-DIN openings. Companies like Hamilton Motor Company offer upgrade kits specifically designed for 2015-2018 Outback and Forester models.
These units maintain the factory aesthetic while adding modern features like wireless CarPlay.
2019+ Starlink-Equipped Vehicles
Newer Subaru models with Starlink connectivity require additional considerations:
- The telematics module affects front speaker operation and may require bypass adapters
- Some owners choose to completely remove Starlink functionality for privacy reasons
- Specialized bypass plugs maintain audio functionality while eliminating tracking capabilities
Harman Kardon Audio Systems
Vehicles equipped with Harman Kardon premium audio present unique challenges:
- Aftermarket head units must provide appropriate outputs to drive the factory amplifier
- Additional interface modules or line output converters may be required
- Some owners report improved sound quality after completely replacing the factory Harman Kardon system
Warranty and Legal Considerations
Before replacing your infotainment system, check if you’re covered under Subaru’s warranty extension program. The extended coverage applies to various infotainment failures and could save you thousands.
The $6.25 million class-action settlement for 2017-2018 Starlink defects established precedent for manufacturer responsibility. Ongoing litigation for 2019-2023 models may result in additional compensation or extended coverage periods.
Technology Benefits of Upgrading
Superior Smartphone Integration
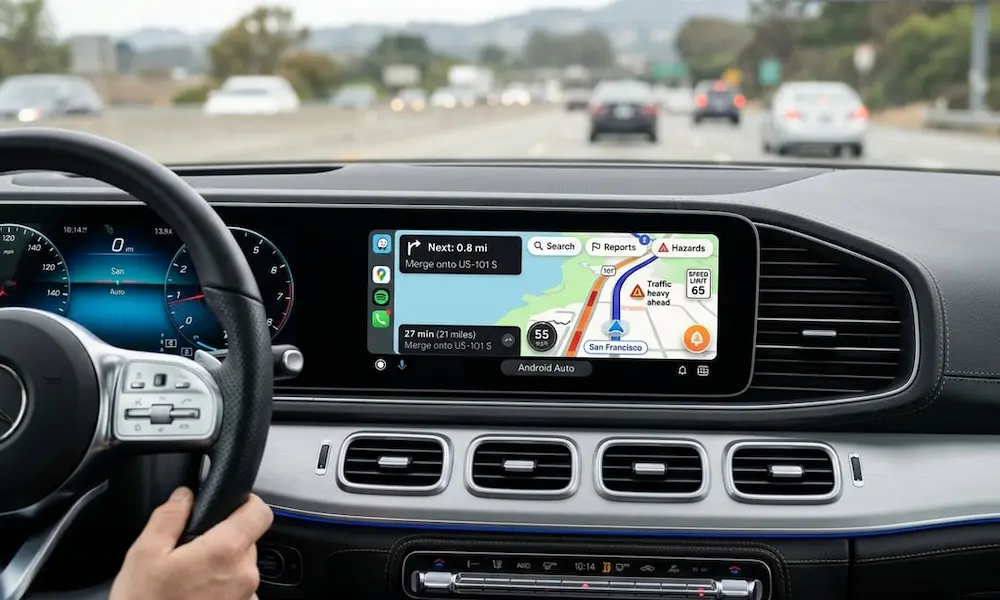
Modern aftermarket head units provide vastly improved smartphone integration compared to factory Starlink systems:
- Wireless Apple CarPlay and Android Auto eliminate cable clutter
- Faster processors mean quicker responses and smoother operation
- Higher-resolution displays (1080p vs. the factory 720p)
- Customizable interfaces with more user-friendly layouts
Audio Quality Improvements
Aftermarket units typically deliver superior sound quality:
- Advanced 15-band parametric equalizers vs. basic 3-band EQ in factory units
- Time alignment capabilities for precise soundstaging
- Higher voltage pre-amp outputs (4-5V vs. 2V factory) for cleaner signal
- High-resolution audio support for lossless music playback
Making Your Decision: Which Option Is Best?
For Budget-Conscious Owners
If cost is your primary concern, Chinese Android units offer the most features per dollar spent. The Seicane and ATOTO A6 Pro models provide wireless CarPlay/Android Auto and large screens starting around $200-$300.
For Reliability and Ease of Use
Sony head units, particularly the XAV-AX4000, offer excellent reliability and intuitive interfaces. They boot quickly, respond consistently, and have well-designed user interfaces that don’t distract from driving.
For Audiophiles and Sound Quality
Kenwood Excelon and Alpine units provide the best sound quality with advanced DSP capabilities. The Kenwood DMX709S and Alpine iLX-507 include independent channel equalization, time alignment, and high-voltage pre-amps that transform your audio experience.
For Factory-Like Integration
If maintaining the stock look and functionality is important, OEM replacements or touchscreen-only repairs offer the most seamless integration. However, be prepared for potential repeat failures since the replacement units often share the same design flaws.
The Installation Process
A typical aftermarket head unit installation follows these steps:
- Disconnect the battery to prevent electrical shorts
- Remove trim panels surrounding the infotainment system
- Extract the factory head unit (typically held in with 10mm bolts)
- Connect wiring harnesses to the new head unit before mounting
- Test all functions before final reassembly
- Mount the new head unit and reinstall trim pieces
Professional installations typically take 2-4 hours depending on the complexity and specific vehicle model.
Sound Quality Optimization
After installing your new head unit, take time to properly set up the audio system:
- Set time alignment based on your seating position (if available)
- Adjust equalizer settings to compensate for cabin acoustics
- Set proper crossover points for your speakers
- Balance front-to-rear and left-to-right for proper staging
Premium aftermarket units allow for much more precise audio tuning than factory systems, resulting in dramatically improved sound quality even with factory speakers.
Final Thoughts
Subaru infotainment system replacement has become a necessary upgrade for many owners dealing with persistent ghost touch and system reliability issues. While OEM replacement ensures factory compatibility, aftermarket solutions provide superior features, reliability, and value.
The extended warranty coverage through 2025 significantly impacts replacement timing and costs for affected model years. Always check your warranty status before pursuing aftermarket solutions, as dealer goodwill assistance can substantially reduce OEM replacement costs.
Whether you choose a premium audio-focused system, a budget-friendly Android unit, or OEM replacement, the right infotainment upgrade can transform your daily driving experience, adding modern convenience and eliminating the frustrations of a failing factory system.