Got a check engine light and a hunch it’s your coolant temp sensor? You’re in the right place. Finding the dodge 3.6 coolant temperature sensor location trips up a lot of people — because it actually moved between model years. This guide tells you exactly where to look, what to watch out for, and how to avoid a very common (and costly) mix-up.
Why the Sensor Location Actually Matters
You can’t replace what you can’t find. And on the 3.6L Pentastar V6, looking in the wrong spot wastes time and can lead to replacing the wrong sensor entirely.
The 3.6L Pentastar powers a huge range of vehicles — Chargers, Challengers, Durangos, Journeys, Grand Caravans, and more. It’s been in production since 2011, and during that run, the coolant temperature sensor moved from the back of the engine to the front.
That one detail changes everything about how you find it.
The Two Locations: A Quick Overview
Before diving into specifics, here’s the big picture:
| Model Years | Sensor Location | What You Need to Move First |
|---|---|---|
| 2011–2018 | Rear of driver-side cylinder head, near the firewall | Engine cover, sometimes intake components |
| 2019–2024 | Front thermostat housing, where the upper radiator hose connects | Engine cover + air intake tube |
Keep that table in mind as you read on. It’ll save you a lot of searching.
Dodge 3.6 Coolant Temperature Sensor Location: 2011–2018 Models
On pre-2019 Pentastar engines, the coolant temperature sensor sits at the rear corner of the driver-side cylinder head, as close to the firewall as it gets. It’s threaded directly into the water jacket, and the engine’s wiring harnesses partially hide it.
RWD Platforms: Charger, Challenger, and Durango
In rear-wheel-drive vehicles, the engine sits longitudinally — front to back. The driver’s side cylinder head faces left when you’re standing at the front of the car.
The sensor screws into the very back corner of that head. It points roughly toward the firewall.
- Dodge Charger (2011–2018): Remove the plastic engine cover. The sensor sits behind the intake manifold at the rear of the driver-side head. A deep socket and long extension get you there.
- Dodge Challenger (2011–2018): Access is tight here. The deep cowl and compact engine bay make this one of the harder sensor jobs on the platform. The connector’s plastic tends to get brittle from heat exposure.
- Dodge Durango (2011–2018): More room to work than the Challenger, but the procedure is the same. Remove the cover, reach past the intake, and use a deep socket.
FWD Platforms: Journey and Grand Caravan
In front-wheel-drive vehicles, the engine sits transversely — sideways. That flips the orientation entirely.
Here, the “driver-side” cylinder head is the one closest to the firewall, not the one facing left when you open the hood.
- Dodge Journey (2011–2018): The sensor is on the rear cylinder bank, closest to the firewall, on the driver’s side of that bank. Expect restricted vertical access between the engine and the cowl.
- Grand Caravan (2011–2020): You’ll need to move the intake air plenum and intake tubes to open up enough space to reach it. Same sensor, same location logic — just more stuff in the way.
| Vehicle | Years | Sensor Location |
|---|---|---|
| Dodge Charger | 2011–2018 | Rear driver-side head, near firewall |
| Dodge Challenger | 2011–2018 | Rear driver-side head; tight cowl access |
| Dodge Durango | 2011–2018 | Rear driver-side head; accessible after cover removal |
| Dodge Journey | 2011–2018 | Rear cylinder bank (closest to firewall), driver side |
| Grand Caravan | 2011–2020 | Rear cylinder head, driver side; behind intake tube |
Dodge 3.6 Coolant Temperature Sensor Location: 2019–2024 Models
Starting with the 2019 model year, Dodge moved the sensor to the front of the engine on the thermostat housing assembly. This was a deliberate engineering decision to make the sensor easier to service.
Pull the plastic engine cover off. Remove the large air intake tube. Now look at the front of the engine where the upper radiator hose connects to the block. The sensor is right there — pointing upward or at a slight angle — in plain sight.
Vehicles with the front-mounted sensor include:
- Dodge Charger (2019–2024)
- Dodge Challenger (2019–2024)
- Dodge Durango (2019–2024)
- Chrysler 300 (2019–2024)
- Jeep Grand Cherokee (2019–2024)
Don’t look for it at the rear of the head on these newer engines. That port is often plugged or absent on the updated cylinder head castings.
Don’t Confuse the ECT Sensor with the Oil Temperature Sensor
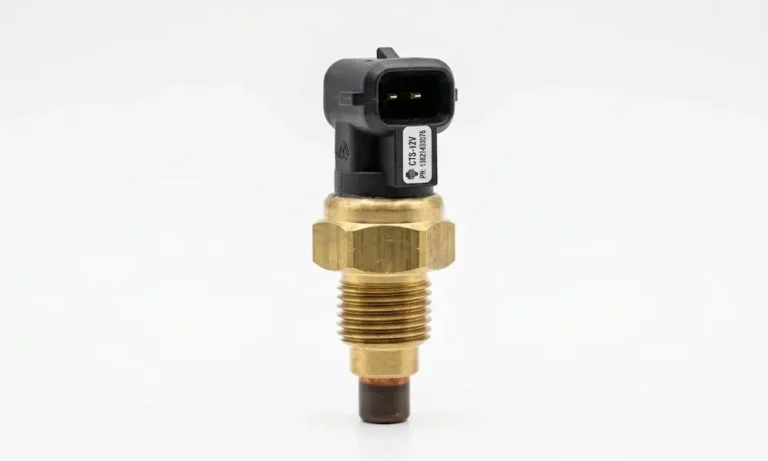
This is the most common mistake people make on the Pentastar. The 3.6L engine has multiple sensors that look nearly identical — same size, same brass body, same 2-pin connector.
The oil temperature sensor lives in the valley of the engine, threaded into the plastic oil filter housing beneath the intake manifold. It measures oil temp, not coolant temp.
If you’re chasing a P0128 or P0118 code and you replace the sensor in the valley, nothing will change. You’ll still have the code, and you’ll be out the time and money you spent on the wrong part.
| Sensor | Location | What It Measures |
|---|---|---|
| Engine Coolant Temperature (ECT) | Cylinder head (rear) or thermostat housing (front) | Antifreeze and water mixture |
| Oil Temperature | Oil filter housing in engine valley | Engine lubricating oil |
| Intake Air Temperature | Air intake tube or manifold | Incoming air |
Quick rule: if it’s tucked in the valley under the intake manifold, it’s the oil sensor. If it’s on the head or at the thermostat housing, it’s the coolant temp sensor.
What Trouble Codes Point to This Sensor?
The powertrain control module monitors the sensor’s voltage constantly. When that voltage falls out of the expected range, you get a check engine light and one of these codes:
| OBD-II Code | Meaning | Likely Cause |
|---|---|---|
| P0117 | ECT Sensor Circuit Low | Short to ground or failed sensor |
| P0118 | ECT Sensor Circuit High | Open circuit, broken wire, or unplugged connector |
| P0128 | Coolant Temp Below Thermostat Regulating Temperature | Faulty sensor or thermostat stuck open |
| P2181 | Cooling System Performance | Low fluid, sensor error, or broader cooling issue |
P0128 deserves a special note. The sensor itself isn’t always the culprit. A thermostat that stays slightly open lets coolant circulate through the radiator before the engine warms up. Your temperature gauge stays low. The car runs rich. And the code won’t go away no matter how many sensors you replace. If your temp gauge sits in the lower quarter during highway driving, the thermostat is the real problem.
How the Sensor Actually Works
The coolant temperature sensor uses a negative temperature coefficient (NTC) thermistor. That’s a fancy way of saying its resistance drops as temperature rises.
The PCM sends a 5-volt reference signal to the sensor and measures the return voltage:
- Cold engine (~70°F): Resistance runs 2,000–3,000 ohms. High return voltage tells the PCM to run a rich fuel mixture — essentially the modern version of a choke.
- Warm engine (~200°F): Resistance drops to 200–300 ohms. Low return voltage tells the PCM the engine is warm and switches to closed-loop operation using oxygen sensor feedback for fuel trim adjustments.
Tools You Need for Replacement
The job itself isn’t complex, but you do need the right tools — especially for the legacy rear-of-head location.
| Tool | Why You Need It |
|---|---|
| 19mm (or 3/4″) Deep Socket | Fits over the sensor pins to reach the hex body |
| 8mm / 10mm Sockets | Remove the engine cover and intake tube clamps |
| Ratchet + Long Extension | Essential for reaching the rear-of-head location |
| Pocket Screwdriver | Lifts the safety lock tab on the connector |
| Torque Wrench | Prevents over-tightening and cracked housings |
| Drain Pan | Catches coolant that spills when you remove the sensor |
Safety first: The engine must be completely cold before you start. Modern cooling systems run above 200°F and hold pressure. Loosening the radiator cap or coolant reservoir cap while the engine is hot can send boiling fluid straight at your face. Let it cool, release the pressure slowly, then start.
You don’t need to drain the entire cooling system. A small amount of coolant will escape when you unthread the sensor. Have the new sensor ready to install immediately to minimize the loss.
Choosing the Right Replacement Sensor
The PCM’s temperature-to-voltage mapping is specific. A sensor that reads just five degrees off can trigger a persistent P0128 code that’s genuinely difficult to trace.
OEM option: The Mopar 5149077AB is the factory-spec sensor. It matches the PCM’s resistance curve exactly and is the safest choice for any climate or driving condition.
Quality aftermarket: Standard Motor Products, Delphi, and NGK all make reliable replacements for the Pentastar. These work well when OEM parts aren’t immediately available.
Avoid: Unbranded sensors from discount online retailers. Poor manufacturing tolerances lead to inaccurate readings, and a brand-new sensor can create more problems than the one you pulled out.
One More Thing: Coolant Type Matters
Using the wrong coolant can shorten your sensor’s life significantly. The Pentastar requires OAT (Organic Additive Technology) coolant. Older green silicated formulas react with the internal passages and deposit scale on the sensor tip. That scale acts like insulation, slows the sensor’s response, and produces inaccurate temperature readings — often without throwing an obvious code.
If you’re replacing a sensor on a high-mileage vehicle, it’s worth checking what type of coolant is in the system. A full flush with the correct OAT fluid protects the new sensor and the thermostat at the same time.
The Bottom Line on Sensor Location
Here’s the short version:
- 2011–2018: Look at the rear of the driver-side cylinder head, close to the firewall.
- 2019–2024: Look at the front thermostat housing, where the upper radiator hose connects.
- Don’t get fooled by the oil temperature sensor in the valley — it looks the same but is in a completely different spot.
- If you have P0128, check the thermostat before you replace the sensor. The thermostat fails more often than the sensor on this engine.
Get the location right, use a quality part, and the Pentastar will reward you with reliable service for a long time to come.