Hearing a clicking noise from your Accord on tight turns? You might be looking at a failed CV joint. This guide walks you through everything — from spotting the symptoms to torquing the spindle nut correctly. Stick around, because getting one step wrong here can cost you a wheel bearing.
What Is a CV Joint and Why Does It Fail?
Your Honda Accord uses two CV (constant velocity) joints on each front axle. The outboard joint handles steering angles up to 45 degrees, while the inboard joint slides in and out as your suspension travels up and down.
Both joints sit inside rubber boots filled with molybdenum-disulfide grease. Once a boot cracks, the grease flings out, dirt gets in, and the joint grinds itself apart fast. It’s that simple.
How to Spot a Bad CV Joint on Your Accord
Don’t ignore these signs. They get worse quickly.
Clicking or popping during turns — This is the classic sign of a worn outboard joint. The metallic clicking happens because worn bearings fall into pitted grooves inside the joint housing. It gets louder at low speeds during sharp turns.
Vibration under acceleration — A failing inboard joint causes a shudder through the floorboard when you accelerate hard or climb a hill. The tripod rollers develop play and the shaft wobbles.
Grease splattered in the wheel well — This is a dead giveaway for a torn CV boot. Dark grease spread across the inner wheel arch or brake rotor means the boot failed and the joint is now running dry.
Clunking when shifting between Drive and Reverse — This points to excessive play inside the joint caused by worn internal clearances.
| Symptom | Likely Cause | When You Notice It |
|---|---|---|
| Clicking or popping | Worn outboard CV joint | Low-speed tight turns |
| Shudder/vibration | Worn inboard joint | Hard acceleration |
| Grease in wheel well | Torn CV boot | Visual inspection |
| Clunking | Excessive joint play | Shifting gears |
| Humming or growling | Intermediate shaft bearing | Steady highway speed |
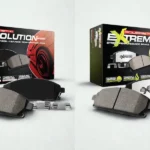
OEM vs. Aftermarket CV Axles: Which Should You Buy?
This decision matters more than most people think.
OEM axles use precision orbital rolling techniques to set exact bearing preload and include factory-calibrated ABS sensor rings. They’re also tuned to your Accord’s specific vibration frequencies.
Budget aftermarket axles can fail in as few as 25,000 miles compared to 100,000+ miles for OEM or premium replacements. Worse, cheap ABS rings can trigger false traction control and stability control warnings — not just an annoyance but a safety issue.
| Feature | OEM / Premium Axle | Budget Aftermarket |
|---|---|---|
| Manufacturing method | Precision orbital rolling | Standard machining |
| Expected lifespan | 100,000+ miles | 25,000–35,000 miles |
| Boot material | High-grade chloroprene | Standard rubber |
| Heat treatment | Induction hardened | Surface treated only |
| ABS ring accuracy | Factory calibrated | Reproduction quality |
Tools You’ll Need Before You Start
Don’t start this job without having everything ready. Stopping mid-job to find a tool is how mistakes happen.
- Hydraulic floor jack and jack stands
- 32mm or 36mm axle socket (check your specific year)
- 1/2-inch drive breaker bar or pneumatic impact gun
- Ball joint separator or large hammer
- Torque wrench
- Ratchet and socket set (10mm–19mm)
- Drain pan for transmission fluid
- Center punch and hammer for staking the axle nut
- New cotter pins
Honda Accord CV Joint Replacement: Step-by-Step
Safety First — Getting the Car Up Safely
Park on a flat surface. Chock the rear wheels and set the parking brake firmly. For the Accord, place the floor jack under the front crossmember and set jack stands under the reinforced pinch welds behind the front wheel arches.
Remove the wheel, then clear the stake on the axle nut before the car goes fully up — you’ll need the brakes to hold the hub while you break the nut loose. Use a center punch to bend the staked flange outward, then crack the nut with your breaker bar.
Removing the Suspension Components
The steps vary slightly by generation, but the goal is always the same: tilt the knuckle outward far enough to slide the outer joint out of the hub.
For 7th Gen Accords (2003–2007) with double-wishbone suspension, remove the 17mm damper fork bolts — one pinch bolt at the top, one through-bolt at the bottom. Then pull the cotter pin and 17mm castle nut from the upper control arm ball joint. Strike the side of the knuckle with a heavy hammer to shock the taper loose. Don’t use a pickle fork here unless you’re replacing the ball joint too — the wedge will destroy the boot.
For 9th and 10th Gen Accords (2013–present) with MacPherson struts, the process is simpler. Disconnect the lower ball joint and tilt the strut assembly outward to free the hub.
Pulling the Axle Out of the Transmission
Insert a pry bar between the inner joint housing and the transaxle case. One sharp pop is all it takes to compress the snap-ring and release the axle. Don’t pull on the shaft itself — you’ll pull the tripod joint apart and scatter bearing rollers inside the transmission.
Have your drain pan ready. A small amount of transmission fluid will spill out. While you’re in there, inspect the transmission output seal. If it looks hardened or shows any seepage, replace it before installing the new axle.
The Passenger-Side Intermediate Shaft
Many V6 and higher-torque four-cylinder Accords use an intermediate shaft on the passenger side bolted to the engine block. This shaft equalizes axle length to prevent torque steer. On these models, the passenger-side CV axle plugs into the intermediate shaft, not directly into the transmission.
The intermediate shaft usually stays in place during a CV axle swap. But if you hear a steady growling noise that doesn’t change with turning angle, the intermediate shaft’s support bearing has failed and the whole shaft needs to come out.
Installing the New Axle
Check that the new axle matches the old one in length, spline count, and ABS ring configuration before you touch the car.
Follow this sequence:
- Apply a light coat of clean transmission fluid or moly grease to the inboard splines — this protects the transmission seal on the way in
- Push the inboard end firmly into the transaxle until you feel the snap-ring click into place — tug on the inner housing to confirm it’s seated
- Guide the outer splines through the wheel hub — a small amount of anti-seize on the hub splines will save you headaches on the next replacement
- Reinstall all suspension hardware — use new cotter pins on every castle nut
Torque Specs for Every Honda Accord Generation
The spindle nut isn’t just holding the axle in place. It sets the preload on your wheel bearing. Too loose and the bearing races separate under cornering. Too tight and the bearing overheats and fails. Use a calibrated torque wrench — don’t guess.
| Accord Year | Spindle Nut Torque (ft-lbs) | Spindle Nut Torque (Nm) |
|---|---|---|
| 1976–1991 | 137 | 185 |
| 1992–1994 | 184 | 250 |
| 2003–2007 (4-cylinder) | 134 | 181 |
| 2003–2007 (V6) | 181 | 245 |
| 2008–2012 (all models) | 181 | 245 |
| 2013–2017 (all models) | 242 | 328 |
| 2018–2022 (10th gen) | 242 | 328 |
After torquing, stake the nut’s flange into the axle keyway with a punch and hammer. This locks it in place permanently.
Here are the other suspension fasteners you’ll need during reassembly:
| Fastener | Torque (ft-lbs) | Torque (Nm) |
|---|---|---|
| Lower ball joint nut (7th gen) | 37–43 | 50–58 |
| Lower ball joint nut (9th gen) | 44–51 | 55–69 |
| Tie-rod end nut | 32–40 | 43–54 |
| Damper fork pinch bolt | 47–55 | 64–74 |
| Upper control arm nut | 35–43 | 47–58 |
| Wheel lug nuts | 80 | 108 |
The 2013–2015 Accord Drive Shaft Safety Recall You Need to Know About
If you own a 2013–2015 Honda Accord with a four-cylinder engine and CVT, pay attention here. NHTSA issued recall #20V-770 after discovering that a factory assembly lubricant degraded the protective coating on drive shafts in states that use road salt. Severe corrosion — especially under the rubber damper weight on the shaft — can cause the shaft to fracture under load.
A broken drive shaft means instant loss of power to the wheels. It can also prevent “Park” from holding the car if the parking brake isn’t engaged. Check your VIN at NHTSA.gov and inspect the shaft for heavy rust or flaking under the damper weight.
Topping Off the Transmission Fluid
You’ll lose some transmission fluid when you pull the axle. The fluid you add back must match what’s already in the transmission. Using the wrong fluid causes clutch slippage and harsh shifts.
| Transmission Type | Correct Fluid | Which Accords |
|---|---|---|
| Stepped automatic | Honda ATF DW-1 | Pre-2013 4-cyl, all V6 |
| CVT | Honda HCF-2 | 2013–2022 4-cylinder |
| 9-speed automatic | Honda ATF Type 3.1 | Select V6 / 2.0T |
| Manual | Honda MTF | All manual variants |
| Hybrid e-CVT | Honda ATF Type 2.0 | Hybrid models |
CVT fluid is fundamentally different from standard ATF. ATF is designed to allow controlled slipping during gear changes. CVT fluid creates high friction between the steel belt and pulleys to prevent slip. Never substitute one for the other.
Final Checks Before You Drive
Spin the wheel by hand before lowering the car. It should spin freely with no binding or grinding. Once the car is back on the ground and lug nuts are torqued to 80 ft-lbs, pump the brake pedal several times to reseat the pads against the rotor.
Take a short test drive. Listen for clicking at low speeds through parking lot turns. Feel for vibrations between 50–70 mph. A clean Honda Accord CV joint replacement means both of those are completely gone — smooth acceleration, quiet cornering, and full confidence that your driveline is transferring torque the way it was designed to.