Is your engine running rough, flooding with fuel, or starving mid-throttle? A misadjusted carburetor float is often the culprit. This guide walks you through exactly how to adjust float on carburetor for Holley, Edelbrock, Rochester Quadrajet, Briggs & Stratton, and Tecumseh engines. Stick around — the fix is simpler than you think.
What Does the Carburetor Float Actually Do?
The float is your carburetor’s fuel level manager. It sits inside the fuel bowl and rises with the fuel. When fuel hits the right level, the float pushes a needle valve shut. Fuel stops flowing in. As the engine burns fuel, the float drops, the needle opens, and fresh fuel refills the bowl.
It’s a simple loop. But when the fuel level drifts too high or too low, every circuit in the carburetor goes haywire — idle, transition, and main metering.
The physics behind it matter too. The venturi inside the carburetor creates a low-pressure zone as air rushes through. Atmospheric pressure in the vented fuel bowl pushes gasoline up through the main jet and into that airstream. The fuel bowl level directly controls how easily that happens. Too high, and fuel spills in too easily. Too low, and the venturi can’t pull enough fuel through.
How a Wrong Float Level Wrecks Your Engine
Before you touch anything, know what you’re solving. Here’s what a misadjusted float actually looks like in practice.
| Fuel Bowl Level | Acceleration Symptoms | Exhaust & Combustion Signs | Idle Behavior |
|---|---|---|---|
| Too High | Bogging during hard cornering or sudden braking | Black smoke, raw fuel smell, fouled spark plugs | Rough idle, engine loads up and stalls after warm-up |
| Too Low | Flat spot off idle, engine sags under load | Engine runs hot, white/blistered plugs, carburetor backfire | Lean misfire, stalls when throttle closes |
One thing worth noting: if fuel is actively pouring out of the carburetor, that’s almost never a float height problem. It’s a stuck or worn needle and seat. Check that first before you start bending tabs.
Know Your Float Material Before You Adjust Anything
Different float materials behave differently in fuel. If you mix up the specs, you’ll set the wrong level even with a perfect measurement.
- Hollow brass floats are durable but check for trapped liquid inside by shaking them. A cracked solder seam lets fuel in, the float sinks, and your bowl floods.
- Nitrophyl foam floats slowly absorb ethanol and water over time. A waterlogged Nitrophyl float gets heavier, sinks deeper, and raises the fuel level even if the setting looks right.
- Duracon plastic floats resist chemical attack well. But they’re lighter than brass, so they ride higher. A Duracon float needs a higher physical dry setting than brass. Set it to the brass spec and you’ll run lean.
Ethanol-blended fuels accelerate all of these problems. They’re corrosive, hygroscopic, and they leave a sticky residue on Viton-tipped needle valves. If you’re running E10 or higher, clean that needle tip with mineral spirits periodically to stop it from sticking open.
The One Measurement Mistake Everyone Makes
Most people flip the carburetor completely upside down to measure the float. That’s wrong.
Modern inlet needles have a small spring-loaded bumper pin inside. Its job is to absorb vibration. If the float’s full weight presses down on that pin while inverted, it compresses the spring and skews your measurement. You’ll set the float too low and end up running rich.
The correct method: tilt the carburetor to roughly 45 degrees — think 10 o’clock or 2 o’clock position. The float arm should rest gently against the needle bumper pin without pushing it in. Now take your measurement.
That one detail is the difference between a tuned carburetor and a head-scratcher.
How to Adjust Float on Carburetor: Step-by-Step by Brand
Holley Carburetors
Holley gives you two options: dry bench calibration or wet on-engine calibration. The wet method is more accurate because it measures the real fuel level under live pump pressure.
Dry bench method:
Invert the fuel bowl. Adjust the float contact tab until the float surface sits parallel to the floor of the inverted bowl casting. For externally adjustable models, use a 7/64″ gap at the toe (far end) of the primary float and a 13/64″ gap at the heel (hinge end) of the secondary float.
Wet calibration method (preferred):
Park on a flat surface. Run the engine until idle stabilizes, then shut it off. Remove the sight plug on the side of the primary bowl. Fuel should sit exactly at the bottom edge of that hole.
To adjust:
- Loosen the top lock screw with a flathead screwdriver
- Turn the hex adjusting nut with a 5/8″ open-end wrench
- Clockwise = lowers the fuel level
- Counter-clockwise = raises it
- Make 1/4-turn adjustments only
- Tighten the lock screw, restart, wait 30 seconds, recheck
Edelbrock Performer Carburetors
Edelbrock uses dual brass floats hung from the air horn cover. Be gentle — brass pontoons crack at their solder seams if you apply too much force.
- Remove the air horn cover and invert it so the floats hang upward
- Remove the gasket, then measure from the machined gasket surface to the outer toe of each float using a 7/16″ drill bit as a gauge
- If adjustment is needed, remove the float assembly completely before bending the tab — never bend it while it’s loaded against the needle seat
- Bending the tab toward the float body lowers the fuel level; bending it away raises it
- Check that both floats sit parallel to the air horn casting edges — a crooked float binds on the bowl wall
For float drop: flip the air horn right-side up, let the floats hang, and measure from the gasket surface to the outer float tip. Target is 15/16″ to 1-1/2″ depending on the application. Bend the secondary stop tab to adjust drop.
Rochester Quadrajet Carburetors
The Quadrajet has one centrally mounted float. Getting this right matters — a low level causes high-speed fuel starvation.
- Remove the air horn cover and gasket, but leave the float, hinge pin, and inlet needle in the bowl
- Hold the hinge pin firmly in its channels
- Press gently on the float lever arm tab directly over the needle until the needle seats — don’t press hard or you’ll deform the Viton tip permanently
- Measure from the top of the bowl casting (not the gasket) to the top of the float, at a point 3/16″ back from the toe
- Compare to your application’s spec — Quadrajet specs vary by engine
- Bend the float lever tang up or down to adjust. Never bend the plastic pontoon itself
Critical assembly detail: When reinstalling the needle pull clip, slide it over the edge of the float arm from front to back. Never insert the clip ends through the holes in the float arm — that locks the needle open and floods the engine.
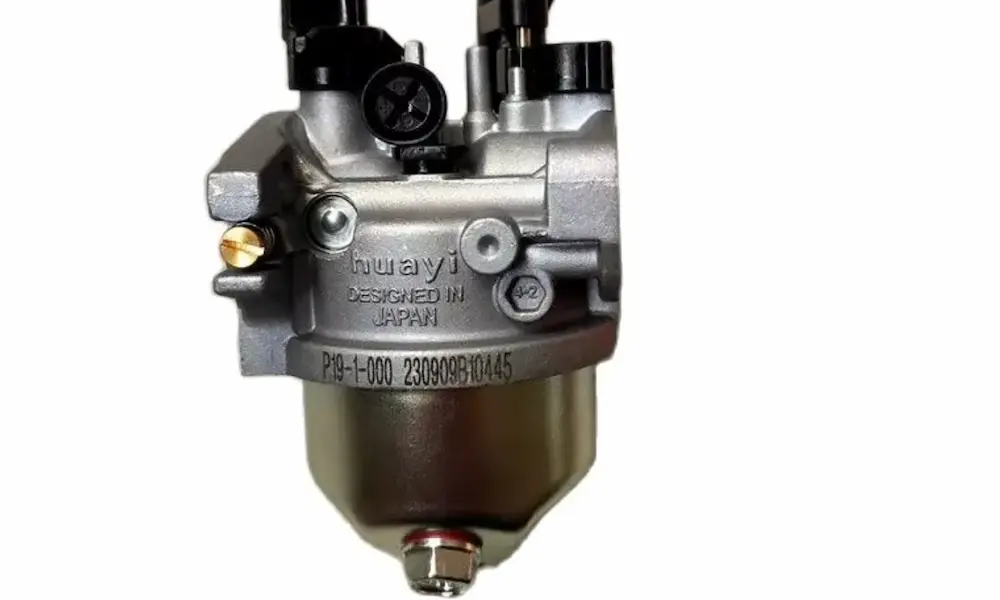
Nikki Carburetors (Briggs & Stratton Vanguard V-Twin)
Nikki carbs are metric. Use a vernier caliper or precision ruler for this one.
- Disassemble and remove the float bowl cover, then invert it so the float hangs upward
- Measure from the machined gasket surface to the highest point of the float body
- Target: 10.5 mm to 12.5 mm
- Bend the tab that contacts the needle valve — down toward the casting raises the float and decreases fuel volume; up away from the casting lowers the float and lets more fuel in
- Re-measure after every bend and verify both pontoons sit level side to side
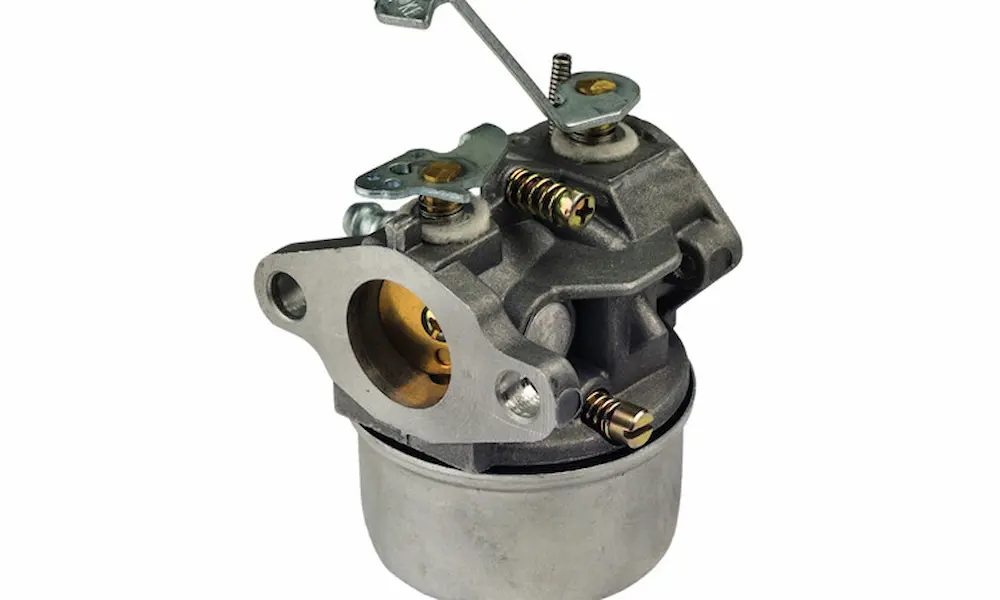
Tecumseh Small Engine Carburetors
Tecumseh keeps it simple: a drill bit as a go/no-go gauge.
- Remove the fuel bowl by unscrewing the center bolt
- Invert the carburetor body
- Lay an 11/64″ drill bit flat across the gasket surface beneath the free end of the float — use a 7/32″ bit on some models, check your spec
- The float is correct when it just barely touches the drill bit shank without lifting off the needle
- Bend the small tang between the pontoons to adjust
Wire clip orientation matters here. The open end of the needle wire clip must face the air intake side of the carburetor. Install it facing the engine side and the needle won’t center in the seat — fuel leaks every time.
Quick Reference: Float Specs by Carburetor
| Carburetor | Measurement Point | Target Spec | Adjustment Method |
|---|---|---|---|
| Holley Primary (side-hung) | Inverted bowl, float toe | 7/64″ (0.109″) | Bend contact tab |
| Holley Secondary (side-hung) | Inverted bowl, float heel | 13/64″ (0.203″) | Bend contact tab |
| Edelbrock Performer | Inverted air horn, outer toe | 7/16″ (0.437″) | Bend needle contact tab |
| Rochester Quadrajet | 3/16″ from float toe, bowl surface | 11/64″–3/16″ (typical) | Bend float lever tang |
| Nikki Briggs Vanguard V-Twin | Inverted cover, highest float point | 10.5–12.5 mm | Bend needle contact tab |
| Tecumseh Small Engine | Inverted body, drill bit gauge | 11/64″ or 7/32″ | Bend tang between pontoons |
Fine-Tuning Idle After Float Adjustment
Float level sets the baseline. After that, the idle mixture screws need a proper set too.
Warm the engine fully and make sure the choke is wide open. Slowly turn the idle mixture screws out until you find the highest idle speed. Then turn them back clockwise (leaning the mixture) until the speed drops by about 20 RPM on a tachometer. That’s your clean, stable idle without plug fouling.
For aluminum cylinder engines, target idle speed is 1,750 RPM. Cast iron cylinders run at 1,200 RPM. Wrap the tachometer’s primary wire around the spark plug lead to get an accurate reading.
Safety Rules You Can’t Skip
Fuel adjustments mean working with pressurized, flammable liquid. A few rules that aren’t optional:
- Disconnect the negative battery terminal and pull the spark plug wires before any bench work
- Work outdoors or in a space with real airflow — not just a cracked window
- Keep shop rags on hand to wipe fuel spills immediately, especially during wet on-engine adjustments
- Never use duct tape or zip ties to secure fuel lines during diagnostics — fuel vapors degrade them fast
- Tighten carburetor fasteners finger-tight plus a maximum of 1/4 turn to avoid cracking aluminum castings
- Keep a charged Class B fire extinguisher within arm’s reach
- Wait at least two minutes after shutdown before removing the gas cap, and don’t fill the tank to the brim — leave an inch of expansion room
For medium-strength thread security on carburetor fasteners, use blue threadlocker with a nylon washer under the head nut. It absorbs micro-vibrations without cracking the casting.