Your tailgate just slammed down again, or your liftgate won’t stay open. Sound familiar? Bad struts cause both problems — and fixing them yourself is easier than you think. This guide walks you through everything: diagnosis, tools, and the actual replacement steps. Stick around, because the right technique makes all the difference.
What Are Tailgate Struts and Why Do They Fail?
Tailgate struts are pressurized cylinders filled with nitrogen gas. They control how your tailgate or liftgate moves — either slowing a heavy tailgate on the way down or holding a liftgate up overhead.
Inside each strut, pressurized gas pushes against a piston rod. That force is what does the heavy lifting (literally). Over time, the seals that hold that gas in start to degrade. Climate plays a big role here. Southern heat makes seals brittle. Northern winters drop the internal pressure temporarily. Either way, the strut loses its strength.
Most struts last anywhere from 5 to 10 years, depending on how often you use your gate and where you live.
Signs Your Tailgate Struts Need Replacing
Don’t wait until something breaks. Watch for these warning signs:
- Your liftgate won’t stay open — it slowly sags or falls closed
- Your pickup tailgate slams down hard when you release the latch
- The gate feels unusually heavy to raise
- You spot an oily film on the piston rod (that’s leaking internal lubricant — a dead giveaway the gas has escaped too)
If you notice any of these, it’s time to learn how to replace tailgate struts before someone gets hurt.
Understanding the Two Main Types of Strut Systems
Not all struts work the same way. The setup on your truck is very different from what’s on your SUV.
| System Type | How It Works | Common Failure Sign |
|---|---|---|
| Pickup Truck Tailgate Assist | Damps and slows downward opening | Gate slams violently on release |
| SUV/Hatchback Liftgate Strut | Lifts and holds gate overhead | Gate won’t stay open or is hard to raise |
| Power Liftgate Actuator | Electric motor drives movement | Gate reverses, stalls, or won’t respond |
Knowing your system type determines your tools, your technique, and your safety steps.
Ball-and-Socket vs. Bolt-On Mounting
Most SUVs and hatchbacks use a ball-and-socket mounting style. A steel ball stud screws into the vehicle body, and the strut’s socket snaps onto it with a spring steel clip. It allows the strut to rotate as the gate swings open and closed.
Pickup trucks often use bolt-on eyelet mounts — a stronger setup that handles higher loads and shares its mounting bolt with the tailgate’s safety cable. That’s what makes truck installs slightly more involved.
Tools You’ll Need Before You Start
You don’t need a fully stocked shop to do this job. Most strut replacements come down to just a few basic tools.
| Tool | What It’s For |
|---|---|
| Narrow flat-head screwdriver | Prying spring clips on ball sockets |
| Right-angle pick | Reaching clips in tight spots |
| Socket set (metric) | Bolt-on mounts and bracket hardware |
| Torx bit set (T15–T50) | Ford F-150, Jeep Grand Cherokee, and similar vehicles |
| Plastic trim tool set | Removing interior panels without cracking them |
| Penetrating oil | Breaking loose rusted bolts |
| Blue threadlocker | Keeping new bolts tight against road vibration |
| Work gloves and safety glasses | Protecting yourself during the whole job |
Pick up penetrating oil if your vehicle’s more than five years old. Rust on mounting bolts is one of the most common headaches in this job.
Safety First: How to Prop Your Gate Before You Begin
This step isn’t optional. The moment you disconnect an old strut, that gate’s weight is fully on you (or your helper). A liftgate made of steel, glass, and wiring can weigh over 100 pounds.
Always support the gate before you touch anything else. Here’s how to do it properly:
- Park on level ground and set your parking brake
- Use a rigid prop — a telescoping hood rod, a solid piece of lumber, or a step ladder under the gate
- Have a helper hold the gate at full extension if you don’t have a prop (just make sure they’re ready for it to get heavier once the strut releases)
- Disconnect your battery if you’re working on a power liftgate system — you don’t want the motor firing mid-job
Also wear safety glasses. Prying a spring clip in a tight space can send it flying.
How to Replace Tailgate Struts on an SUV or Hatchback (Ball-and-Socket Method)
This is the most common setup you’ll encounter. The job goes quickly once you understand the clip system.
Step 1: Open the gate fully and prop it up.
Make sure it’s secure before you do anything else.
Step 2: Find the retaining clip.
Look at the back of the strut’s socket — it’s the part clipped onto the ball stud. You’ll see a small C-shaped metal spring clip.
Step 3: Pry the clip out about a quarter inch.
Use your narrow screwdriver or right-angle pick. You don’t need to remove the clip completely — just pull it far enough to clear the groove on the ball stud.
Step 4: Pull the strut off the ball stud.
With the clip tensioned back, tug the strut away from the stud. It’ll pop off. Repeat this on both the upper and lower mounting points.
Step 5: Clean the ball studs.
Wipe away any old oil or grit with a clean rag. This ensures the new socket seats properly.
Step 6: Check the new strut’s orientation.
Here’s a detail most guides skip: install the strut with the cylinder (the thick part) at the top and the piston rod pointing down when the gate is closed. This keeps the internal oil in contact with the seal, which extends the strut’s life significantly.
Step 7: Snap the new strut onto the ball studs.
Align the socket with the ball stud and push firmly until you hear a clear click. That click means the spring clip has locked into place. Do both ends, then repeat on the opposite side of the vehicle.
Step 8: Test the gate.
Lower and raise it several times. It should lift smoothly and hold position without sagging.
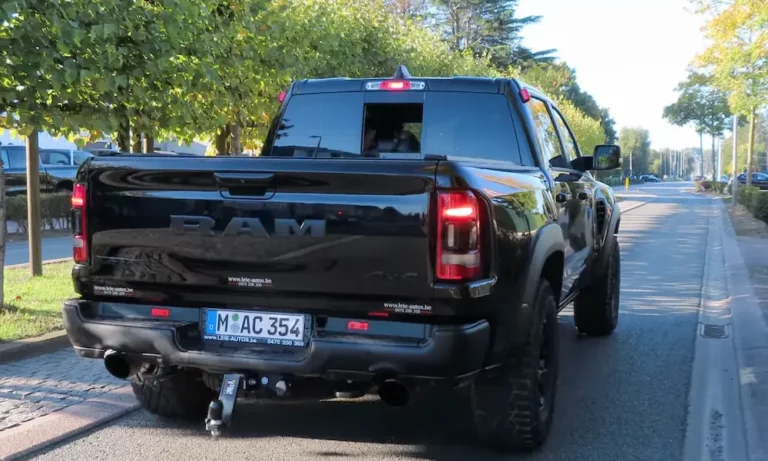
How to Replace Tailgate Struts on a Pickup Truck
Truck tailgate assist struts are a different animal. They work alongside your factory safety cables, which means you need to manage both at the same time. Vehicles like the Ram 1500 and Ford F-150 require this more involved approach.
Step 1: Lower the tailgate and support it in the open position.
Step 2: Find the anchor bolt on the truck’s bedside.
This bolt holds the safety cable. Remove it and temporarily detach the cable.
Step 3: Mount the new strut.
Most aftermarket tailgate assist kits include a specialized bolt or bracket that lets the safety cable and the strut’s eyelet share the same mounting point. Attach the strut’s larger eyelet here, then connect the smaller end to the new bracket near the tailgate hinge area.
Step 4: Route the safety cable properly.
This is important. The cable needs a clear path that doesn’t pinch against the strut when the gate closes. Good kits include a foam cushion or routing guide that you stick inside the tailgate to keep the cable clear of the strut body.
Step 5: Cycle the gate slowly several times.
Watch for binding between the cable, the strut, and the taillight housing. Everything should move freely. If anything feels tight or rubs, adjust the cable routing before you call it done.
Replacing Power Liftgate Actuators: What’s Different
Power liftgate systems use an electric motor and gear drive instead of a simple gas strut. Many vehicles pair one power actuator with one standard strut to balance the load. The replacement process requires extra steps around electrical safety and system calibration.
Before you touch anything: Disconnect the vehicle’s battery. The liftgate controller can send a signal to the motor at any time, and forcing the gears to move under load can damage the new actuator immediately.
Removing interior trim: On vehicles like the Chevrolet Tahoe, Jeep Grand Cherokee, or Tesla Model S, the actuator’s mounting points hide behind interior panels. You’ll need your trim tools and the correct Torx bits to remove those panels without cracking them.
| Vehicle | Trim Access Location | Tooling Needed |
|---|---|---|
| Chevrolet Tahoe/Suburban | Lower tailgate and D-pillar panels | T30 Torx, trim tool set |
| Jeep Grand Cherokee | Rear header and side bolster trim | 10mm socket, pry bar |
| Tesla Model S/X | C-pillar and rear headliner | T25 Torx, 10mm socket |
| Ford Explorer | Rear quarter interior panels | Phillips and flathead screwdrivers |
Reconnecting the harness: The wiring harness runs through a rubber grommet in the body. Feed it carefully through the opening, keeping connectors away from sharp sheet metal edges. When you install the new actuator, seat that grommet fully. A loose grommet lets moisture into the cabin, which can corrode the control module.
Calibrating the system: After installation, the liftgate controller needs to learn the new motor’s resistance levels and travel limits. On most vehicles, you close the gate until it latches, then hold the liftgate button for 5 to 10 seconds until you hear a series of beeps. Without this relearn step, the gate may reverse unexpectedly or refuse to operate.
Dealing With Rusted or Seized Hardware
If your vehicle lives in the Rust Belt, expect trouble with mounting hardware. Here’s how to handle it without breaking something:
- Soak seized bolts in penetrating oil. Give it at least 15 minutes — longer if the rust is heavy.
- Tap the bolt head with a hammer to help break the rust bond before you turn it.
- Use a bolt extractor if the head strips. Grip the outside of the fastener and back it out.
- Replace damaged ball studs. If the stud itself is corroded or won’t hold, drill it out and install a new one with the correct thread pitch.
After installation, use blue threadlocker on all mounting bolts. Road vibration will loosen them over time without it.
How to Make Your New Struts Last Longer
Good maintenance keeps your new struts working well for years. These habits make a real difference.
- Wipe the piston rod regularly. Grit and road salt act like sandpaper against the main seal. A quick wipe with a dry cloth every few months keeps them clean.
- Skip the harsh chemicals. Don’t spray wax or degreasers on the rod — they degrade the seal material.
- Monitor performance in winter. A gate that moves slowly in cold weather is normal. A gate that won’t stay open at all is telling you the strut’s almost done.
- Replace struts in pairs. If one side fails, the other isn’t far behind. Replacing both at once saves you from doing the job again in two months.
How to Dispose of Old Struts Properly
Don’t throw old gas struts in the trash. They’re pressurized canisters — if a garbage truck compacts them, they can become dangerous projectiles. If they sit in a hot landfill, same problem.
Take them to an automotive recycling center or a metal scrap yard. These facilities safely depressurize the units and recycle the steel. If you work in a shop, follow your established hazardous waste protocols for shocks and struts. Never try to puncture or burn an old strut. The result can be explosive — and that’s not an exaggeration.
Knowing how to replace tailgate struts is only half the job. Knowing how to handle the old ones responsibly is the other half.