Staring at a carburetor with no clue what series it is? You’re probably about to order the wrong rebuild kit. This guide walks you through Walbro carburetor identification from stamp to series, cross-references to OEM part numbers, and everything in between. Stick around — the counterfeit-spotting section alone could save you a frustrating afternoon.
Where to Find the Identification Code on a Walbro Carburetor
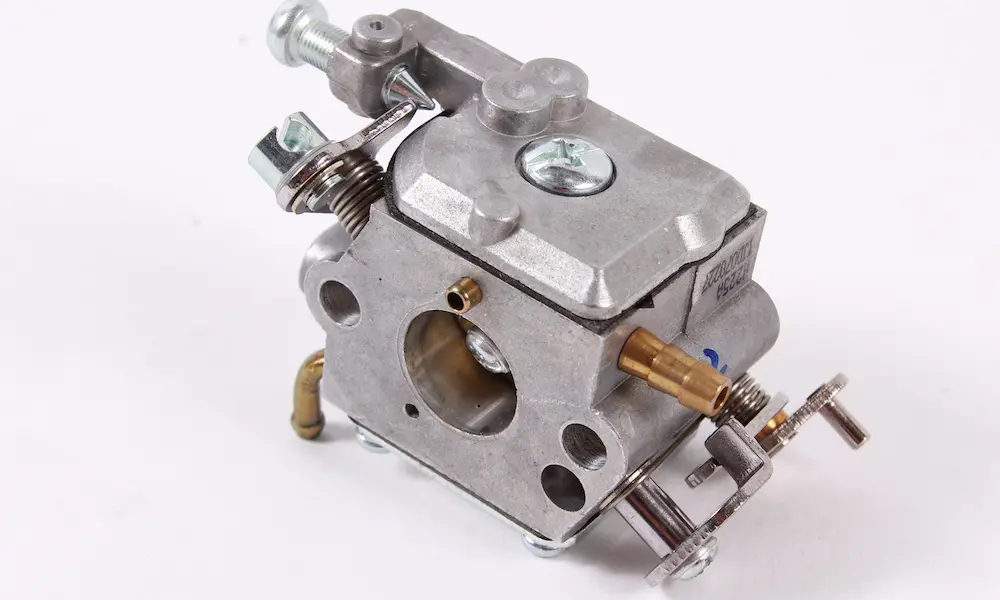
Before you do anything else, find the stamp. All Walbro carburetors carry two sets of identifying characters in specific locations.
Here’s where to look:
- Near the fuel inlet fitting — the most common spot for the series prefix
- Near the idle and high-speed mixture needles — common on smaller diaphragm units
- On the side of the body opposite the jets — typical on medium-to-large models
- Roll-stamped into the mounting flange — found on select larger or older units
The name “Walbro” is cast in raised letters on the main housing too. That’s your first clue you’re dealing with a genuine unit — more on spotting fakes later.
How to Read the Walbro Code: Series, Model, and Revision
The stamped code has three distinct parts. Randy’s Engine Repair breaks this down well, but here’s the plain-English version:
Part 1 — Series Prefix (2–3 letters)
This identifies the carburetor family: WA, WT, HDA, WJ, WG, WTE, SDC. Each family has its own mounting footprint, bolt pattern, and internal fuel circuit.
Part 2 — Model and Revision Number
This follows the prefix directly. In WT-160B, the “160B” is the specific model revision. That letter suffix matters more than people realize — it controls jet calibration, linkage angles, fuel nipple positions, and limiter cap setup.
Part 3 — Date or Production Batch Code
A third set of characters often indicates the manufacturing date. This helps when tracking mid-year production changes from the original equipment maker.
Installing a carburetor with the right series but the wrong suffix? That’s a recipe for misaligned linkages, pinched fuel lines, and adjustment screws that don’t line up with your shroud holes.
Common Walbro Models at a Glance
| Carburetor Model | Stamping Location | Example Equipment | Machine Type |
|---|---|---|---|
| WA-55-1 | Near fuel inlet | Echo PB 400 | Backpack Blower |
| WT-160B | Side opposite jets | Weed Eater Series | Line Trimmer |
| WT-426-318 | Near fuel inlet | Stihl MS260 | Professional Chainsaw |
| HDA-22-1 | Side opposite jets | Dolmar/Makita 120 | Mid-Duty Chainsaw |
| WJ-115-1 | Mounting flange | Husqvarna 395XP | High-Displacement Chainsaw |
| WTE-719 | Side of body casting | Stihl MS260 | Ground-Engaging Chainsaw |
| KH-47-053-86 | Mounting flange | Kohler K321AQS | Garden Tractor |
Walbro Series Specifications: Size, Bore, and Application
Walbro’s diaphragm carburetor spec sheet divides the lineup into two mounting footprints: 31mm bolt spacing for small-frame models and 46mm spacing for large-frame units.
Each series also has three internal diameters: choke bore, venturi, and throttle bore. The venturi is the narrow section that accelerates air and draws fuel in. The throttle bore sits just wider, with the butterfly valve positioned there.
Series Comparison Table
| Series | Bolt Spacing | Venturi Range | Displacement | Common Use |
|---|---|---|---|---|
| WA / WT / WTA | 31mm | 6.35–13.49mm | 14–50cc | Trimmers, handheld blowers, small chainsaws |
| HD / HDA | 31mm | 11.11–15.08mm | 40–60cc | Mid-range chainsaws, clearing saws |
| WJ | 46mm | 14.29–17.46mm | 50–100cc | Professional high-displacement chainsaws |
| WG | 46mm | 21.67mm | 100cc+ | Concrete cut-off saws, large commercial engines |
| WB | 46mm | 20.64–25.40mm | 100–150cc+ | Racing karts, heavy industrial engines |
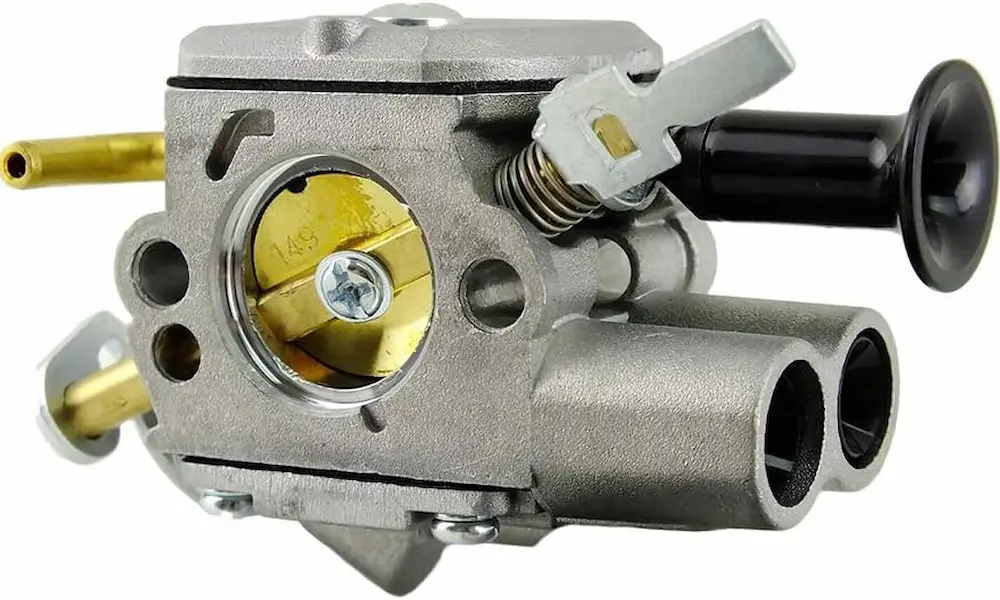
One detail worth knowing: the WA series has no integrated choke plate. Cold-start enrichment comes from the air filter housing instead. The WT and HDA series both use integrated butterfly-style chokes built directly into the carburetor body.
OEM Cross-Reference: Stihl, Husqvarna, and Echo
Here’s where most people get tripped up. Stihl, Husqvarna, and Echo all catalog their carburetors under their own part-numbering systems. You won’t find “WT-426-318” in a Stihl parts diagram — you’ll find “1121 120 0611.”
How Each Brand Numbers Their Parts
Stihl uses an 11-digit code split into three segments (e.g., 1121 120 0611). The first four digits identify the chassis family — 1121 covers the 024/026/MS260 line. The middle three digits (120) flag the carburetor assembly. The last four identify the revision. That 11-digit code maps directly to a Walbro stamp like WT-426-318.
Husqvarna uses a 9-digit format (e.g., 503 28 18-05 or 544160901). Husqvarna part 503 28 18-05 cross-references to the Walbro HD-12B, used on the 372XP professional chainsaw.
Echo uses either an 11-digit numeric code (12300052133) or an alphanumeric format (A021000811). The prefix 123000 or A021 typically signals a carburetor. Echo part 12300052133 cross-references to a Walbro WT-424-1.
OEM Cross-Reference Quick Chart
| Brand | Machine | OEM Part | Walbro Designation | Rebuild Kit | Diaphragm Kit |
|---|---|---|---|---|---|
| Stihl | MS260/026 | 1121 120 0611 | WT-426-318 | K20-WAT | D10-WAT |
| Stihl | MS290/029 | 1127 120 0604 | HD-18D | K10-HD | D10-WTE |
| Husqvarna | 372XP/365 | 503 28 18-05 | HD-12B | K10-WAT | D10-WAT |
| Husqvarna | 340/350 | 503 28 32-08 | HDA-159A | K22-HDA | D22-HDA |
| Echo | SRM-2400 | 12300051731 | WYJ-220-1 | K20-WYL | D20-WYJ |
| Echo | HCA-2400 | 12300052133 | WT-424-1 | K10-WAT | D10-WAT |
Choosing the Right Rebuild Kit: K-Series vs. D-Series
Walbro offers two service kit levels — and picking the wrong one wastes time.
K-Series (Complete Rebuild Kit)
The K-series kit gives you everything needed for a full restoration. It includes:
- Pump and metering diaphragms
- Sealing gaskets for pump and metering covers
- Fuel inlet screen
- Inlet needle valve
- Fulcrum/metering lever and pin
- Metering lever spring
- Welch plugs
Use a K-series kit when the machine has fuel starvation, hard starting, or an unstable idle. The needle valve tip and metering spring degrade independently of the diaphragms — so swapping only the diaphragms won’t fix everything.
D-Series (Diaphragm and Gasket Kit)
The D-series is a maintenance solution. It covers only the soft diaphragms and gaskets. Use it during routine annual tune-ups or when the metal hardware is still in good shape but the diaphragms have stiffened up from modern fuel additives.
The Metering Lever Height: The Setting Most People Skip
This is the most critical adjustment in any Walbro rebuild. The metering lever height controls the fuel level in the metering chamber, which directly sets your air-fuel ratio.
- Too high → needle valve opens early → flooding, rich condition, fuel weeping from the venturi
- Too low → fuel flow restricted → lean condition, stalling under load, slow throttle response
Walbro makes a dedicated Metering Lever Gauge (part number 500-13-1) with stamped profiles for different series. Set the lever so its tip just contacts the gauge tab across the gasket surface. Adjust by gently bending the lever tab that contacts the needle valve.
WT-Series Disassembly: Step-by-Step Sequence
The Walbro WT-series service guide outlines a methodical teardown. Follow this order to avoid missing blockages:
- Remove the fuel pump cover — loosen the central screw, lift the cover
- Inspect the pump diaphragm and gasket — check for tears, distortion, or stiff flapper valves
- Test pneumatic channels — blow compressed air through the pulse hole and fuel inlet passage
- Pull the inlet screen — remove with a pick and discard it; don’t reuse these
- Disassemble the metering chamber — remove four screws, lift cover, diaphragm, and gasket
- Extract needle and lever — back out the retaining screw, lift lever and spring carefully, inspect the needle tip for groove wear
Mixture Screw Adjustment After Reassembly
Once the carb is back on the engine, you need to set the low-speed mixture circuit. Here’s the tuning sequence:
- Turn the low-speed screw clockwise until finger-tight. Don’t force it.
- Back it out one full turn to one-and-one-eighth turns as a starting point.
- Start the engine, let it warm up for three to five minutes.
- Slowly turn the screw clockwise until engine speed starts dropping — that’s your lean limit.
- Turn it counter-clockwise past idle until speed peaks and starts dropping — that’s your rich limit.
- Set the screw midway between those two points for a stable idle and clean throttle response.
In-Tank Fuel Filters: Don’t Skip This
A clean carburetor won’t last long with a clogged in-tank filter feeding it. These felt-element filters trap fine debris and fuel varnish — and they can’t be washed out. Replace yours every time you rebuild the carb.
| Filter Model | Compatible Brands | Displacement Rating | Fuel Line ID | Ethanol Limit |
|---|---|---|---|---|
| Walbro 125-532 | Echo, Husqvarna, Shindaiwa | 30–125cc | 3/16 inch | Up to 10% |
| Walbro 125-528 | Echo, Husqvarna, John Deere, Tanaka | Up to 80cc | 3/16 inch | Up to 10% |
| Walbro 125-527 | Echo, Shindaiwa, Kawasaki | Up to 50cc | 1/8 inch | Up to 10% |
Spotting Counterfeit Walbro Carburetors
The aftermarket is flooded with clone and counterfeit carburetors. Some are functional budget options; others are outright fakes. Here’s how to tell the difference:
Casting quality — Genuine units use precision die-cast aluminum with a uniform dull grey finish. Fakes often have a shiny or bluish tint with rough casting lines and visible flash.
The logo notch — The official Walbro logo has a sharp triangular “^” notch on the lower line. Counterfeits typically have a smooth bottom line or incorrect font alignment.
Stamping depth — Genuine codes are hydraulic-press stamped, giving uniform depth and clean alignment. Fake codes are often hand-stamped — uneven, faded, or missing entirely.
Bolt hole alignment — Clone carburetors often have slightly offset mounting holes that won’t seat properly on the engine studs. Fuel nipples may also be pressed in at wrong angles, causing pinched lines or leaks.
Internal contamination — Clones are often assembled without thorough post-machining cleaning. Metal filings and brass chips can remain in the fuel chambers, clogging metering passages quickly.
For professional chainsaw work, stick with genuine OEM units. The tuning stability and service life difference is real.
One More Thing: Walbro Carbs vs. Walbro Fuel Pumps
This trips people up constantly. In 2015, Walbro’s automotive fuel pump line (GSS342, 255 lph series) transferred entirely to TI Automotive. Any automotive fuel pump sold today under the Walbro name is either old stock or a counterfeit.
The Walbro company still exists and actively makes small-engine carburetors, ignition systems, and fuel delivery components for the lawn, garden, marine, and recreation markets. These are two completely separate product lines with different support chains.
The Shift Toward EFI: What It Means for Walbro Identification
EPA and CARB emissions standards are pushing small-engine manufacturers toward electronic fuel injection. Companies like Löweheiser now produce EFI throttle bodies built to the exact same 31mm and 46mm Walbro mounting footprints — so they bolt directly onto engines designed for Walbro carbs.
The key difference? EFI eliminates the venturi entirely. No venturi means no airflow restriction at wide-open throttle, which improves volumetric efficiency and produces more power. Fuel delivery shifts from vacuum-drawn jets to pressurized electronic injectors controlled by an ECU. The mounting patterns stay the same, but everything inside the intake path changes.
For now, diaphragm carburetor service skills remain essential — the installed base of Walbro-equipped equipment runs into the tens of millions. But knowing the EFI transition is underway helps you understand why accurate Walbro carburetor identification matters even more today: you need to know exactly what you’re working with before you decide whether to rebuild, replace, or upgrade.