Got a flat on your Grand Caravan and can’t figure out where the spare tire is? You’re probably looking in the wrong place. This van hides its spare tire somewhere most drivers never expect — and getting it out takes a specific set of steps. Read this before you end up stranded on the shoulder with no clue what to do next.
Where Is the Spare Tire on a Dodge Grand Caravan?
The Dodge Grand Caravan spare tire location isn’t at the rear. It’s not tucked inside the cargo area either. The spare sits underneath the van, directly below the front floor pan — roughly between the driver and passenger seats when you look down from above.
This center-mounted, “mid-ship” placement surprises almost everyone. It even got a write-up on Jalopnik calling it “really weird.” And honestly? That’s fair.
Why Is It There?
Blame the Stow ‘n Go seating system. When Chrysler designed the 2008–2020 fifth-generation platform, the Stow ‘n Go seats folded directly into deep wells cut into the rear floor pan. That killed any chance of a traditional rear underbody spare tire mount. So engineers moved the spare tire forward, suspending it under the front cabin on a cable winch system.
The result? A perfectly flat cargo floor that no competitor could match at the time — but a spare tire retrieval process that makes most people say a few words they’d rather their kids not repeat.
Does Your Van Even Have a Spare Tire?
Here’s something important: not all Grand Caravans have a physical spare tire.
Starting with many 2016–2020 models, Chrysler began shipping vans with a Tire Service Kit instead of a spare. This compact inflator kit lives in the rear-left storage panel where the jack used to sit. It combines an electric air compressor with a canister of liquid sealant.
| Feature | Physical Spare Tire | Tire Service Kit |
|---|---|---|
| Repair Type | Full replacement | Temporary seal and inflate |
| Weight | 30–50 lbs | ~5 lbs |
| User Effort | High (jacking required) | Low (no jacking needed) |
| Works on Sidewall Damage | ✅ Yes | ❌ No |
| Works on Large Gashes | ✅ Yes | ❌ No |
| Sealant Shelf Life | N/A | 4–5 years |
According to AAA, the kit only seals small punctures — under a quarter-inch — in the tread area. A sidewall blowout, a big gash, or a tire that’s separated from the rim? The kit won’t help at all. You’ll need a tow.
Check your rear-left panel first. If you see a small electric pump and a canister, you have a kit, not a spare.
What Tools Come With the Van?
The tool kit lives in the rear cargo area, on the driver’s side (left) interior trim panel. There’s a plastic cover with two quarter-turn latches. Pop those open and you’ll find:
- A scissor jack
- A lug wrench
- Two extension rods (black steel bars that connect together)
- A winch handle (often integrated into the lug wrench)
You need all of these to access the Dodge Grand Caravan spare tire location properly. Don’t lose any of them — and definitely check that they’re actually in the van before you need them roadside.
How to Get the Spare Tire Out: Step-by-Step
This process has more steps than a normal tire change. Follow them in order.
Step 1: Secure the Vehicle
Pull as far off the road as possible. The NHTSA recommends maximizing your distance from traffic before you do anything else. Engage the parking brake, shift into Park, and block the wheel diagonally opposite from the flat tire to stop any rolling.
Step 2: Assemble the Retrieval Tool
Grab the tool kit from the rear-left panel. Connect the two extension rods together to make one long shaft. Attach the lug wrench to the end to create a T-handle. This gives you enough reach and leverage to operate the winch nut inside the van.
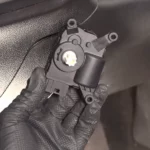
Step 3: Find the Winch Drive Nut
This is where your trim level matters:
- Base models: Look on the floor between the two front seats. There’s a small plastic cap you can pry off to reveal the nut.
- Super Console models (SXT, GT): Open the storage bin closest to the dashboard. Remove the rubber mat inside to find the nut.
Step 4: Lower the Tire
Insert the square end of your assembled extension rod into the winch drive nut. Turn it counter-clockwise to lower the tire. You’ll feel resistance at first as the cable takes the tire’s weight. Keep cranking — you need full cable slack before you can pull the tire out. If you stop too early, the tire won’t clear the undercarriage.
Step 5: Pull the Tire Out From the Driver’s Side
Walk to the center of the van on the driver’s side. The exhaust system runs along the passenger side, so always extract from the driver’s side. You may need to use the extension rod as a hook to drag the tire toward the edge of the chassis.
Step 6: Remove the Retaining Bracket
Once the tire’s accessible, you’ll see a T-shaped bracket at the end of the cable running through the wheel’s center hole. Tilt the bracket and slide it through the hole to free the tire completely.
| Phase | Action | Key Detail |
|---|---|---|
| Tool Prep | Open rear-left panel | Rotate two plastic latches |
| Tool Assembly | Connect rods + wrench | Build a T-handle |
| Console Access | Remove mat or cap | Find drive nut in front cabin |
| Winching | Turn counter-clockwise | Crank until cable is fully slack |
| Extraction | Pull from driver’s side | Avoid exhaust on passenger side |
| Disengagement | Tilt T-bracket | Slide through wheel center hole |
Driving on the Donut Spare: Know the Rules
Most Grand Caravans carry a “donut” spare — a smaller temporary tire. It’s not a full-size replacement, and you can’t treat it like one.
Stick to these limits:
- Maximum speed: 50 mph
- Maximum distance: 50 miles
- Best placement: Mount it on a rear wheel if possible. If a front tire blew, move a good rear tire to the front and put the donut on the rear. This keeps your steering and braking performance where you need it most.
Get to a tire shop as soon as you can. The donut is a temporary fix, not a long-term solution.
The Salt Belt Problem: Why the Winch Seizes
Here’s where things get ugly for drivers in Michigan, Ohio, New York, Illinois, and other heavy-salt states. The winch and cable sit directly behind the front wheels in a constant spray zone of water, salt, and road grit.
Over time, the cable rusts and the internal winch gears seize. When that happens, you can’t lower the tire — even in an emergency.
Watch for these warning signs:
- The drive nut won’t turn or requires brutal force
- The tire drops a few inches, then stops cold
- Grinding or clicking sounds when you crank the handle
- Visible rust flakes on the winch housing
- Broken strands visible on the steel cable
How to Prevent It
Twice a year, run the full retrieval process just for maintenance. Lower the tire completely, inspect the cable, apply a thin coat of grease or cable lubricant, then re-stow it. This simple habit keeps the mechanism from freezing in place. Also check that the spare itself holds air — donut spares typically need 60 psi, which is printed on the sidewall.
If you live somewhere that salts roads heavily, spray a rust inhibitor on the winch housing every fall before the first snowfall.
What to Do If It’s Already Seized
If the winch won’t budge during a maintenance check, soak the housing and cable with penetrating oil. Let it sit for several hours or overnight, then try again.
On the roadside, try a two-person method: one person applies moderate torque to the drive nut while the second pulls down on the tire from underneath. The combined movement sometimes breaks the rust bond inside the winch.
As a last resort, cutting the cable with heavy-duty bolt cutters drops the tire to the ground. It destroys the hoist permanently, but it gets you moving in an emergency. Replacement hoist units are available as OEM or used parts — the installation involves four bolts to the floor pan.
Safety Tips for Roadside Tire Changes
The Grand Caravan spare tire location creates a specific safety challenge. Since you extract the tire from the driver’s side — and in the U.S. you pull over to the right shoulder — you’re working closest to moving traffic.
Before you touch anything:
- Wear high-visibility clothing if you have it
- Place emergency flares or reflective triangles several hundred feet behind the van
- Block the opposite wheel before jacking
The Grand Caravan weighs over 4,500 pounds. Place the scissor jack only on the designated frame rail jacking points — just behind the front wheels or just ahead of the rear wheels. Using the wrong spot can crack the underbody storage bins or cause the jack to slip.
Never put any part of your body under a van supported only by a scissor jack. The jack lifts the vehicle, it doesn’t hold it safely for extended periods.
Spare Tire Maintenance Checklist
Keep this on your phone or in your glove box:
- Every 3 months: Visually check from the side of the van that the tire cover isn’t dangling
- Every 6 months: Run the full lower-and-raise cycle; lubricate the cable
- Once a year: Check spare tire pressure (target: 60 psi)
- Every fall (salt belt drivers): Apply rust inhibitor spray to the winch housing
- Every 4 years: Replace the sealant canister if your van has a Tire Service Kit instead of a spare — check the expiration date printed on the canister
Grand Caravan vs. The Competition
The center-mount system is unique in the minivan segment. Here’s how other vans handled it during the same era:
| Vehicle | Spare Tire Location |
|---|---|
| Dodge Grand Caravan (2008–2020) | Center underbody (mid-ship winch) |
| Chrysler Pacifica | Rear-side interior or inflator kit |
| Honda Odyssey | Rear-side interior panel |
| Toyota Sienna | Rear underbody or run-flat tires |
| Kia Carnival | Rear-side interior panel |
The Grand Caravan’s setup was the most demanding to use — but it’s also the reason this van had the flattest, most flexible cargo floor of any minivan at the time. That trade-off defined the vehicle’s whole personality.
Quick Recap: Dodge Grand Caravan Spare Tire Location at a Glance
- Where: Center underbody, beneath the front floor between driver and passenger seats
- Accessed via: A winch drive nut inside the front cabin, operated with an assembled extension rod
- Tools stored: Rear cargo area, driver-side trim panel, behind a plastic cover
- 2016–2020 models: Many shipped with a Tire Service Kit instead — check before assuming you have a spare
- Biggest maintenance risk: Cable corrosion and winch seizing, especially in salt-belt states
- Donut spare limits: 50 mph max, 50 miles max
The Dodge Grand Caravan’s spare tire setup rewards the prepared and punishes the unprepared. Now you know exactly what you’re dealing with — and what to do about it.