Your Ford 8N is sputtering, surging, or just refusing to idle smoothly — and you suspect the carburetor. You’re probably right. The good news? A proper Ford 8N carburetor adjustment isn’t complicated once you understand how the Marvel-Schebler TSX actually works. This guide walks you through everything: identifying your carb, setting the float, bench calibration, live tuning, and diagnosing what’s still wrong afterward. Read to the end — the diagnostic table alone is worth it.
First, Know Which Carburetor You Actually Have
Not all Ford 8N carburetors are the same. There are two distinct versions, and mixing up their settings causes real problems.
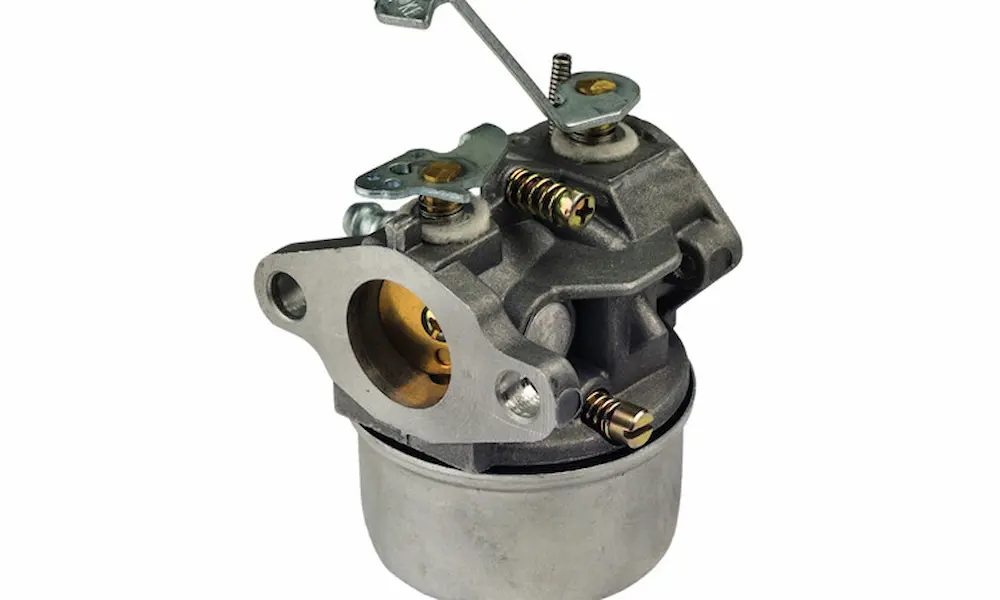
The early production 8N models (along with the 9N and 2N) used the Marvel-Schebler TSX33. Starting at serial number 8N-313112, Ford switched to the TSX241 series — which includes the TSX241A, TSX241B, and TSX241C variants.
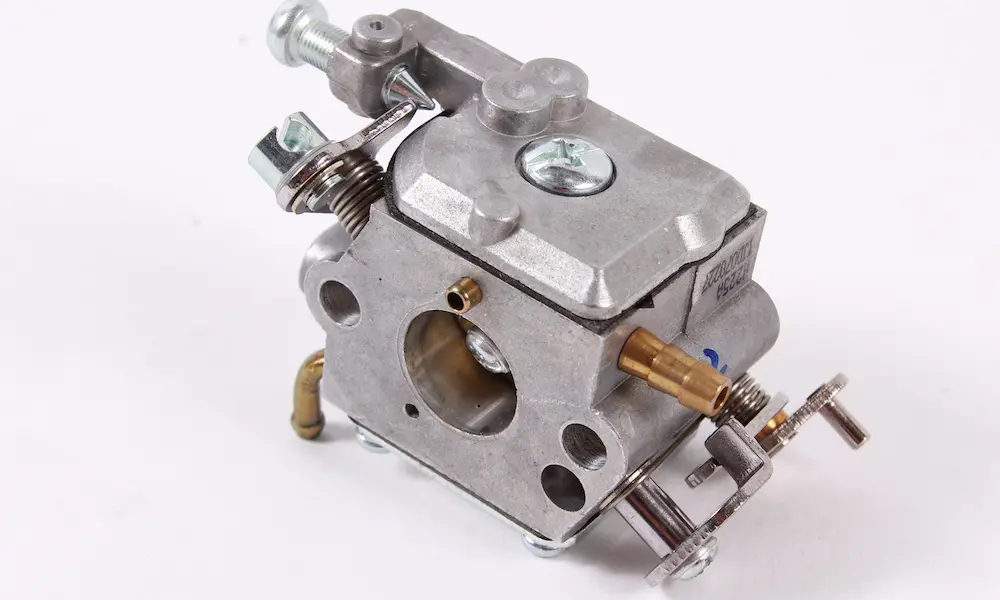
To find your model, look for the Marvel-Schebler part number stamped on the casting boss on the right-hand side of the carb body. The two units look similar from the outside, but their internal geometry, fuel bowl venting, and jet configurations differ enough to require separate baseline settings.
Here’s a quick reference:
| Carburetor Model | Serial Number Range | Idle Mixture Baseline | Main Needle Baseline | Target Idle RPM |
|---|---|---|---|---|
| TSX33 | Up to 8N-313112 | 0.75–1.00 turns open | 1.00–1.50 turns open | 400–450 RPM |
| TSX241 | From 8N-313112 onward | 1.00–1.25 turns open | 1.50–2.00 turns open | 400–500 RPM |
One more thing before you touch any adjustment screws: verify your ignition timing first. As Ford Service Bulletin 115 makes clear, timing problems look exactly like carburetor problems. Don’t waste time tuning the carb if the timing is off.
How the 8N Fuel System Works (and Why It Fails)
The Ford 8N runs a gravity-fed fuel system — no fuel pump at all. Fuel flows purely from the weight of the gas column in the tank. That simplicity makes it reliable, but also very sensitive to restrictions.
The system uses three separate brass mesh filters to keep debris out:
| Stage | Location | What It Does |
|---|---|---|
| Stage 1 | Inside the fuel tank (sediment stem) | Separates the main 9-gallon supply from ~1 gallon of reserve |
| Stage 2 | Top of the glass sediment bowl | Catches rust and tank scale before the fuel line |
| Stage 3 | Brass inlet elbow at the carburetor | Final protection for the needle valve and seat |
Two common mistakes kill this system:
- Installing an aftermarket inline filter. Paper or plastic inline filters are designed for pump-fed systems. Gravity pressure can’t push fuel through them, especially when the tank runs low. The engine starves, runs lean, and eventually stalls. Skip the inline filter entirely.
- A blocked tank vent. The original tank vents through a baffle on the dome. Rust or old paint blocks it easily. When that happens, a vacuum forms above the fuel column and fuel stops flowing. A quick fix is drilling a small vent hole in the gas cap. Problem solved.
If you’re running modern ethanol-blend fuel, consider adding OMC 2+4 fuel additive. Ethanol blends can boil in the gravity line from exhaust heat and form varnish in low-pressure passages. The additive helps prevent that buildup.
Setting the Float Height: Get This Right First
The float controls fuel level inside the bowl. If it’s wrong, your air-fuel ratio is wrong at every throttle position — no amount of needle adjustment will fix it.
Here’s the correct procedure from the N Tractor Club carburetor overhaul guide:
- Disassemble the carburetor and flip the upper throttle body casting upside down — manifold studs pointing straight down.
- Let the dual brass float rest against the inlet needle valve under its own weight.
- Measure from the gasket surface to the nearest edge of each float pontoon.
- The spec for all TSX series carbs is exactly 1/4 inch.
- Adjust by carefully bending the float lever tang that contacts the needle. Never push on the needle itself — you’ll deform the rubber tip or crush the internal spring.
Don’t overlook float drop. The Y-shaped dual float can wedge itself against the narrow bottom of the cast-iron bowl if it drops too far. When that happens, the float can’t rise as fuel refills the bowl — and fuel pours straight out the air intake. Adjust the drop stop tang so maximum downward travel doesn’t exceed 1/4 inch beyond the initial float height setting.
Also: shake each brass pontoon. Hear liquid sloshing inside? That float is compromised and weight-biased. Replace it before reassembly.
Static Bench Calibration Before You Start the Engine
Don’t bolt the carb back on and crank the engine without doing a proper bench setup. This static baseline gets the engine started and warm enough for final live tuning.
A few assembly notes first:
- Install the throttle butterfly with its angle mark facing the manifold flange, and tap it to center in the bore before tightening the screws.
- Use a 1/4-inch drive deep socket to install the main nozzle. Don’t cock it — a bent nozzle spout disrupts airflow permanently.
- If your rebuild kit (like the TISCO BK45V) includes both 15-degree and 30-degree tapered idle needles, install the correct taper. The wrong one won’t seat properly and kills idle circuit adjustability.
- Use the original paper bowl gasket thickness. A thick cork replacement shifts the venturi position vertically, causing a severe lean condition.
Here are your baseline screw settings:
| Adjustment Screw | Orientation | TSX33 Starting Point | TSX241 Starting Point |
|---|---|---|---|
| Main (Power) Needle | Points straight down from fuel bowl | Seat gently, back out 1–1.5 turns | Seat gently, back out 1.5–2 turns |
| Idle Mixture Needle | Points horizontally from throttle body | Seat gently, back out 0.75–1 turn | Seat gently, back out 1–1.5 turns |
| Throttle Speed Stop Screw | Throttle shaft linkage | Close butterfly fully, then in 1.25 turns | Close butterfly fully, then in 1.25 turns |
One critical warning: seat these needles gently. Over-torquing gouges the soft brass tips and deforms the cast-iron seats. Once that happens, accurate calibration becomes impossible.
Live Engine Tuning: How the Air-Bleed System Actually Works
This is where most people get confused — and frustrated. The Marvel-Schebler TSX uses an air-bleed idle circuit, which works backwards from what most people expect.
- Turning the idle needle IN (clockwise) restricts the air bleed, increases vacuum on the idle jet, and richens the mixture.
- Turning the idle needle OUT (counterclockwise) admits more air, reduces vacuum, and leans the mixture.
Yes, it’s the opposite of most carbs. Keep that straight.
Step-by-step live tuning process:
- Warm the engine fully. Choke wide open. Tractor in neutral on level ground.
- Set the dash throttle to the lowest idle position.
- Adjust the Throttle Speed Stop Screw to hit 400–500 RPM. Slightly worn engines often run more reliably closer to 500–550 RPM.
- Slowly turn the Idle Mixture Needle counterclockwise (leaning) in 1/8-turn increments. Wait a few seconds after each turn.
- Keep leaning until the engine stumbles.
- From that stumble point, turn the needle back clockwise (enriching) until RPM peaks and the engine smooths out.
- Repeat this process at least three times. Always aim for maximum idle RPM, not just smoothness.
Once idle is dialed in, move to the Main Adjustment Needle under full load at governed speed. Turn it clockwise (leaning) until the engine loses power. Then back it out counterclockwise until power returns and the engine runs cleanly. If it hesitates under rapid throttle, open the main needle an additional 1/8 to 1/2 turn to richen the transition mixture.
Reading the Symptoms: What Your Engine Is Telling You
Still having issues after adjustment? Let the engine do the talking.
| Symptom | What You’re Seeing | Likely Cause | Fix |
|---|---|---|---|
| Tan/gray plug tip | Normal deposits | Correct mixture | No action needed |
| Sooty black plug tip | Overly rich | Stuck choke or needles too open | Lean the idle or main needle clockwise |
| White blistered plug tip | Overly lean | Vacuum leak or clogged jets | Inspect seals; enrich needle counterclockwise |
| Thick black exhaust smoke | Rich combustion | Choke stuck or float too high | Open choke; lower float height |
| Thick white exhaust smoke | Fuel contamination | Water in tank | Drain and refill with fresh fuel |
For surging, stumbling under load, or a condition that only clears with partial choke, suspect a vacuum leak at the throttle shaft. Spray a small amount of carburetor cleaner at both ends of the throttle shaft while the engine idles. An RPM change confirms the leak. The shaft needs replacement and possibly re-bushing.
Internal passage blockages need more than spray cleaner — 90-degree turns in the passages trap debris. Use a 0.018-inch welding tip cleaner wire to clear the 0.021-inch idle jet passage, then blow it out with compressed air. Never use a larger steel wire — it will permanently enlarge the brass orifice and ruin your calibration.
Finally, don’t overlook your distributor. Worn centrifugal advance weights and sticky springs mimic a lean fuel condition almost perfectly. If tuning the carb doesn’t cure your high-speed surging, pop the distributor cap and inspect those advance weights before you do anything else.